Why PDFs are different
PDFs are designed for reading, not data processing. There’s no structured row-column format to parse directly — which means extracting data from them requires a different approach than CSV or Excel. Parabola uses AI to read your PDF and translate it into a clean, structured table. Your job is to guide that process by telling the step what data to look for and where to find it.Parabola can extract data from handwritten documents as well. Legibility matters — heavily stylized or unclear handwriting may require additional instructions and iteration to get right.
Two types of data to extract
Before configuring the step, it helps to think about the data within your PDF in terms of two categories:Setting up the step
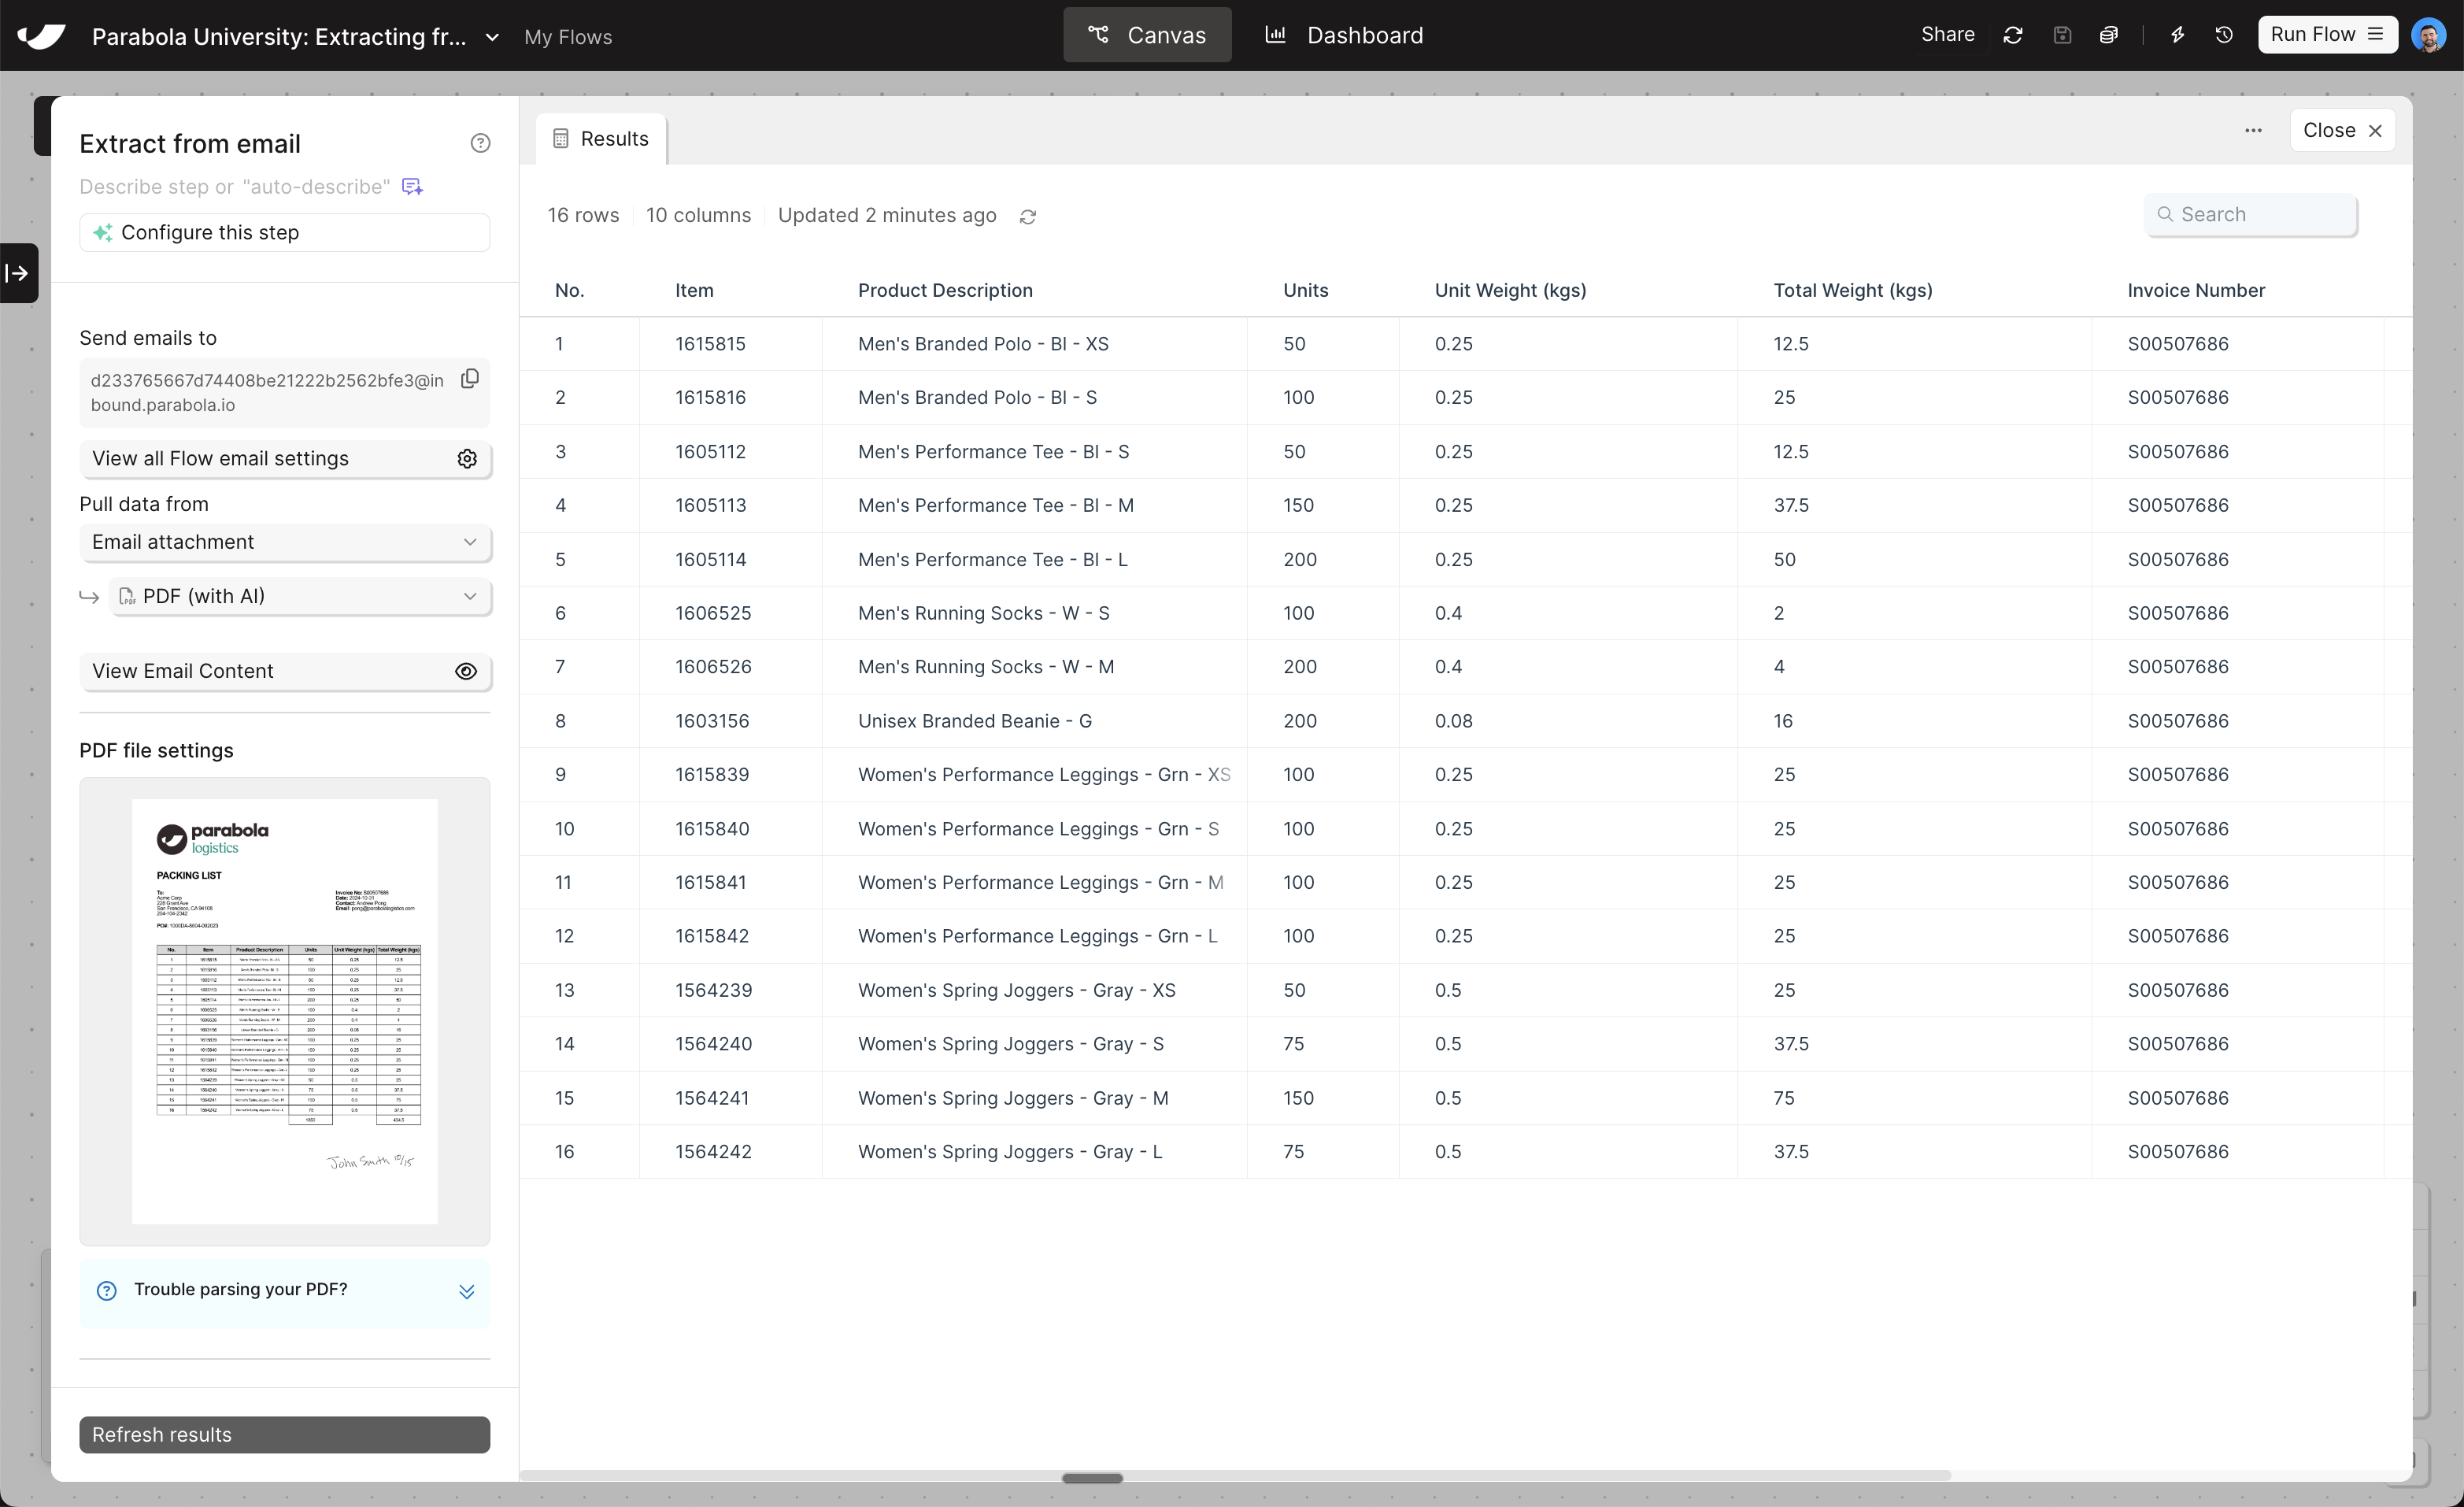
Set the file attachment type dropdown to PDF (with AI). The panel will update to show PDF-specific configuration options.Extracting a table
Expand the Extract a table section. You have three modes to choose from:- Auto-detected table (default)
- Define a custom table
- Extract all data (OCR-first)
Parabola scans the PDF and automatically identifies the most likely table, labeling its columns. This is the fastest way to start and works well for clear, consistently structured PDFs.After sending an email with a PDF, use the “Use an auto-detected table” dropdown to review all tables Parabola found in your document. If a column is missing, you can add it manually.
Use this default option first, and only change if it’s not giving you your desired results after some iteration.
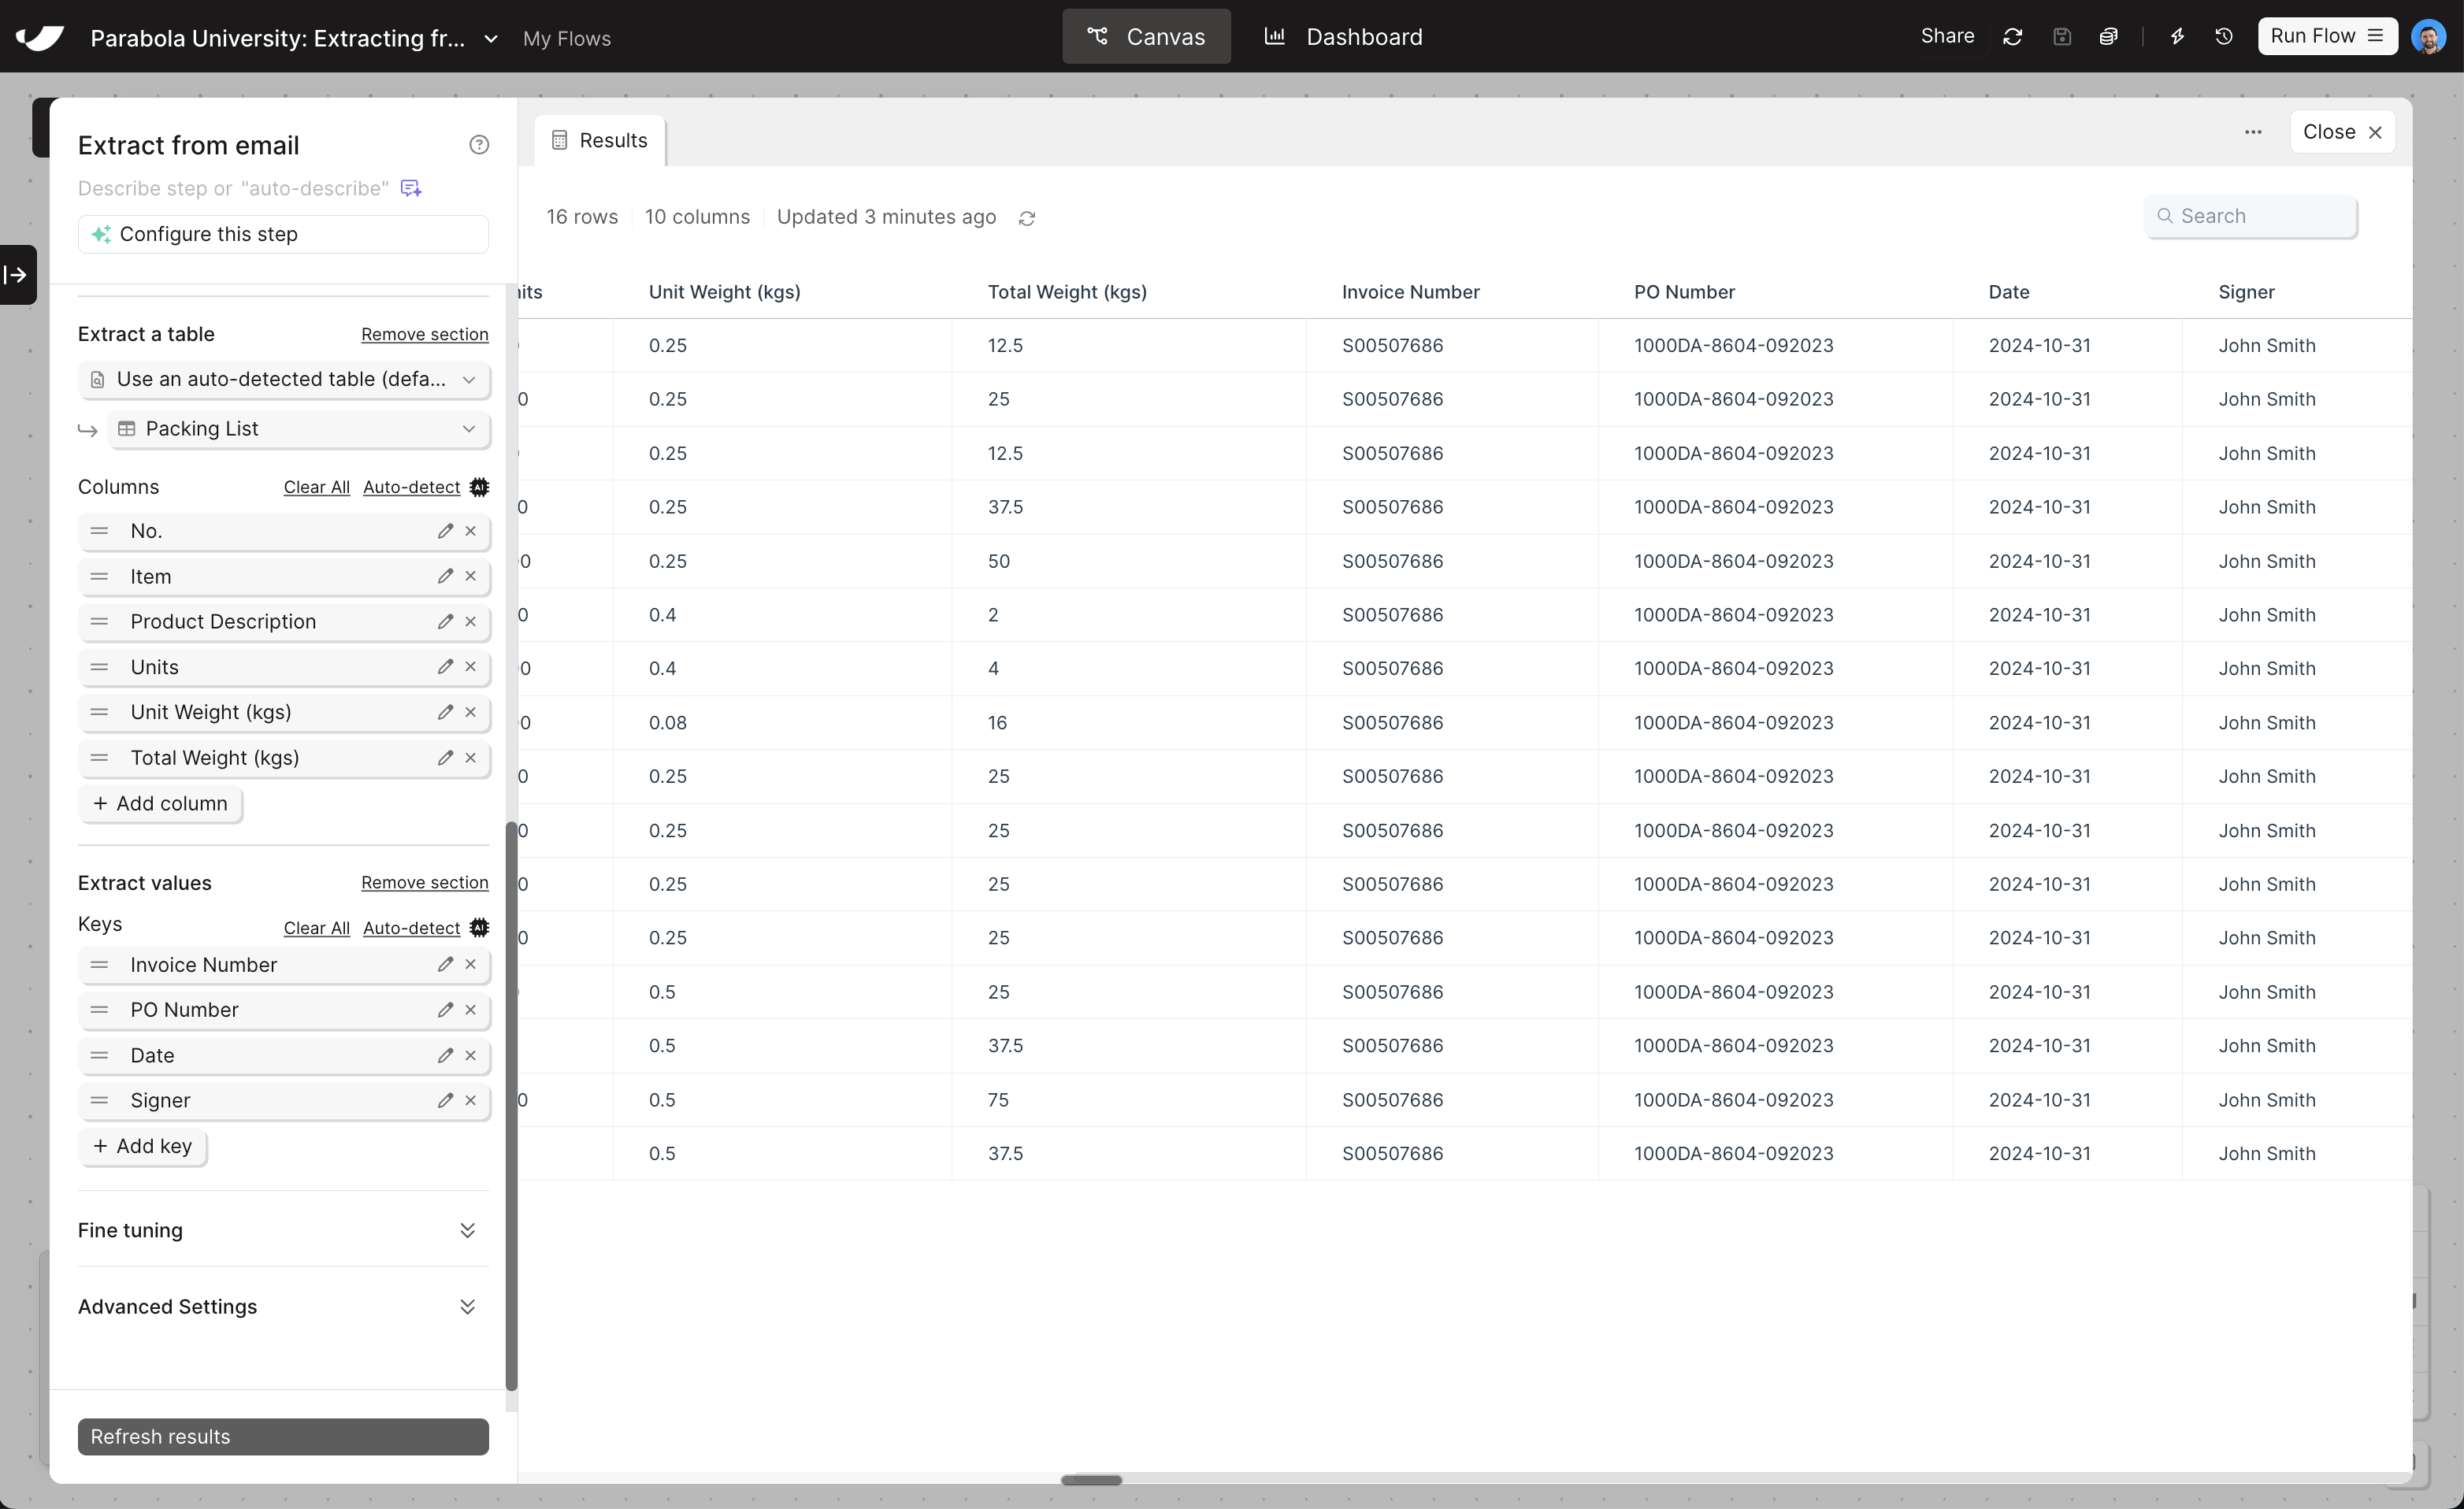
Extracting individual values (keys)
Document-level values like invoice date, PO number, and total amount go in the Extract individual values section.1
Click '+ Add key'
Add a new value definition.
2
Give it a name
The name doesn’t need to match the PDF exactly — just make it descriptive enough that Parabola can identify the right field.
3
Add example values and instructions if needed
If the value is straightforward (e.g., “Invoice Date”), a name alone may be enough. For ambiguous fields, add an example value or extra context in the instructions field. The more example values and instructions you provide, the more accurate your results will be.
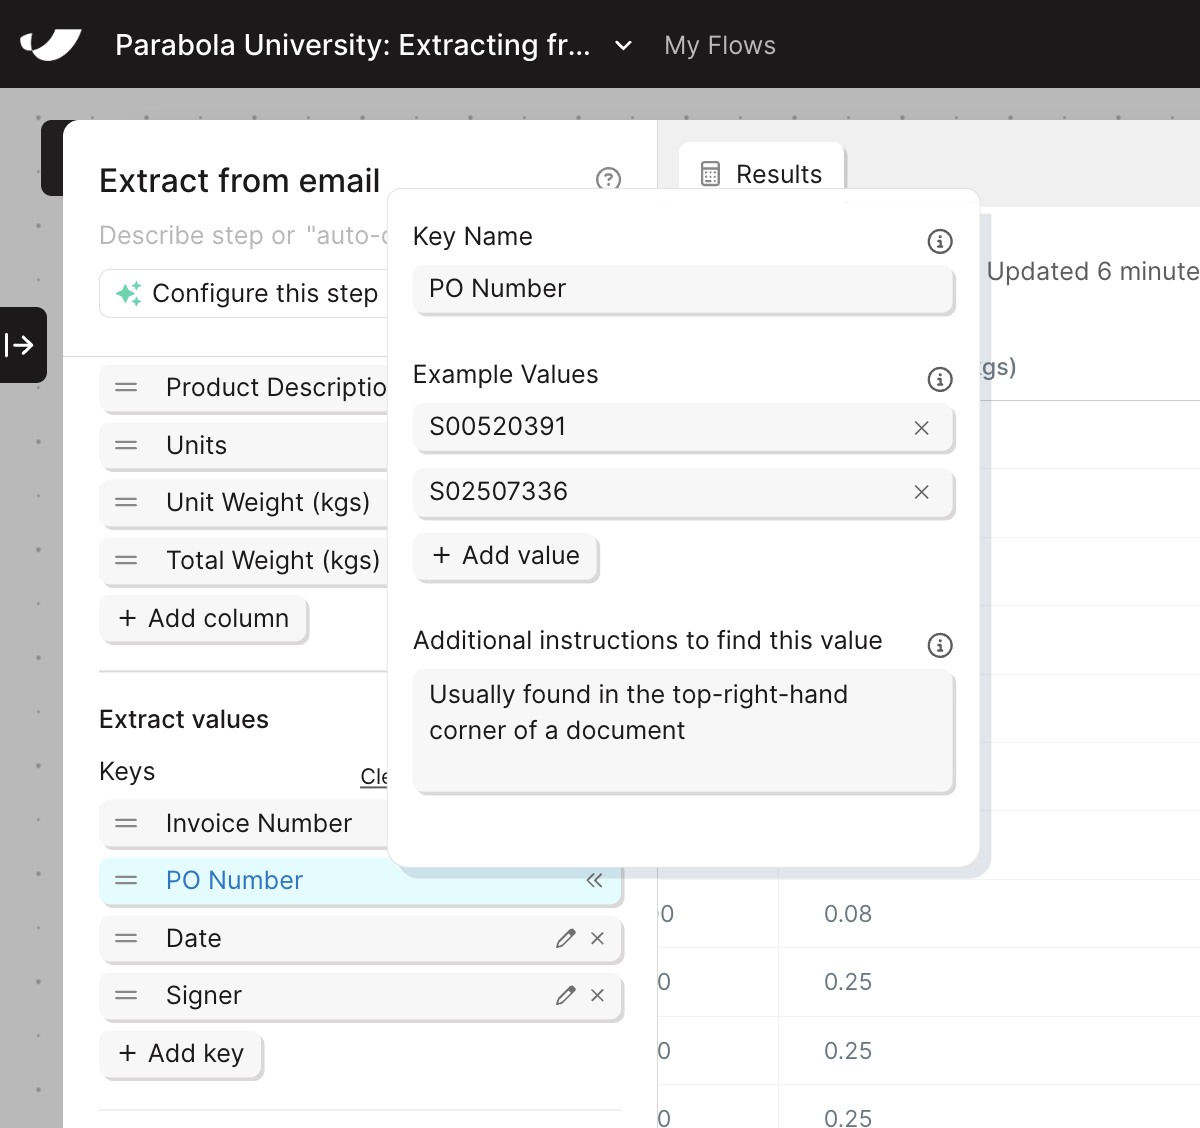
Example of field-level-fine-tuning in an Extract from email step
Fine-tuning
At the bottom of the panel is a Fine-tuning section. Use it to give the AI general context about the document or the expected output — things that aren’t specific to a single column or key.Sending in data
Once you’ve applied some preliminary settings, you’re ready to email a PDF to your Parabola step.Don’t worry about a 100% perfect setup before sending in your PDF. It’s easiest to apply some lightweight settings (ex. set data type to PDF with AI, make sure it’s set to use an auto-detected table, and add some keys), and then do additional fine-tuning after the PDF is pulled in.
What’s next
You know how to configure basic PDF extraction. In the next lesson, we’ll cover the advanced settings — text parsing modes, page filtering, and retry behavior — for handling more complex documents.Building challenge
Click here to create a fresh flow. Then…
1
Add an Extract from email step to the canvas
Drop the step directly on the card in your flow
2
Change the settings to "PDF (with AI)" → "Extract a table" → "Use an auto-detected table"
Leave the “Columns” section section blank (AI will fill this out)
3
In the "Keys" section, add the following values:
- Invoice Number
- PO Number
- Date
- Signer
4
Send an email to the address in your step
Include the PDF from lesson 1 as an attachment
5
Fine-tune the results
If any fields didn’t parse properly (like Signer), try adding some example values and/or field-level instructions
Check your work
Check your work