

Guide
- If you are looking to troubleshoot issues with the Netsuite integration, skip to Common Issues + Fixes
- If you are setting up the Netsuite integration in Parabola for the first time, skip to How to Configure the Netsuite Integration in Parabola
- If you have already setup the integration, but need need to update permissions (incl. read/write permissions), skip to #1: Creating a Role
Section #1: How to Configure the Netsuite Integrations in Parabola
Before we can connect to Netsuite with Parabola, we need someone with Admin permissions to do a few things in Netsuite:1
Create a role
- This role is how Netsuite gates permissions
- The permissions we grant will dictate whether we can authenticate, and what objects/fields we can read and write to once we do
2
Create an integration
- This is the Netsuite application that our step will connect to
- This will give us our Consumer ID and Consumer Secret
3
Create a token
- The token will be associated with the role and integration we created in steps 1 and 2
- This will give us our Token ID and Token Secret
#1: Creating a Role
Go to Setup -> Users/Roles -> Manage Users -> New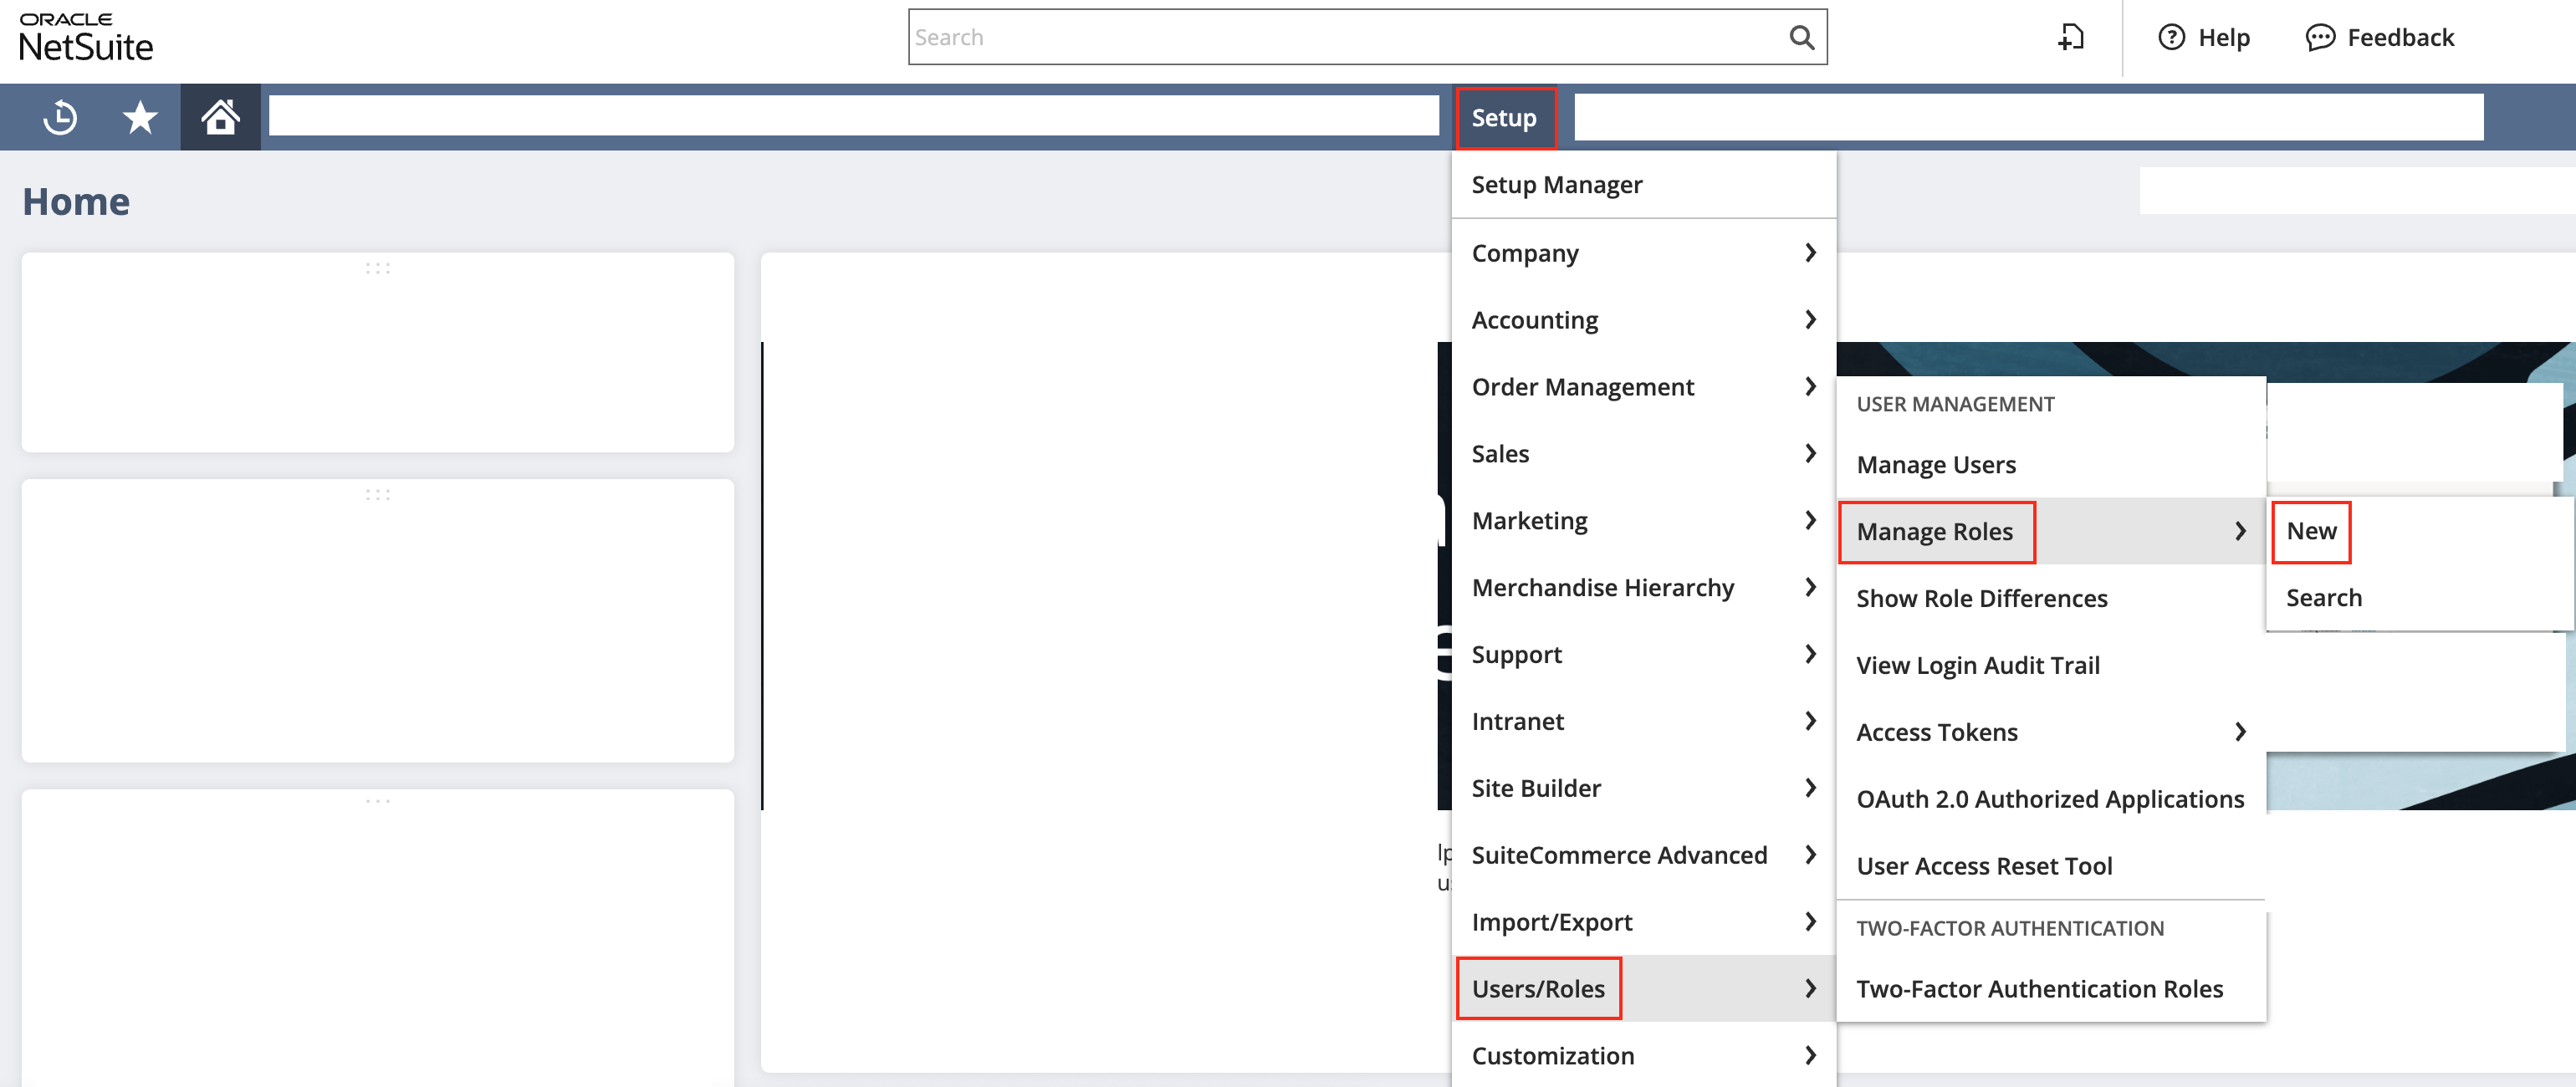
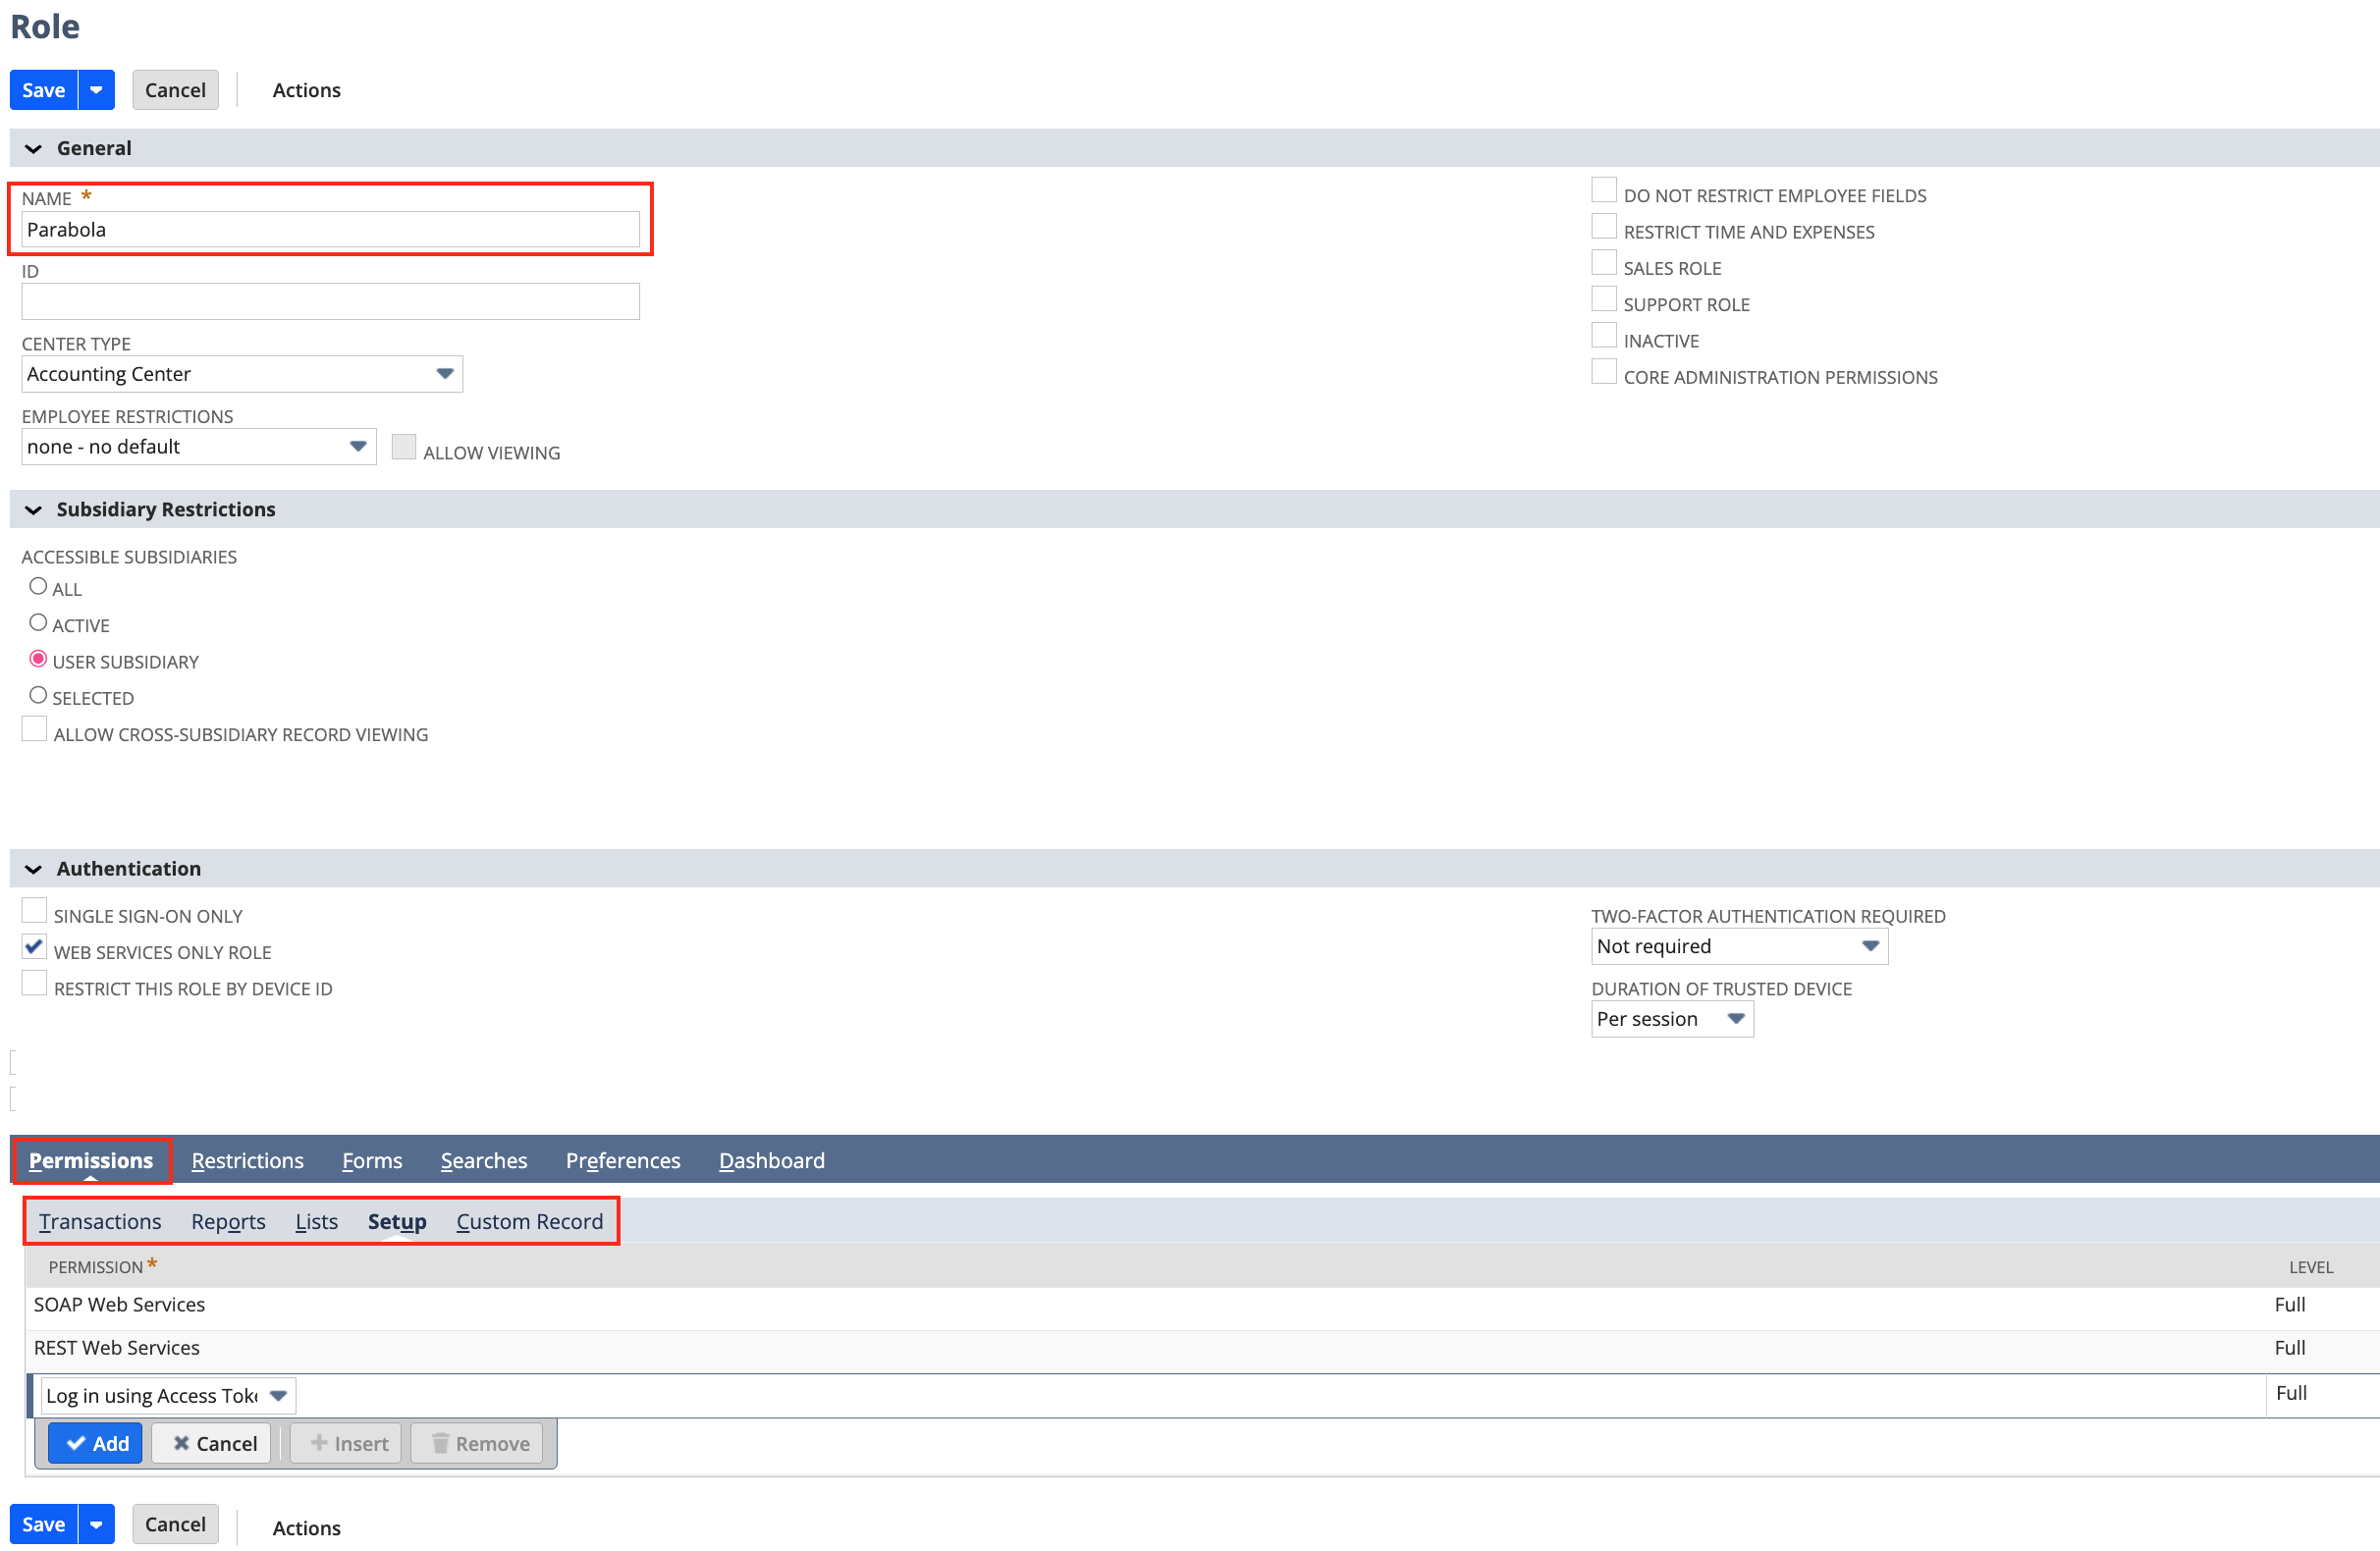
- Name: Parabola (or something else that is identifiable)
- Under “Authentication”, check “Web Services Only”
- This makes it so the role can only be used for integrations
- Under “Permissions”, enable the following:
Transactions
- Any specific transaction types required: sales orders, purchase orders, transfer orders, etc.
- Find transaction
Reports
- Any specific report types required
Lists
- Any specific lists required: items, locations, companies, customers, etc.
- Perform search, persist search, and publish search
Setup
- Log in using Access Tokens
- SOAP Web Services
- REST Web Services
- Any specific custom record objects required
- Setup permissions give us the ability to set up the initial connection to Netsuite. a. Log in using Access Tokens gives Parabola permission to authenticate using the tokens generated in the following steps b. SOAP Web Services gives our Pull from Netsuite step permission to read data using the method we use on our backend c. REST Web Services gives our Send to Netsuite step permission to write data using the method we use on our backend
-
These permissions give us the ability to search Netsuite data:
a. Transactions
- Find transactions
- Perform search
- persist search
- publish search
- The remaining permissions under Transactions, Reports, Lists, and Custom Records dictate which objects we can read (using Pull from Netsuite) and write to (using Send to Netsuite). a. If you only want Parabola to read data, set these permissions to “View” b. If you want Parabola to read and write data, set these permissions to “Full”
#2: Creating an Integration
Video walk-though of the setup process:1
Setup > Integration > Manage Integrations > New
2
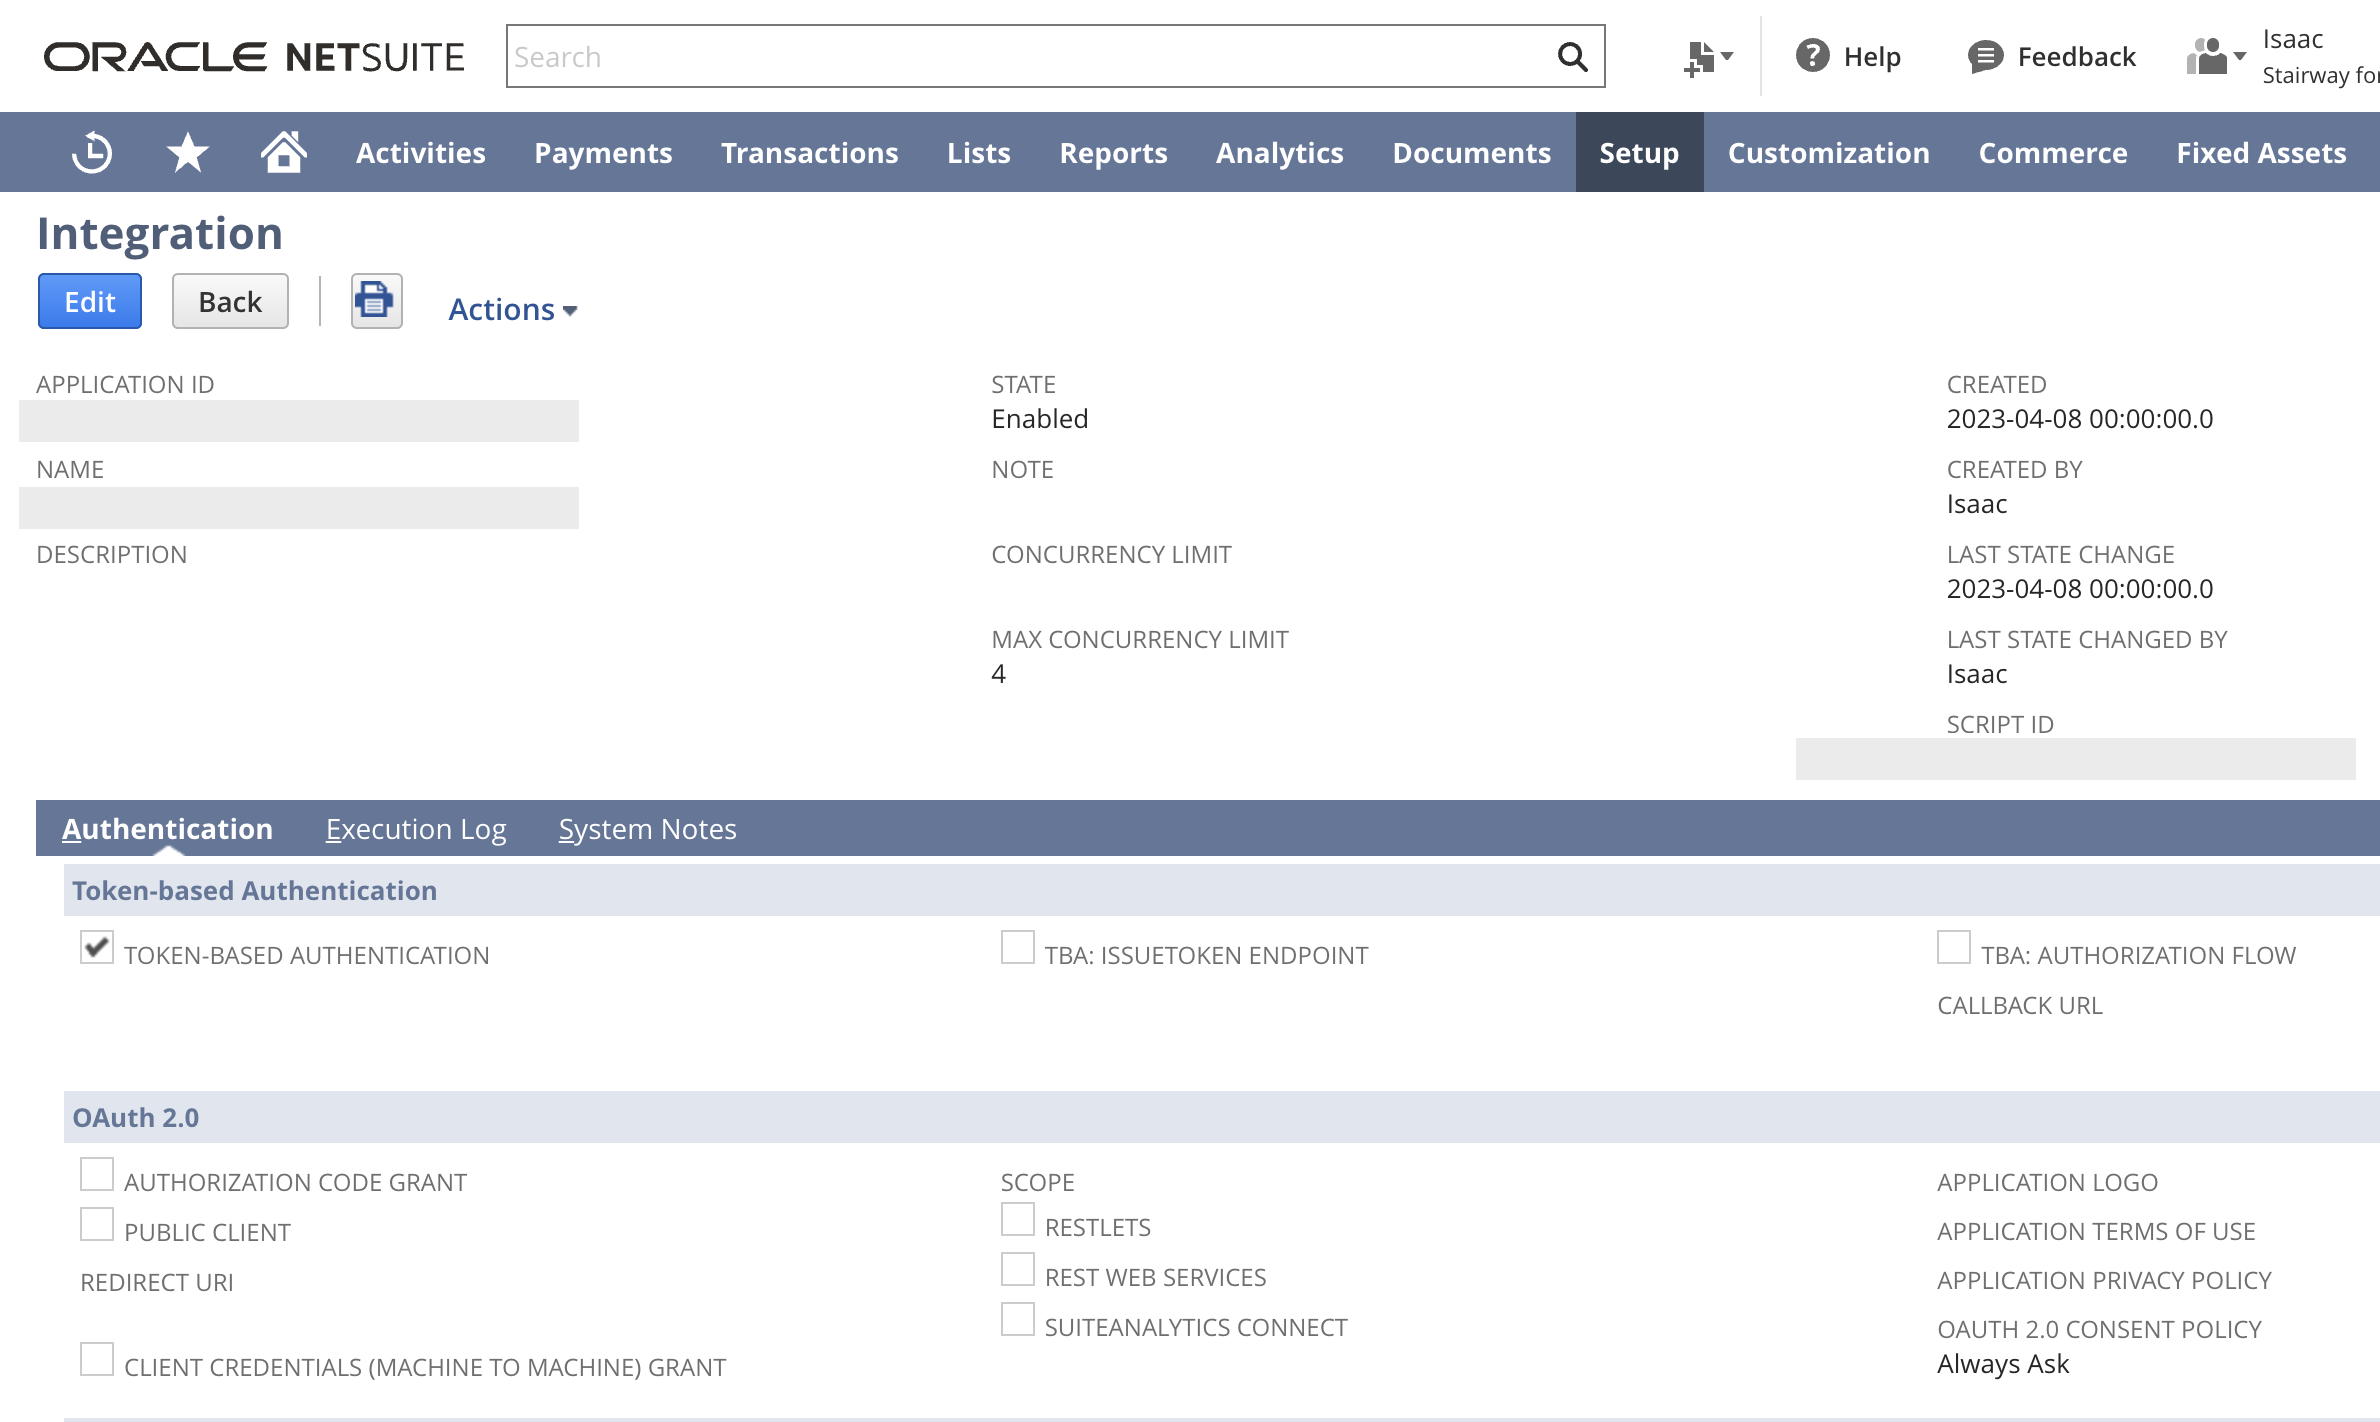
Specify an integration name, ensure the status is set to active, and select the token-based authentication option.
3
Uncheck the TBA: Authorization Role and Authorization Code Grant checkboxes.
4
Save the record.
#3: Creating a Token
Once the role, user, and integration have been created, you’ll need to generate the tokens which are required for authentication in Parabola. Follow the path below in the NetSuite UI to create a new token record.1
Setup > Users/Roles > Access Tokens > New Access Tokens
2
Specify the integration created previously, the desired user, and role, and click save.
3
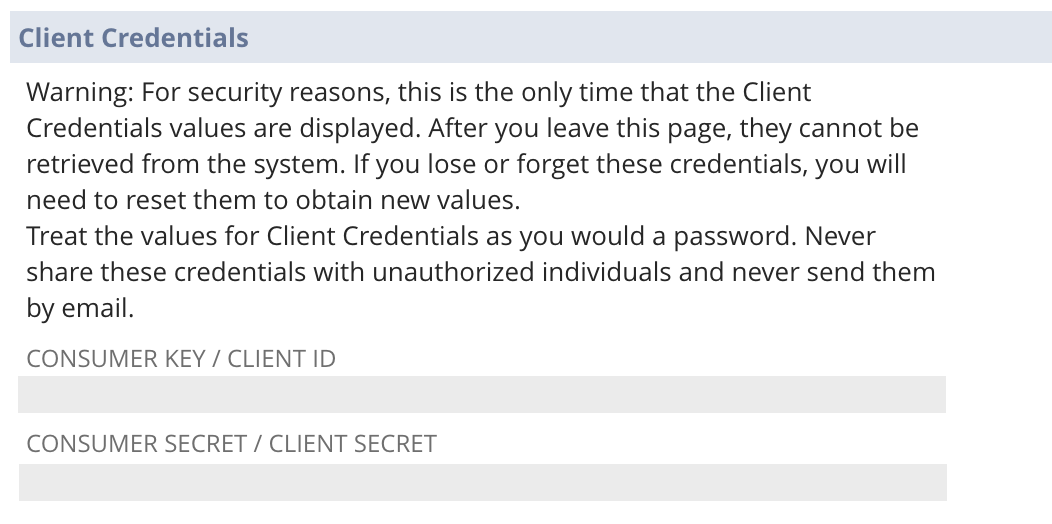
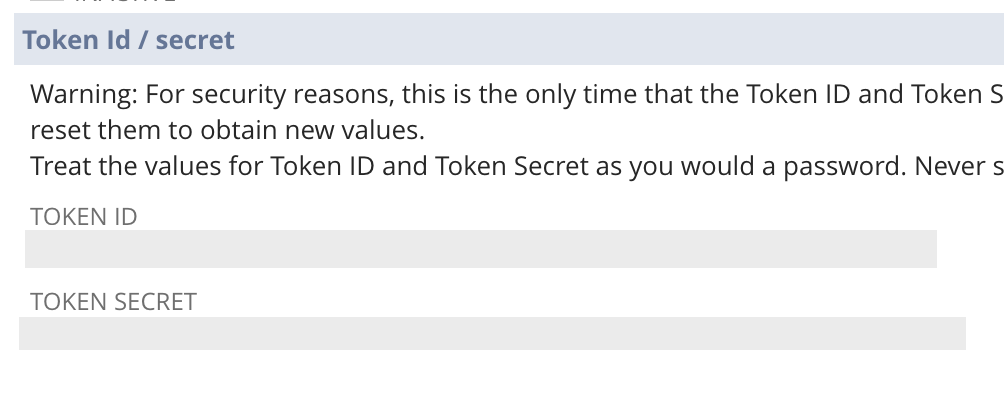
The newly created token id and token secret will appear at the bottom of the page. Record these credentials, as they will disappear once you leave this page.
#4: Configure your settings in Parabola
1
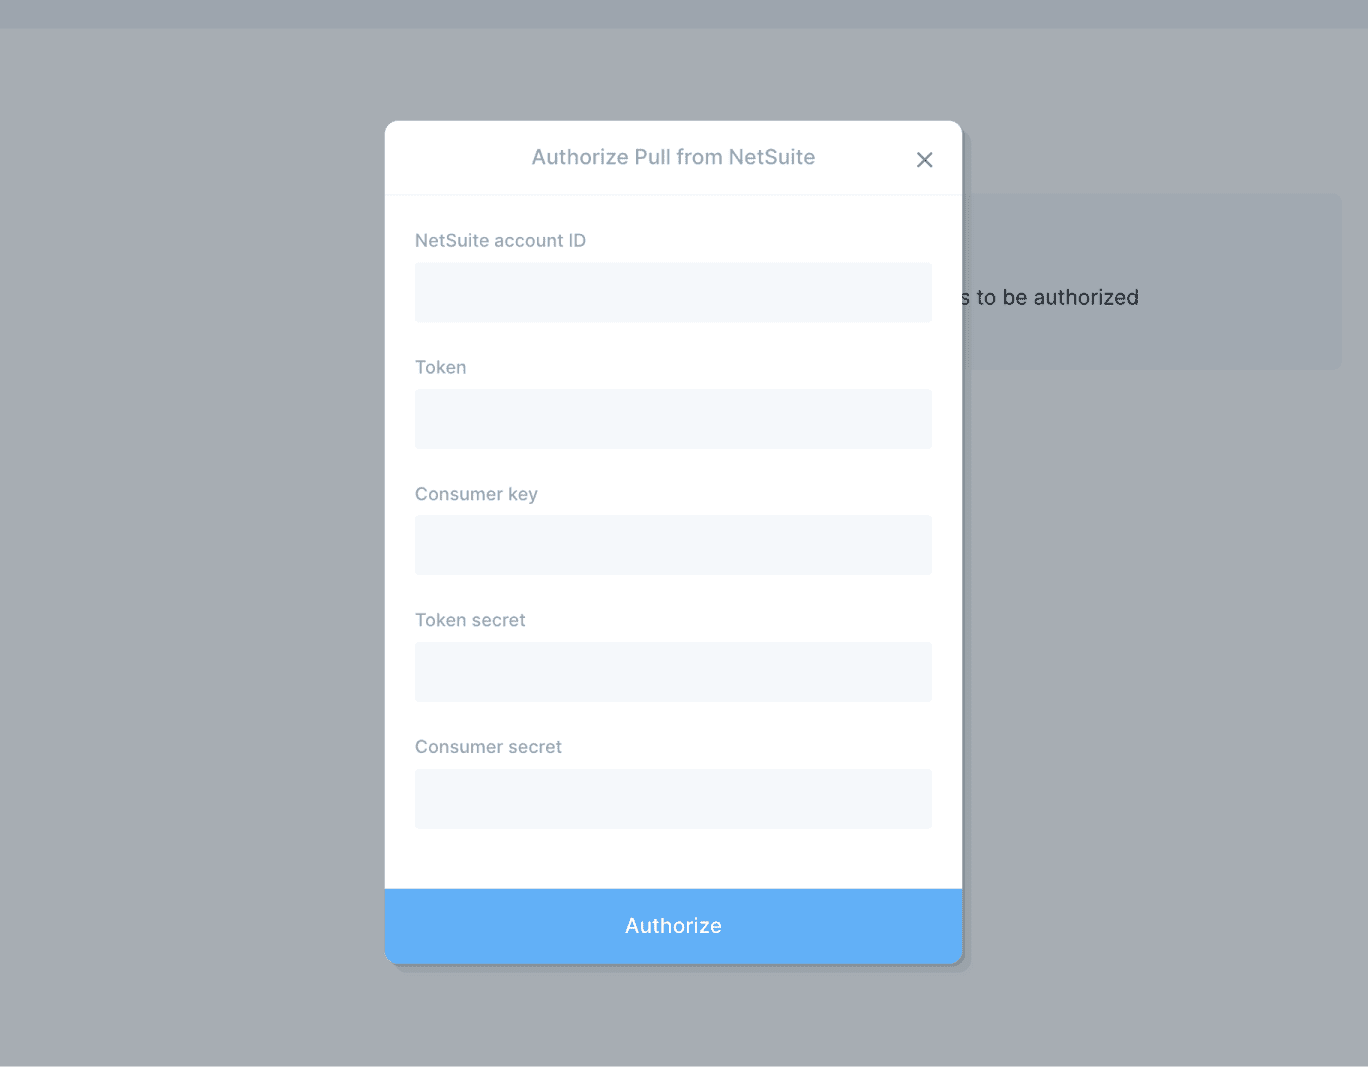
Gather the credentials created from each step earlier in the process and navigate to the Pull from NetSuite step in Parabola.
2
Open the Pull from NetSuite step and click Authorize or Edit Accounts
3
Enter each applicable token and consumer key/secret and click authorize.
Final Notes
- Authorization: Once this integration has been created, it should never expire, and you can leverage it for both the Pull from Netsuite and Send to Netsuite steps.
- Sharing: You can share this integration across your organization across your organization, so multiple people can use the same authorization to connect to Netsuite
- Instructions
- In any instance of a Pull From Netsuite or Send To Netsuite step, once you double-click into the step, you can click the authorization dropdown in the top left > “edit accounts” > click the 3 dots to the right of the account you want to share > “Sharing Settings”
- You can share with the whole organization, or with individual users
- Notes on permissioning
- If you share this authorization, users can use it to both read and write data (in line with the permissions granted to the Netsuite role), so make sure the permissions on the role are gated appropriately
- If you want to more granularly gate read/write permissions, you can create two separate authorizations (by creating separate integrations/tokens) and share them separately.
- Instructions
Section 2: Common Issues + Fixes
Authentication issues
- Permissions: Check that the role you are using has Log in using Access Tokens, SOAP Web Services, and REST Web Services set to “Full”
- Account ID: If you are connecting to Sandbox, check that you are using the Sandbox account ID, and that the account ID exactly matches what you see in the website URL when you log into Netsuite (e.g. 12345-sb1)
“Could not find saved search” issues
- [XXXXXXXXXX]
Missing data (missing columns / fewer rows than expected)
- This is typically because the role being used for the integration doesn’t have the permissions to see certain columns/objects
- Go to the role and check the Transactions, Lists, and Custom Records permissions to confirm that you have access to everything you want to pull
- If rows are missing, double check Transactions permissions
- If columns are missing, double check Lists and Custom Records
Field values are pulling is as numbers
- Joined Fields
- If you pull in a joined object directly, it will return the raw object — either the internal ID or a JSON blob like
{"attributes":{"internalId":"101"},"name":"DTC"}— instead of the display name. - To solve this, add the “Name” subfield instead of the object itself. For example: if you want the Location field on a Sales Order, don’t add “Location” as a field to return. Instead, scroll down to “Location Subfields” in the field list and add its “Name” subfield.
- Important: The subfield (e.g., “Location : Name”) will only flow into Parabola if Return only columns specified in the search is unchecked in the Pull from NetSuite step.
- If the joined field still comes in as a JSON object, you can flatten it in Parabola using an AI step with the prompt: “expand nested fields to columns”. This splits the object into separate columns (e.g., internal ID and name).
- If you pull in a joined object directly, it will return the raw object — either the internal ID or a JSON blob like
- Custom fields
- If you are pulling in a custom field with a set list of options, it will pull in the internal ID of the option, instead of the option name.
- For example, if you have a custom “Color” field with options “Red”, “Green”, and “Blue”), it will return “1”, “2”, or “3” instead of the color
- There is no way to solve this in the saved search, but as a workaround, you can manually export a list of the options and their internal IDs, and use “combine tables” to join this to the saved search in Parabola
- If you can set the value of the custom field with a text entry box in Netsuite, the custom field should pull in to Parabola with no issue.