
NetSuite is Oracle’s cloud enterprise resource planning (ERP) suite, covering accounting, inventory, CRM, and order management for companies that often run across multiple locations and subsidiaries. Connecting NetSuite to Prowork lets finance and ops teams pull saved search results into the same flows used for reconciliation and reporting, and push sales orders, purchase orders, and other records back to NetSuite, without manual exports or engineering work.

Pull from NetSuite

The Pull from NetSuite integration enables users to connect to any NetSuite account and pull in saved search results that have been built in the NetSuite UI. Multiple saved searches, across varying search types, can be configured in a single flow. The following document outlines the configuration requirements in NetSuite for creating the integration credentials, defining relevant role permissions, and running the integration in Prowork.

NetSuite configuration process

The following configuration steps are required in NetSuite prior to leveraging the Prowork integration:
  • Create or select a web services only role that can be used by Prowork
  • Create or select a user that will be used for the integration in NetSuite. Ensure the role from the step above is applied to this user record
  • Create a new integration in Netsuite
  • This will result in the creation of your consumer key and consumer secret
  • Create a new set of access tokens that reference the user, role, and integration specified above
  • This will result in the creation of your token id and token secret
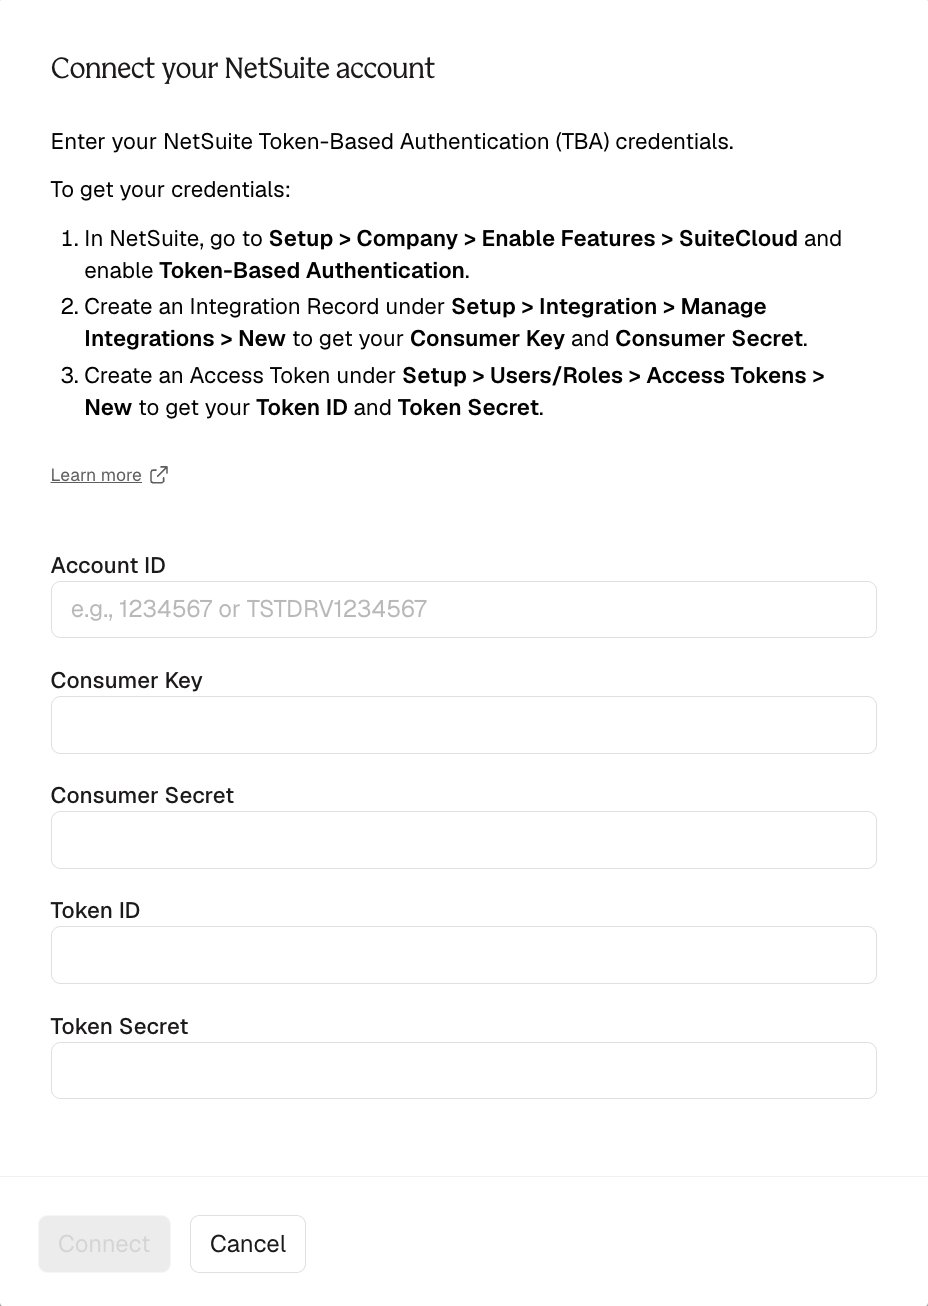
Once complete, you will enter the unique credentials generated in the steps above into the Pull from NetSuite step in Prowork. This will also require your account id, which is obtained from your NetSuite account’s url. Ex: https://ACCOUNTID.app.netsuite.com/ The following document will review how to create each of the items above.

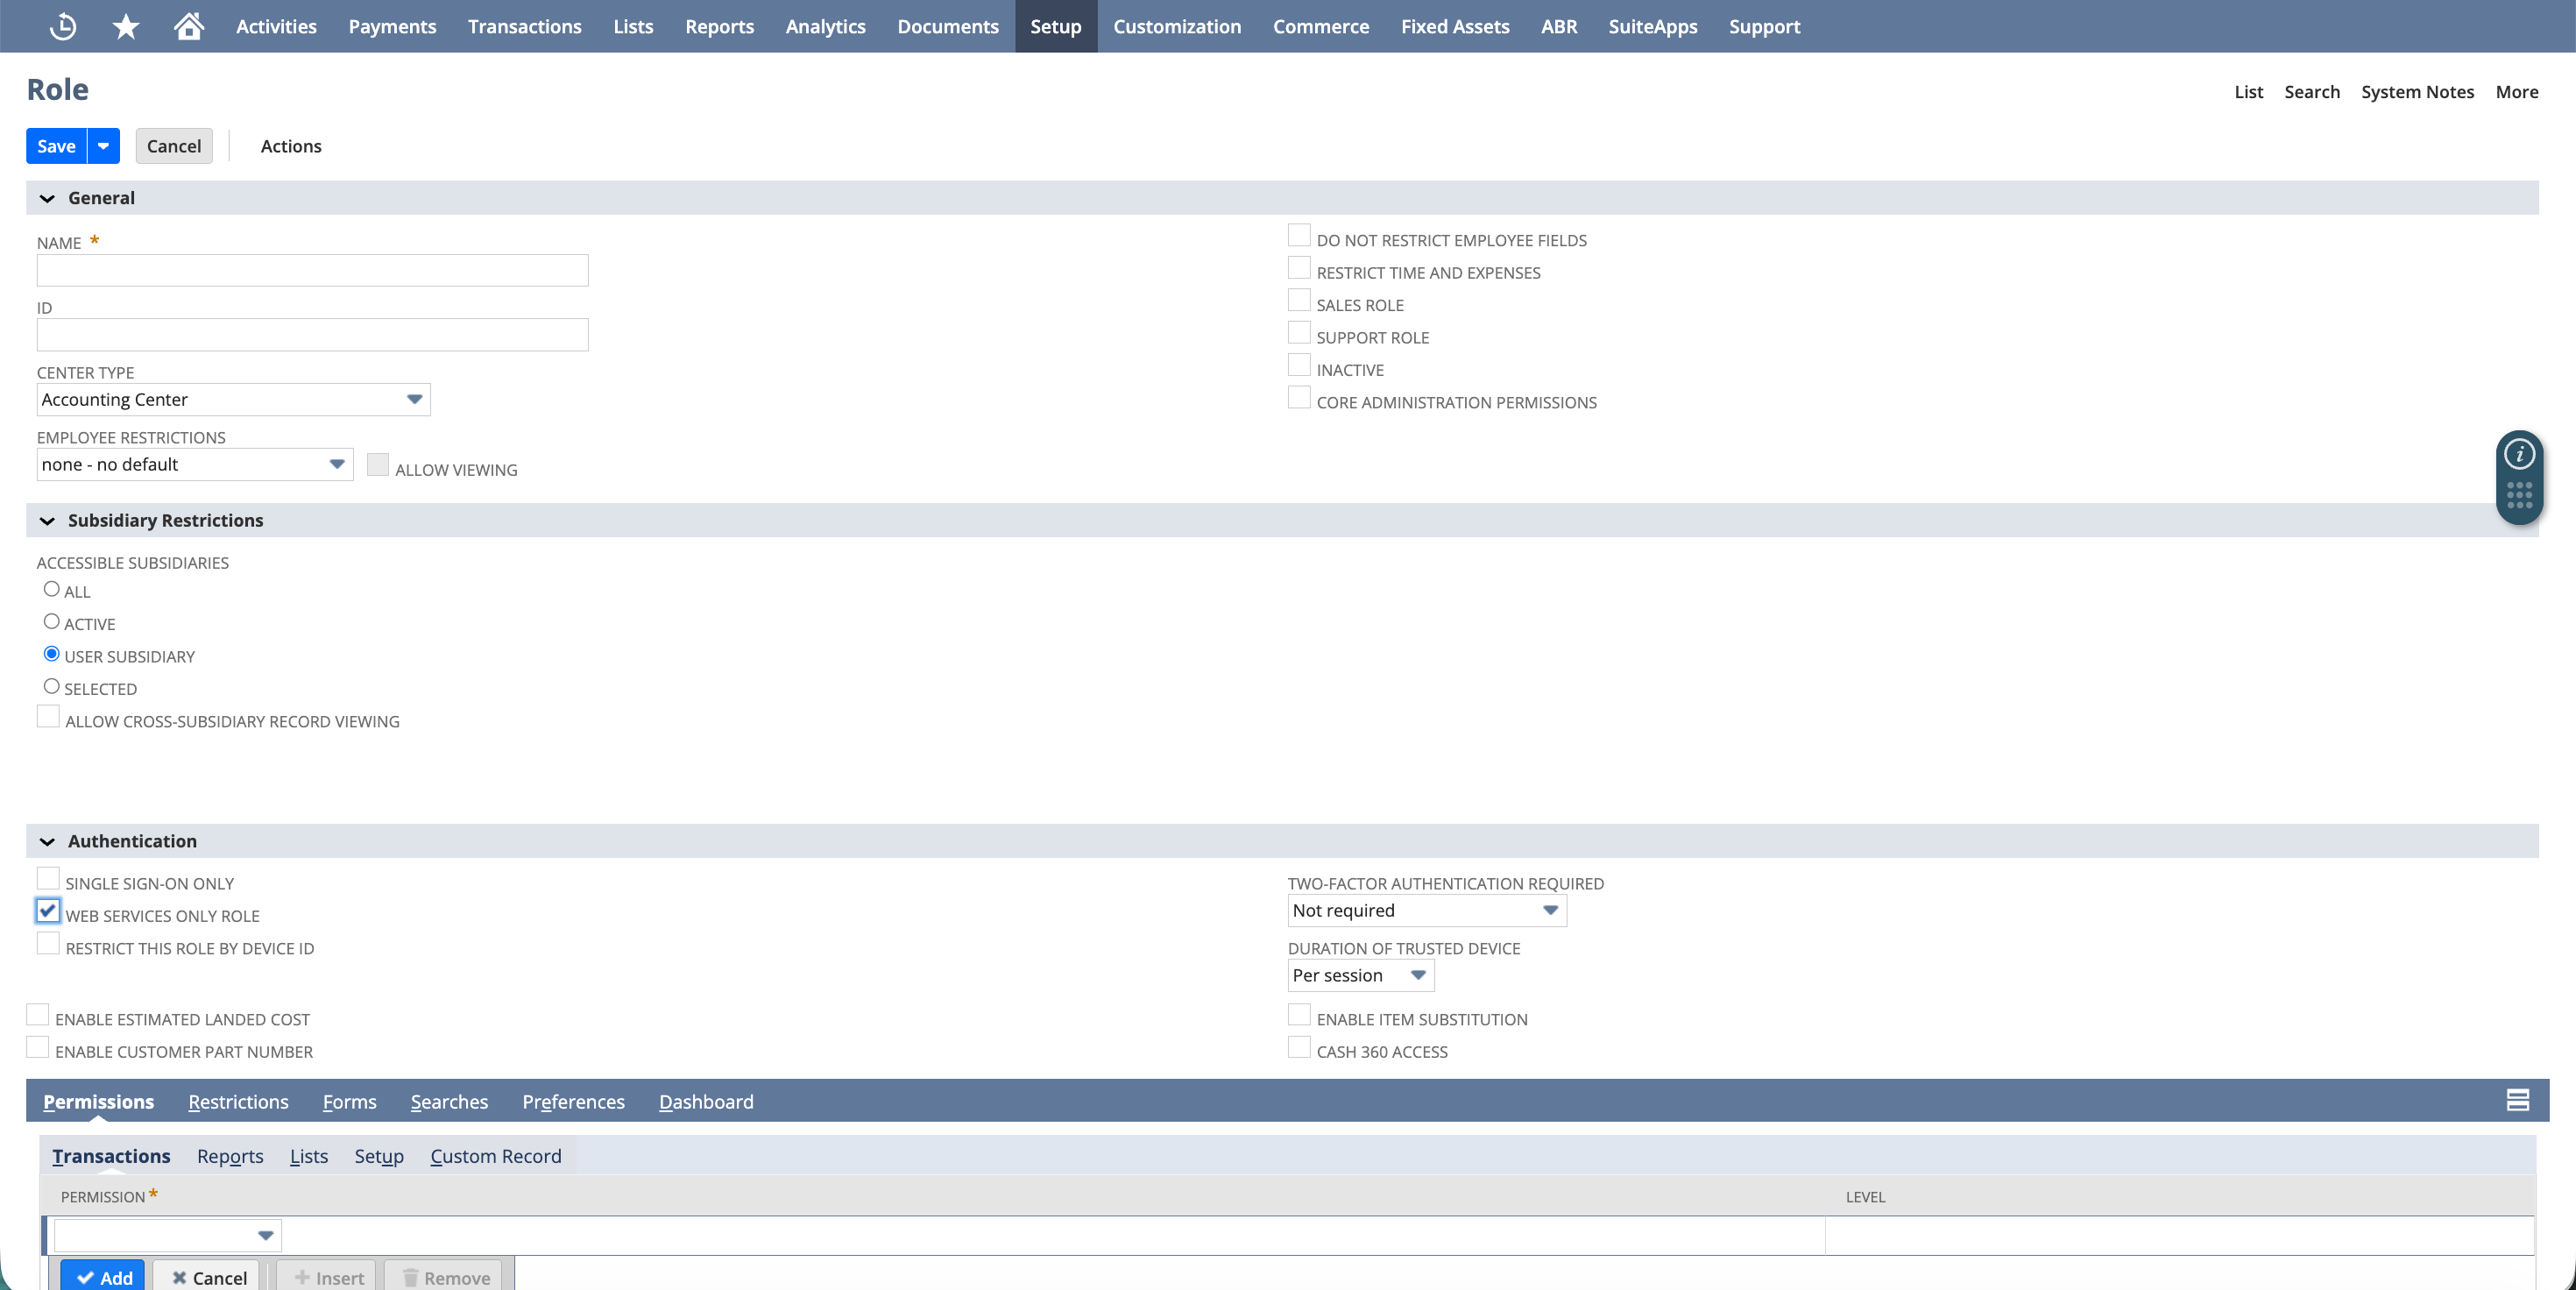
Creating a NetSuite role

The permissions specified on the role applied to your integration will determine which saved searches, transactions, lists, and results you’ll be able to access in Prowork. It is important for you to confirm that the role you plan to use has access to all of the relevant objects as required. The following permissions are recommended, in addition to any specific transaction/list/report specific you may require. In addition to the below permissions, we also recommend adding the permissions listed in this document.

Transactions

  • Any specific transaction types required: sales orders, purchase orders, transfer orders, etc.
  • Find transaction

Reports

  • Any specific report types required

Lists

  • Any specific lists required: items, locations, companies, customers, etc.
  • Perform search, persist search, and publish search

Setup

  • Log in using Access Tokens
  • SOAP Web Services (required for Pull from NetSuite)
  • REST Web Services (required for Send to NetSuite)
Custom Records:
  • Any specific custom record objects required
Ensure the checkbox for the web services only role is selected.

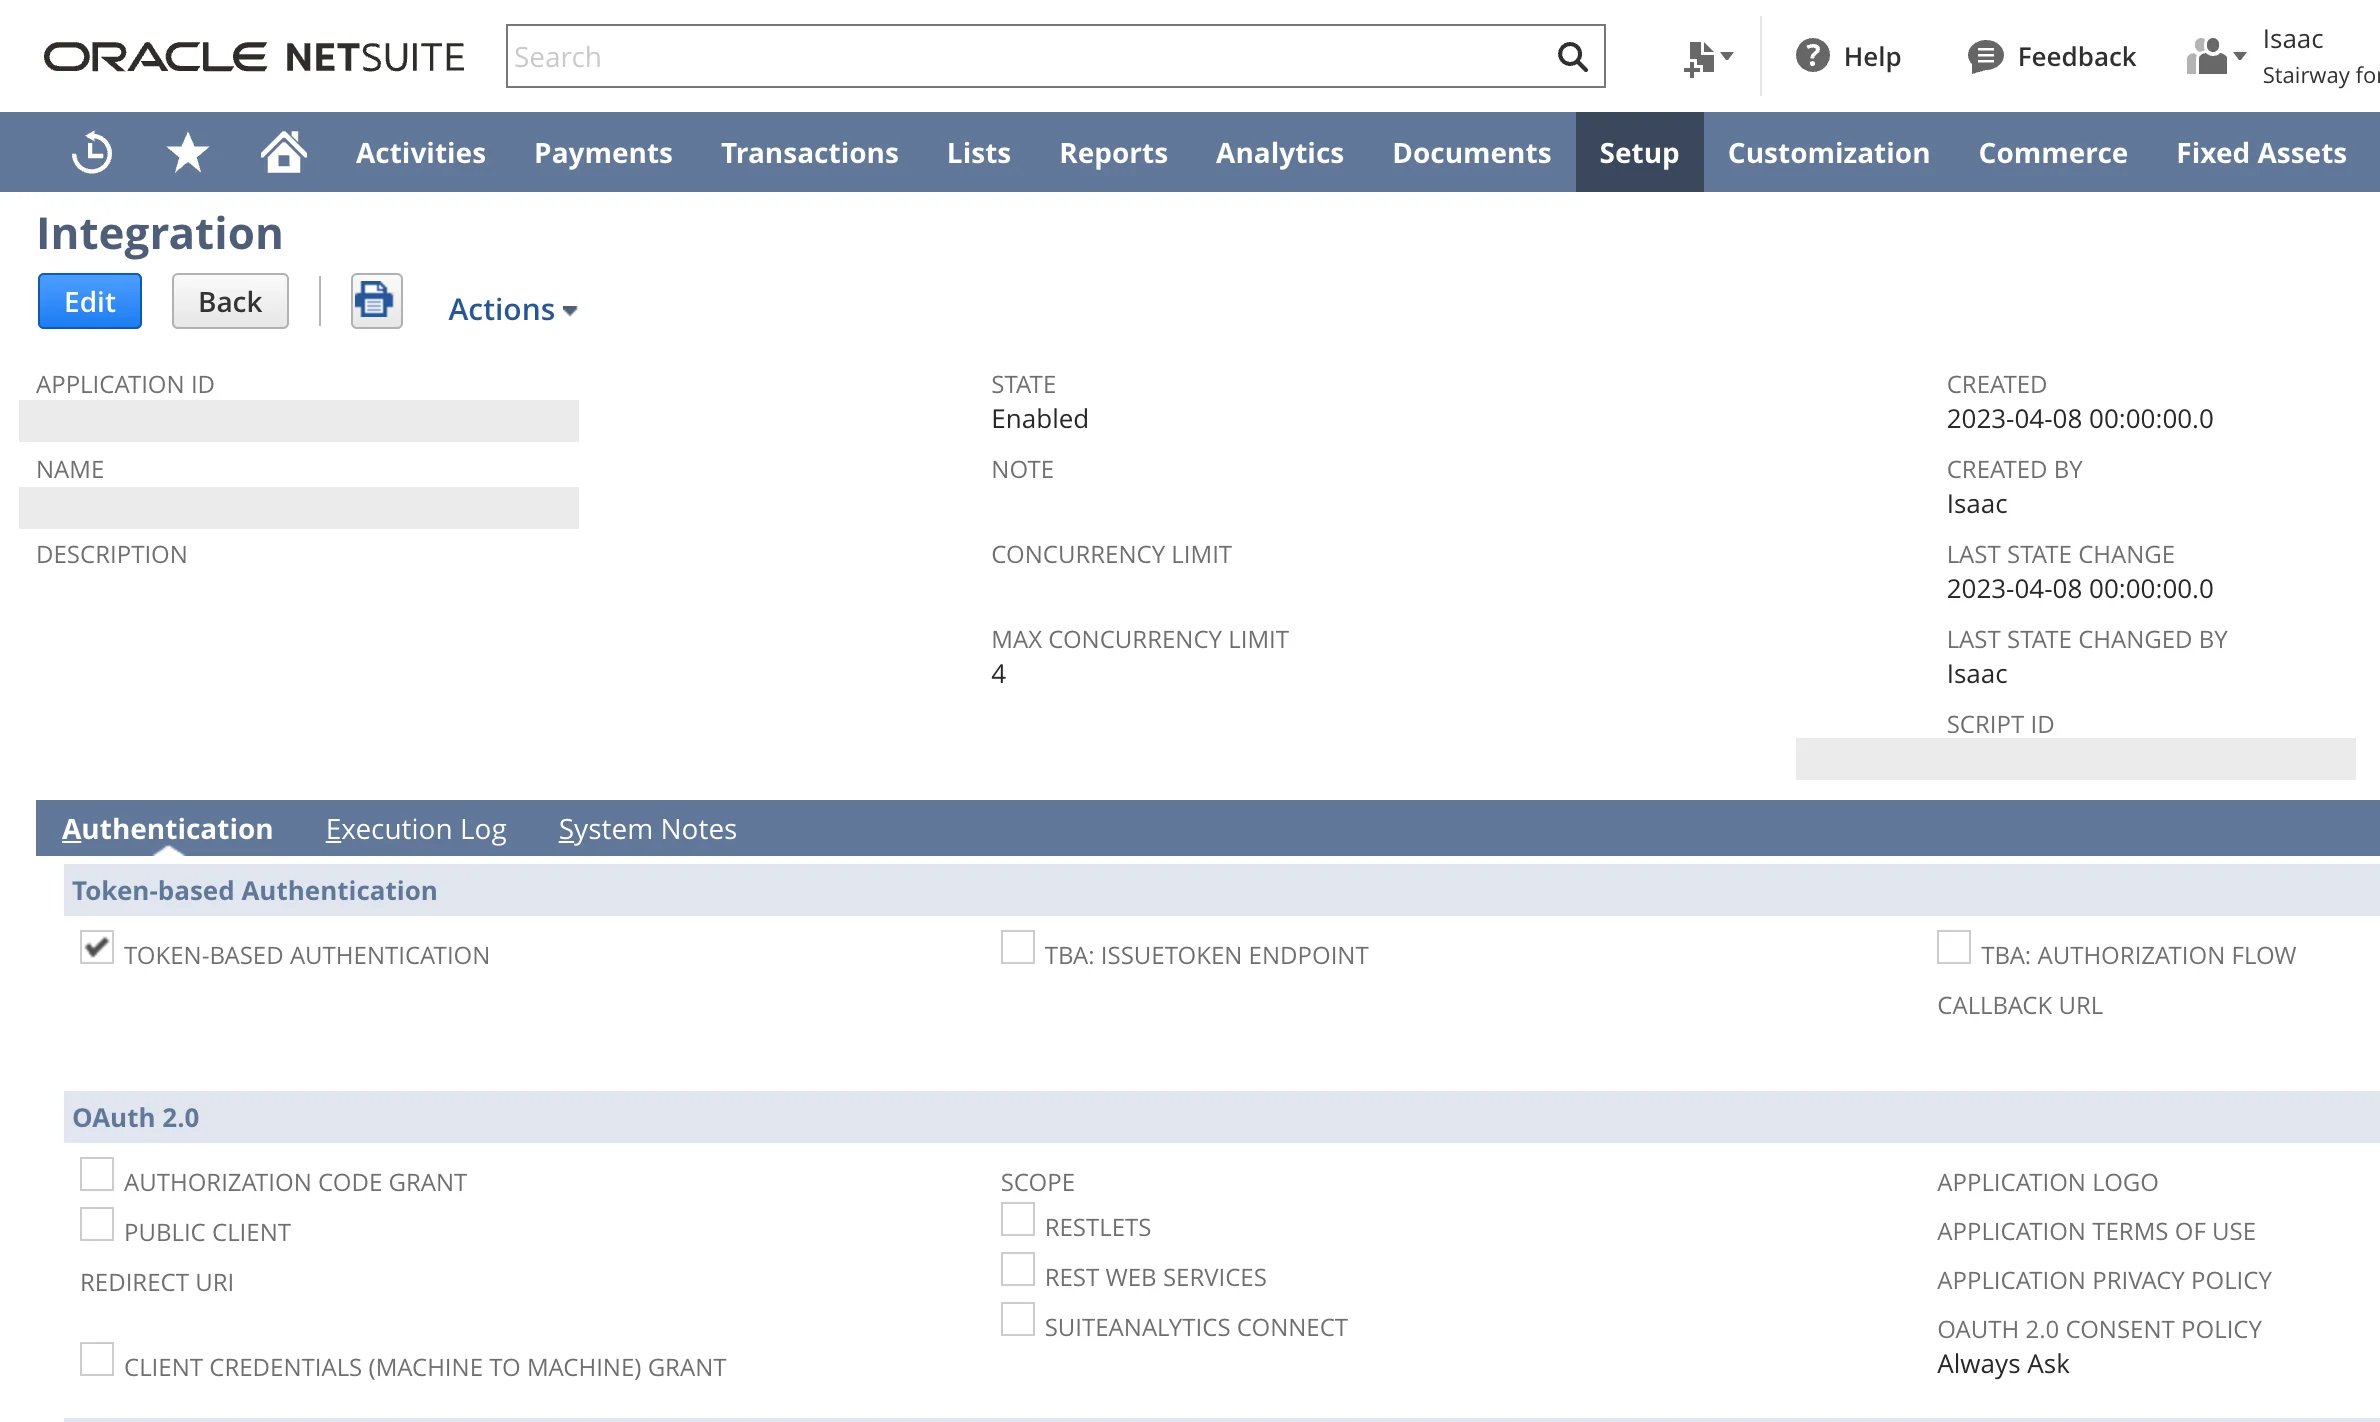
Creating a NetSuite integration

Video walk-though of the setup process:
Follow the path below in the NetSuite UI to create a new integration record.
1
Setup > Integration > Manage Integrations > New
2
Specify an integration name, ensure the status is set to active, and select the token-based authentication option.
3
Uncheck the TBA: Authorization Role and Authorization Code Grant checkboxes.
4
Save the record.
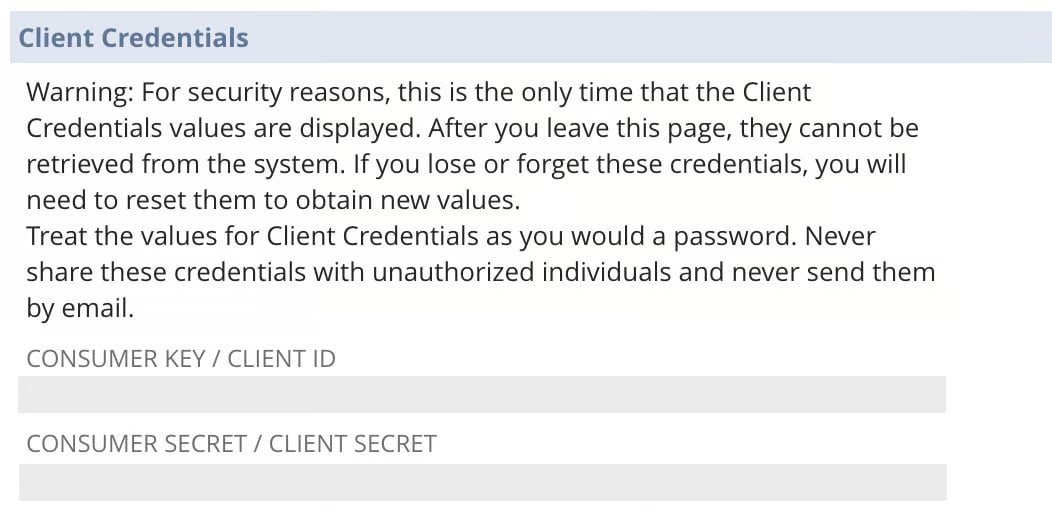
A consumer key and consumer secret will be generated upon saving the record. Record these items, as they will disappear once you leave this page.

Creating a new access token

Once the role, user, and integration have been created, you’ll need to generate the tokens which are required for authentication in Prowork. Follow the path below in the NetSuite UI to create a new token record.
1
Setup > Users/Roles > Access Tokens > New Access Tokens
2
Specify the integration created previously, the desired user, and role, and click save.
3
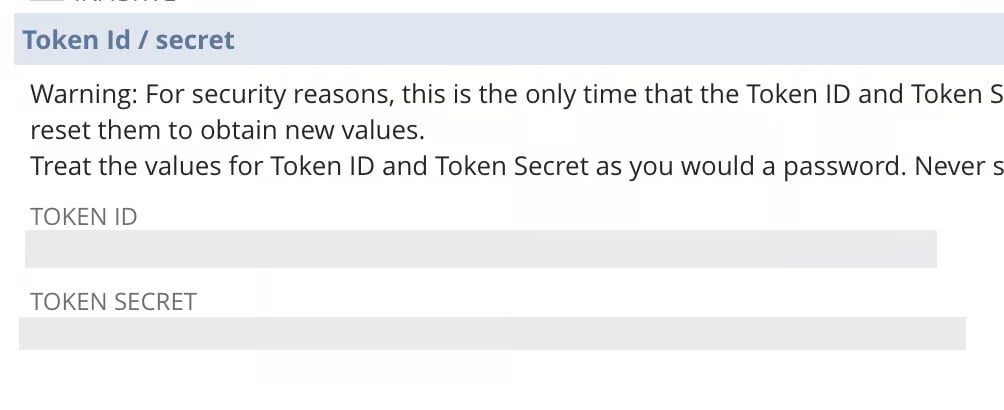
The newly created token id and token secret will appear at the bottom of the page. Record these credentials, as they will disappear once you leave this page.

Configure your settings in Prowork

1
Gather the credentials created from each step earlier in the process and navigate to the Pull from NetSuite step in Prowork.
2
Open the Pull from NetSuite step and click Authorize or Edit Accounts
3
Enter each applicable token and consumer key/secret and click authorize.
Once authorized, you’ll be prompted to select a search type and specific saved search to run. Click refresh and observe your results!
The Return only columns specified in the search checkbox enables a user to determine if all available columns, or only the columns included in the original search, should be returned. This setting is helpful if you’d like to return additional data elements for filtered records without having to update your search in NetSuite.

Helpful Tips

  • The Pull from NetSuite step integrates directly with the saved search function. Based on permissions, users have the ability to access all saved searches from the NetSuite UI within Prowork.
  • If no saved search options are returned for a specific transaction type, please validate your user and role have access to the specific object you’re attempting to access.
  • Users will need permissions within NetSuite to create new integrations, manage access tokens, edit roles, etc. in order to generate the credentials required for this integration
  • Formula fields within saved searches will not be returned
  • Saved searches which include summary results are not supported
  • Ensure the user/role configured for the integration has sufficient permissions to access all necessary saved searches and results
By default, the NetSuite API will only return the full data results from the underlying search record type (item, customer, transaction, etc) and only the internal ids of related record types (vendors, locations, etc) in a search. For example, running the following search in Prowork would return all of the information as expected from the base record type (item in this scenario), and the internal id of the related object (vendor).
The best way to return additional details from related objects (vendor in this scenario) is by adding joined fields within the search. Multiple joined fields can be added to a single search to return data as necessary.
Alternatively, another solution would be running separate searches and joining the results by using a Combine tables step within the flow. This is demonstrated below.

Usage notes

  • Users will need permissions within NetSuite to create new integrations, manage access tokens, edit roles, etc. in order to generate the credentials required for this integration
  • Formula fields within saved searches will not be returned
  • Saved searches which include summary results are not supported
  • Ensure the user/role configured for the integration has sufficient permissions to access all necessary saved searches and results
  • The following transaction searches are not supported in SOAP web services (see NetSuite documentation for details):
    • Blanket Purchase Order
    • CCard Refund
    • Commission
    • Credit Card
    • Currency Revaluation
    • Customer Payment Authorization
    • Deprecated Custom Transaction
    • Finance Charge
    • Fulfillment Request
    • GL Impact Adjustment
    • Inventory Count
    • Inventory Distribution
    • Inventory Status Change
    • Inventory Worksheet
    • Liability Adjustment
    • Ownership Transfer
    • Payroll Adjustment
    • Payroll Liability Check
    • Period End Journal
    • Purchase Contract
    • Request For Quote
    • Revenue Arrangement
    • Revenue Commitment
    • Revenue Commitment Reversal
    • Revenue Contract
    • Sales Tax Payment
    • Statement Charge
    • Store Pickup Fulfillment
    • System Journal
    • Tax Liability Cheque
    • Tegata Payable
    • Tegata Receivable
    • Transfer
    • Vendor Request For Quote

Send to NetSuite

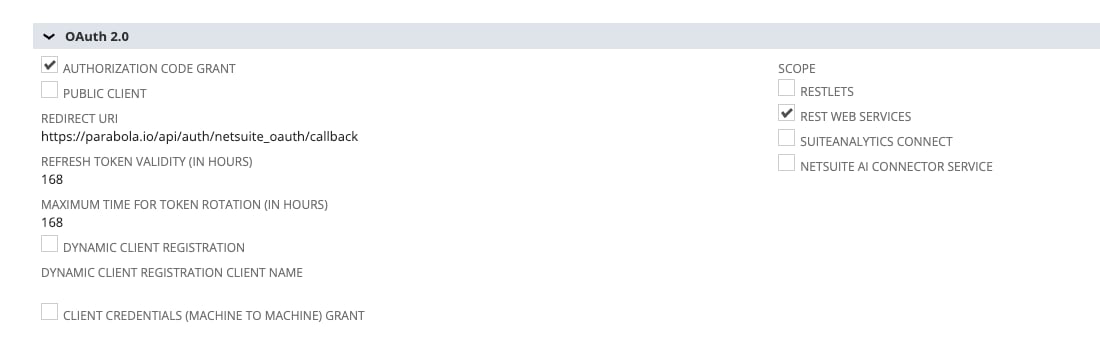
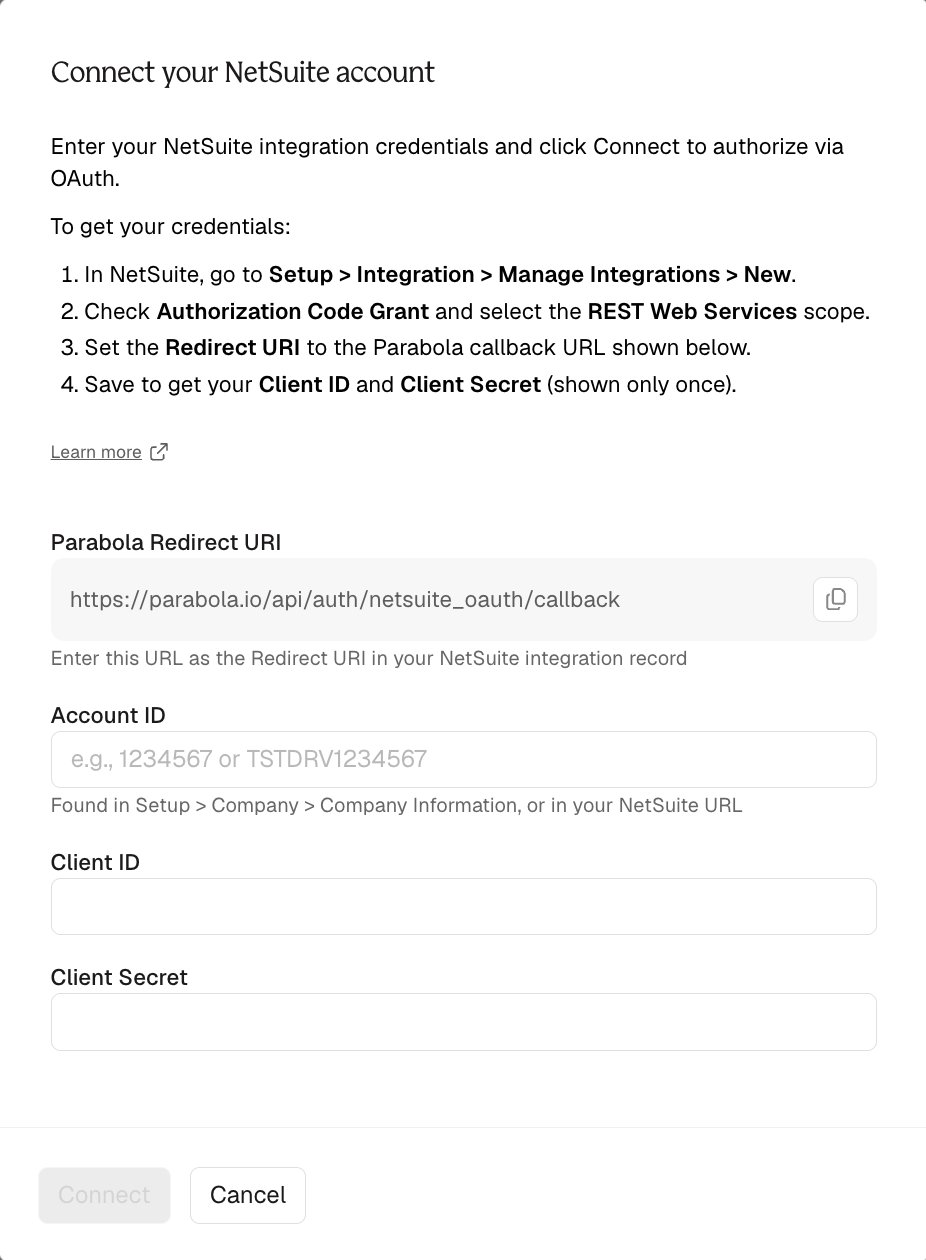
Authentication: Send to NetSuite (REST) uses OAuth 2.0 with Authorization Code Grant.

Connection

The same credentials and role configured for pulling data from NetSuite can be leveraged within Prowork’s Send to NetSuite step. One key difference for posting data to NetSuite is ensuring the role has full access to REST Web Services
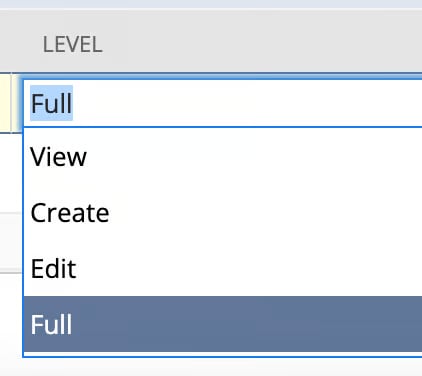
It also is important to confirm that the role has sufficient permissions enabled to create and/or update the relevant objects that are in scope for your team’s use cases. This is completed by selecting the relevant permission and updating the access level to Full
As an example, the following permissions need to be enabled for use cases that involve creating & updating sales orders:
  • Transactions > Sales Orders > Full Access

Using the step

Creating and updating fields within NetSuite requires providing the internal IDs for relevant objects (items, sales orders, customers, subsidiaries, etc) as opposed to providing the human readable names you’re familiar with (SKUs, order numbers, customer names, etc). It is a best practice to leverage Pull from NetSuite step or reference file within your flows to gather the internal IDs for reference prior to using the Send to NetSuite step to prevent errors. Use case example: Creating new sales orders based on a PDF Purchase Order from a customer flow inputs:
  • An extract from email step that parses a new purchase order PDF from a customer
    • This step extracts the order number, customer name & address, each ordered SKU, the quantity, and the relevant order/ship dates
  • Pull from NetSuite steps that list master data references including name and internal ID:
    • Customers
    • Items
Transformation logic:
  • Combine the parsed PDF data with the NetSuite reference searches based on the SKU name & Customer Name
  • Your dataset should now include the relevant internal ID for each object (Item, Customer, Location)
flow outputs:
  • Connect your data to a Send to NetSuite step - Select the action “Create” and the object “Sales Order” - Configure the mandatory fields for entity ID (customer), item internal ID, status, etc.
Record statuses NetSuite requires data to be imported using the specific internal status codes. Specify a status by inserting a custom value with the Status Internal Identifier from the table below.
Bulk Creation A single flow run can create multiple records within NetSuite. It’s important to leveraging the “grouping” function on the item level mapping to ensure sub-items are consolidated into the relevant parent level record. An example is grouping sales order items by the sales order number to ensure each item is associated with the corresponding sales order. Tips:
  • Use Pull from NetSuite steps with saved searches for items, customers, vendors, or locations and reference them in flows to look up internal IDs
  • The NetSuite Entity field relates to Vendor on POs and Customer on SOs
Transfer orders When you create an item line on a Transfer Order, NetSuite automatically creates three lines: an item line, a fulfillment line, and a receipt line. For example, a Transfer Order with SKUs A and B adds A on line 1 and B on line 4 (lines 2 and 3 are the fulfillment and receipt for A; lines 5 and 6 are for B). Keep this in mind when creating or modifying a fulfillment, receipt, or item on a Transfer Order, since you’ll need to specify the line number of the object you’re updating.

Sharing your NetSuite connection with teammates

You don’t need every teammate to generate their own NetSuite tokens. Once one person has authorized a NetSuite connection in Prowork, that authentication can be shared with specific teammates or the whole team, the same way any other Prowork authentication is shared:
1
On the Pull from NetSuite (or Send to NetSuite) step, click Edit Accounts.
2
Find the authorization and click the three dots (), then Sharing settings.
3
Share it with a specific teammate or the whole team, and choose whether they can use it or also edit it.
Flows that use a shared authentication stay in sync. If the connection is re-authorized (for example, after rotating tokens in NetSuite), every flow using it picks up the refreshed credentials automatically. See How do I share an authentication across my team? for the full walkthrough with screenshots. If instead you want each teammate to authenticate independently (for per-person auditability on the NetSuite side), each person creates their own access token against their own NetSuite user, using the same web services only role. See Creating a new access token above.

Troubleshooting

Authentication issues
  • Confirm the role has Log in using Access Tokens, SOAP Web Services, and REST Web Services set to Full.
  • If you’re connecting to a Sandbox, use the Sandbox account ID and confirm it exactly matches the URL you see when logging in to NetSuite (for example, 12345-sb1).
Missing data (fewer columns or rows than expected) This usually means the role can’t see certain columns or objects. Check the role’s Transactions, Lists, and Custom Records permissions:
  • If rows are missing, check Transactions permissions.
  • If columns are missing, check Lists and Custom Records permissions.
Field values pulling in as numbers
  • Joined fields: pulling a joined object directly returns the raw object (an internal ID, or a JSON blob like {"attributes":{"internalId":"101"},"name":"DTC"}) instead of the display name. Add the object’s Name subfield instead (for example, use “Location : Name” rather than “Location”), and make sure Return only columns specified in the search is unchecked in the Pull from NetSuite step. If a joined field still comes in as JSON, flatten it with an AI step using the prompt “expand nested fields to columns.”
  • Custom fields: a custom field with a set list of options returns the option’s internal ID (for example 1, 2, or 3) instead of the option name. You can’t change this in the saved search, but you can export the options with their internal IDs and join them back with a Combine tables step. Custom fields set with a free-text box pull in normally.

FAQs

Common questions that come up when building NetSuite flows.

Which saved search type should I use?

Match the search type in the Pull from NetSuite step to the record you’re querying. Common mappings: If you’re unsure, open the saved search in NetSuite and check which type it was created under. The type you select in the step must match. No. The Pull from NetSuite step only supports saved searches. NetSuite reports use a different API that Prowork can’t access. If a report has the data you need, recreate the equivalent logic as a saved search.

Why isn’t my saved search showing up in the step?

The most common reasons:
  • It isn’t public. Open the search in NetSuite and confirm the Public checkbox is checked.
  • The search type doesn’t match. The type you select in the Pull from NetSuite step must match the type the search was created under (for example, a Transaction search needs “Transaction” selected in the step).
  • Permissions. The role used to authorize the connection may not have access to the search’s underlying record type. Review the role setup in Creating a NetSuite role.
Open the search in NetSuite, go to the Results tab, and look at the Summary Type column. If any field has a value there (Group, Sum, Count, Max, or Min), it’s a summary search, and Prowork can’t pull it. Remove the summary types from every field and re-run, then recreate any aggregation you need in Prowork after pulling the raw records (for example, with a Sum by group or Merge duplicate rows step).

Is there a row limit, and what do I do about large searches timing out?

There’s no hard row limit, but very large searches can time out before the data fully loads. This is a NetSuite API constraint, not a Prowork limit. If you hit it:
  • Narrow the search criteria with filters like date range, status, location, or subsidiary.
  • Split one large search into several smaller ones (for example, by month or subsidiary) and stack the results back together in Prowork.
  • Use a scheduled email export. NetSuite can email a saved search’s results as a CSV on a schedule. Receive that email with an Extract from Email step, which sidesteps the API timeout entirely. This works well for large reference datasets that don’t need real-time freshness.

How do I pull inventory balances into Prowork?

NetSuite’s SOAP API doesn’t expose Inventory Balance as a standard search object, so you can’t pull it directly with a saved search. Instead, build an Item search and add these location-level result fields to get per-location quantities for each item:
  • Inventory Location (the location name)
  • Location On Hand (units physically in stock)
  • Location Available (on hand minus committed)
  • Location Committed (units reserved on open orders)
  • Location Back Ordered (units on back order)
  • Location On Order (units on open purchase orders)
Each row represents one item-location combination, giving you the same breakdown you’d expect from an Inventory Balance report.

If one record fails to send, does the whole flow stop?

No. By default, a failed record logs an error in the flow run history while other records in the same run can still succeed. Open the flow run log to see which rows succeeded and which failed, then read the error messages to understand what went wrong.

Can I send to multiple record types in the same flow?

Yes. Add multiple Send to NetSuite steps to the canvas and point each one at a different action and record type. For example, one step can create a purchase order and a second step can create an item receipt.

How do I confirm a record was actually created in NetSuite?

Two ways: check the flow run log in Prowork, which shows a success or error response for each record, and verify directly in NetSuite by searching for the record. For the first few runs of any new send flow, it’s worth confirming in NetSuite directly rather than relying on the log alone.

Do I need to map all fields, or just the required ones?

Only the required fields, plus any optional fields you specifically want to populate. The step flags required fields and won’t run until they’re mapped. Unmapped optional fields are left blank or filled with NetSuite’s defaults.
Last modified on August 31, 2026