How I built an automatic translator for Webflow blog posts

Hi! I’m Aron Korenblit from Automate All the Things. I’m an automator and I love to share time-saving automations and tools to get more done. I’ve recently been so excited about the new tools gaining traction to help all of us automate the mundane. Webflow and Parabola are two of my favorites!
I’m sharing my process of automatically translating Webflow blog posts using Google Translate and Parabola.
I know there’s been frustration in the Webflow community around the lack of localization in Webflow so I wanted to see if Parabola could solve the problem in an automated, scalable way.
If you’re a visual learner, check out the video tutorial I made for this.
If you want to use my recipe to translate your own Webflow blog content, head here.
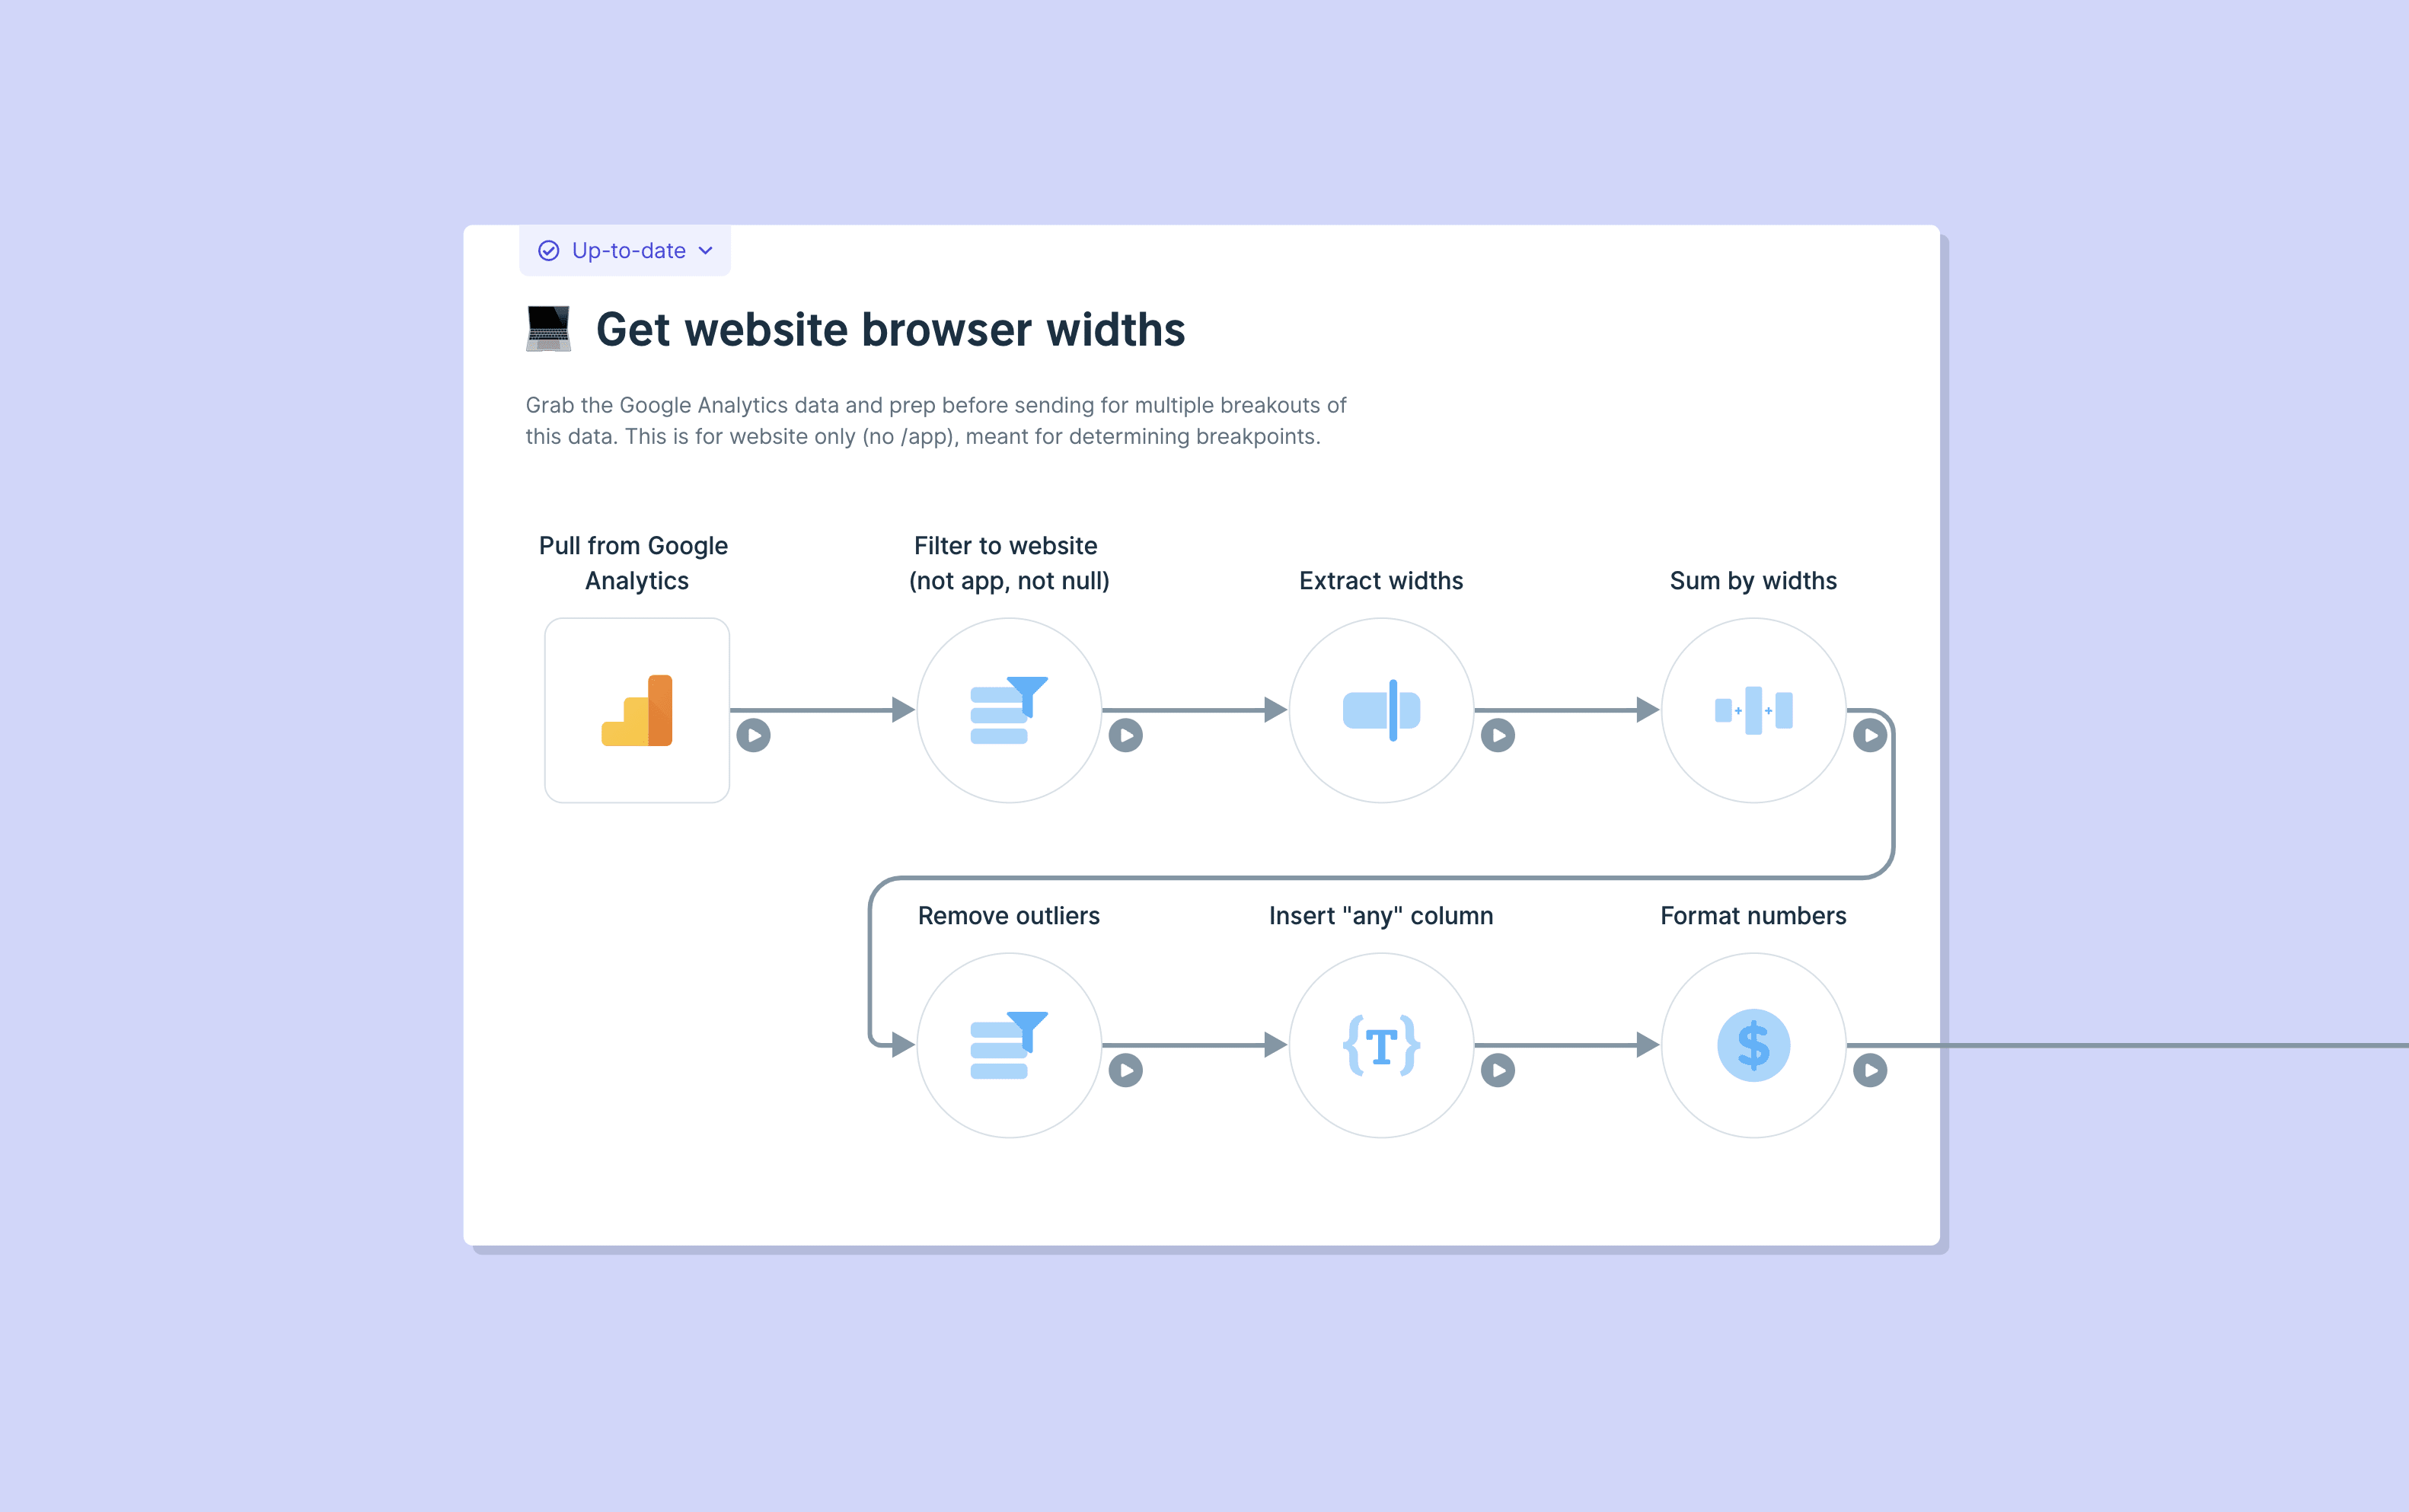
Okay, on to the good stuff. This translator I built in Parabola will take blog content from my English Webflow CMS, translate it using the Google Translate API, and push the translated content to my French Webflow CMS.
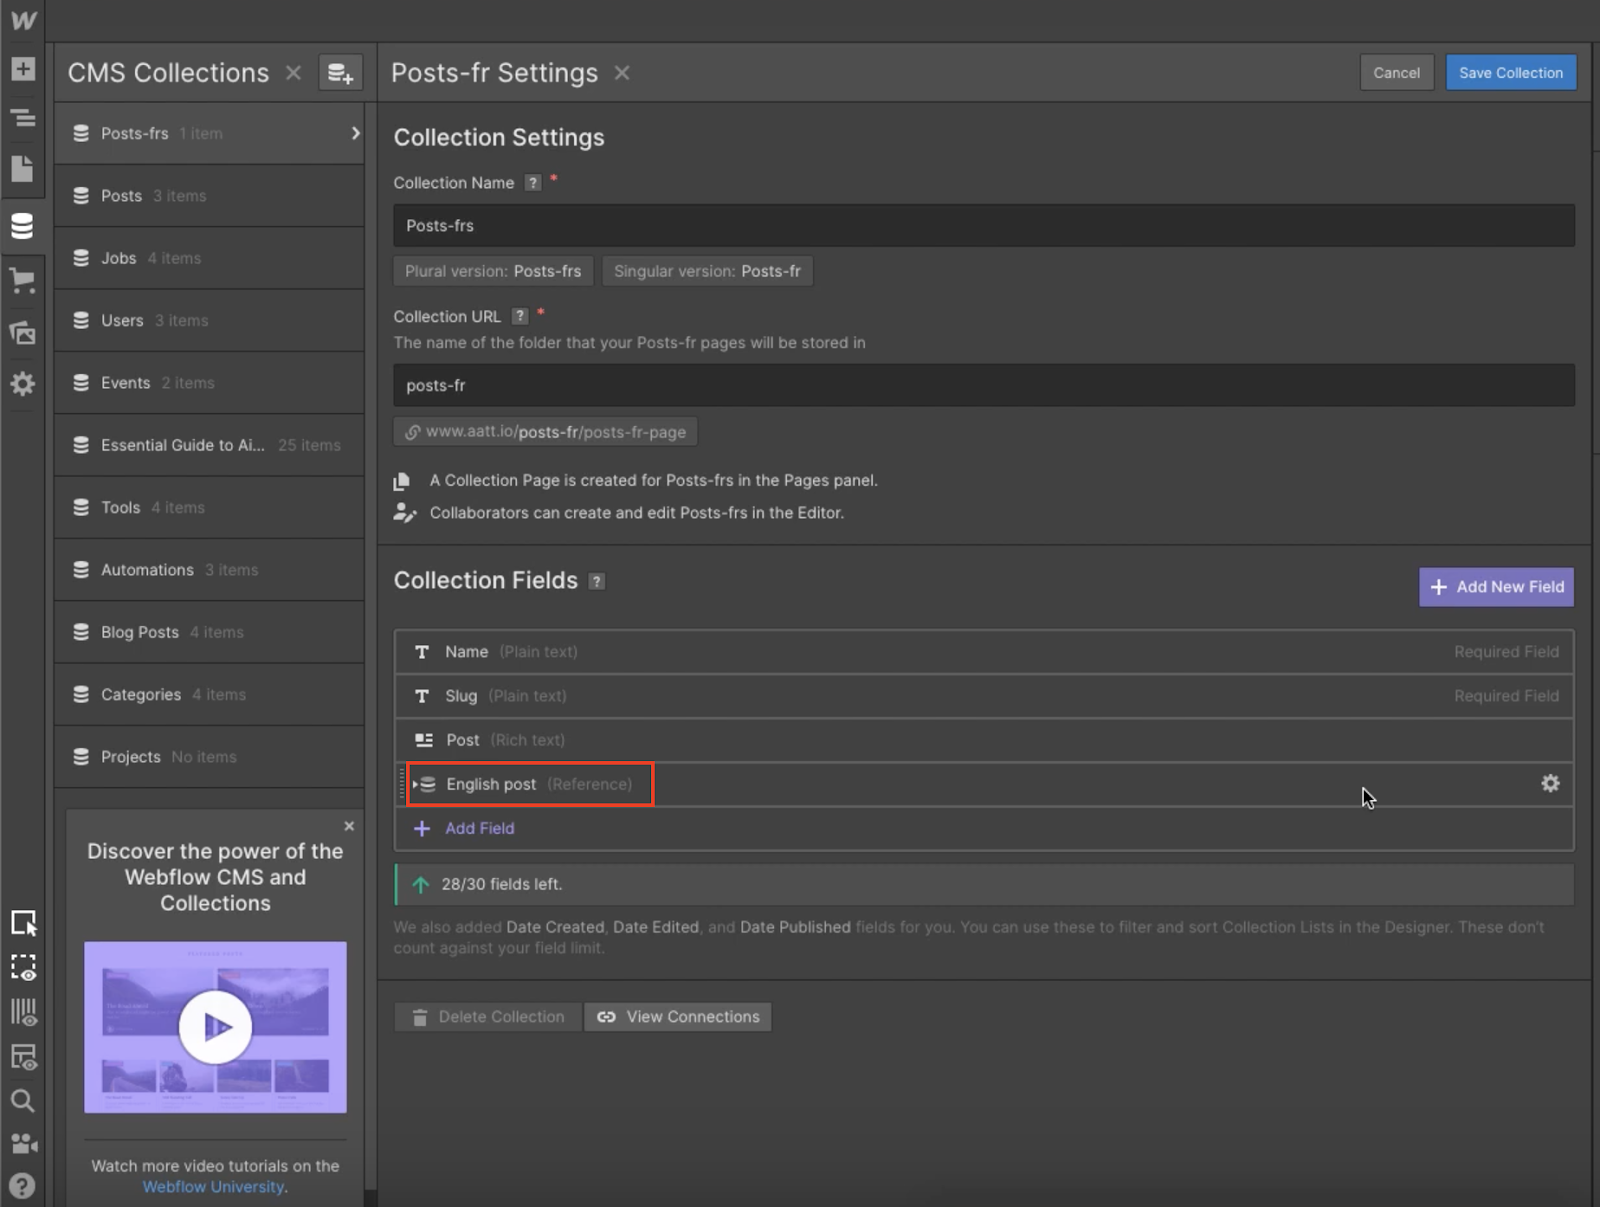
In my French CMS, I added a reference field called English post. We’ll use this field to link the English version of the blog post to the French version. More on this later.
Section 1: Identify blog content needing translation
First, we need to import both CMS collections from Webflow into Parabola. I start by dragging two API Import steps onto my canvas. I use one to import my English collection items and the other to import my French collection items.

I then join the imported tables together matching the id from my English CMS with the reference field in my French CMS, English post, that I mentioned earlier. If the merge works (the reference field is filled), I know that the blog post has been translated already and can be filtered out.

I then use the Row Filter step to do exactly that. I filter out the collection items that already have the Webflow slug populated in the French CMS. This is how I know the blog post has already been translated.

Section 2: Translate the blog content
Now that I have a filtered list of the English blog content that still need to be translated, I use the API Enrichment step to call the Google Translate API.
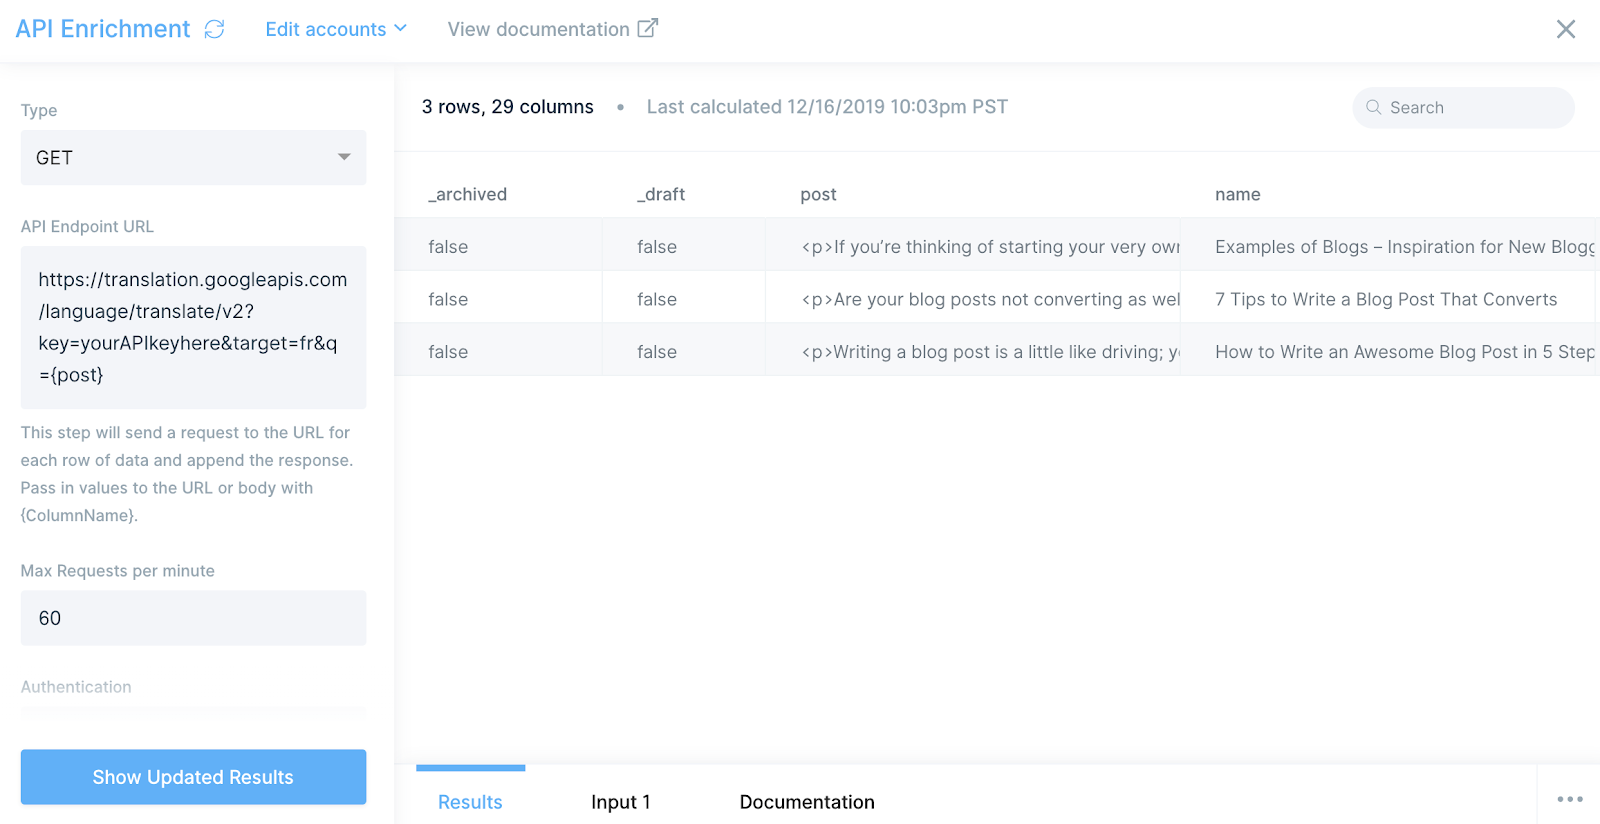
Don’t let this scare you. The Google Translate API is actually pretty simple. The API takes three parameters:
1. key - Your API key
2. target - Your target language. In my case, fr
3. q - the input that needs to be translated. In my case, we’ll be passing through the {post} column from the Webflow import.
I pass this all through the API Endpoint URL in my Enrichment step, like this:
When I pass my data through the Google Translate API, I get an array with the translated text and the detected source language (in my case, en) in return. Don’t forget to select data for your Top Level Key and translation for your 2nd Level Key. This will expand the array of data that’s originally returned in the API call.
Bam! My blog content is translated! Now, onto translating the name/title of my blog posts.
Before running it through another API Enrichment step, I used the Column Rename step to rename the column with the translations I just got back from Google Translate to translatedPostFr. By renaming the column, I ensure that this column doesn’t get overwritten by the Google Translate API when I translate the blog titles.
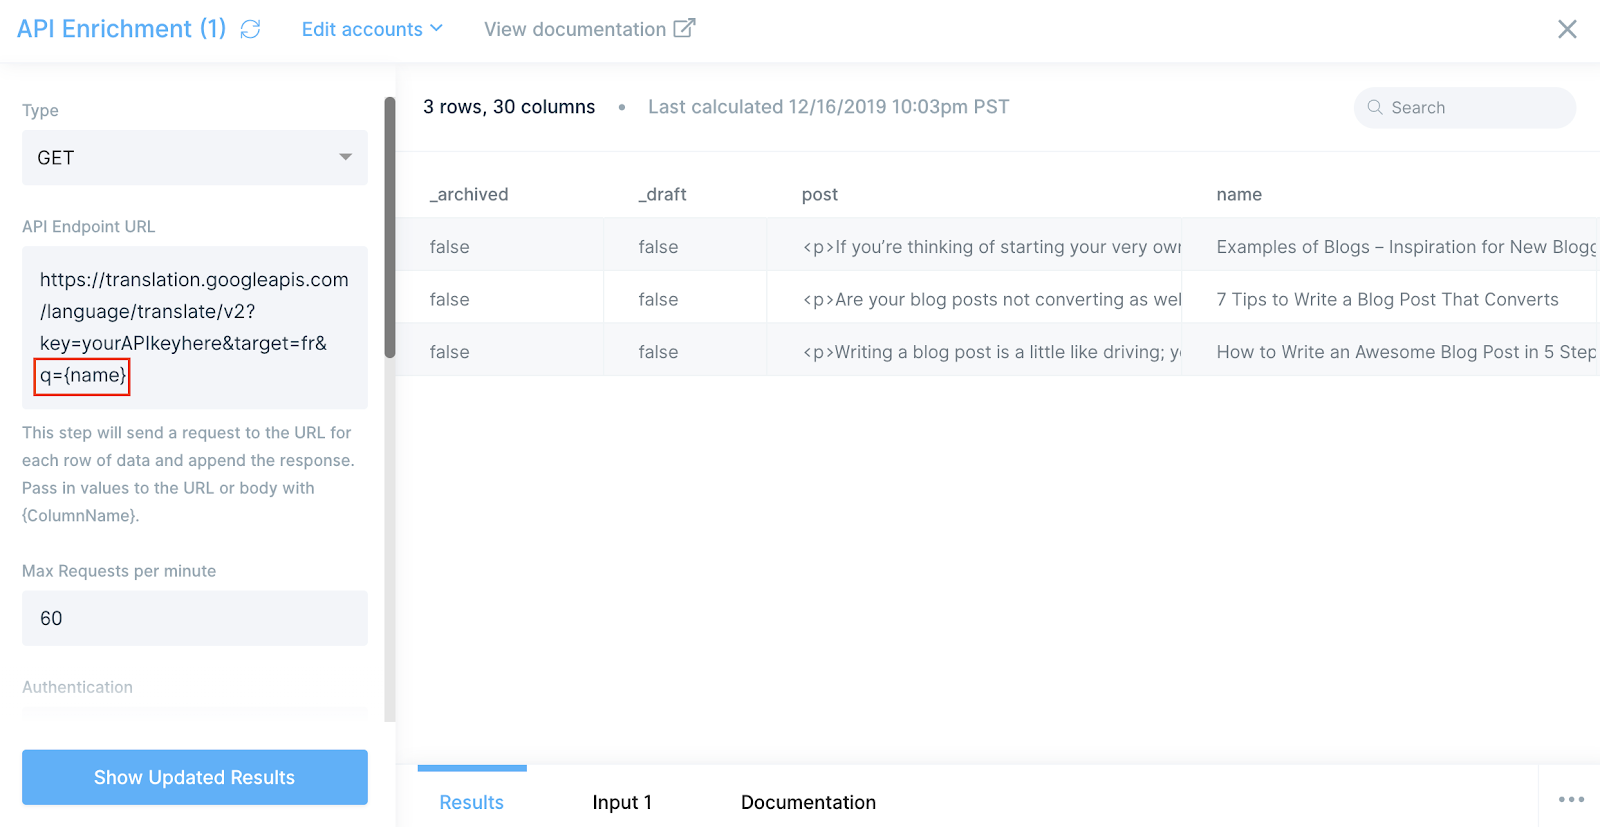
Once I do that, I can run the data through another API Enrichment step. Instead of q={post}, this time, I add q={name} to the API Endpoint URL, so Google Translate knows exactly what content I want translated.
Woot! Blog post titles are now translated too! All that’s left is to export the translated content to Webflow and update the French CMS.
Section 3: Update Webflow with translated content
I use the API Export step and do a POST call to create a new CMS item. In the body of the call, I specify which fields I want to update. For this, I can use the data from my Parabola table and reference columns from it to update Webflow. In my opinion, this is what makes Parabola so powerful!

You’ll see that as part of the body, I’m updating “name” with {api.translatedText} and “post” with {translatedPostFr} (which is the column I had previously renamed). I’m also updating “en-post-2” with {_id} to update my reference field to create the link between the English blog post and French blog post. Remember, this link is what enables us to join the English and French collection item tables together.
Another awesome thing to call out is that Google Translate ignores HTML tags and translates text in between HTML tags. The translation will have the exact same formatting when it lands in Webflow. It’s such a time saver because it requires no extra work on the Webflow-side to reformat.
Voilà! A cheap, automated translator for your Webflow blog posts! I’m super excited about this automation, so hit me up on Twitter or my YouTube channel, and let me know what you think!