Set up the step
When you add the step to a flow, it generates a unique email address. Copy it and use it as your forwarding destination, or share it with whoever sends the data.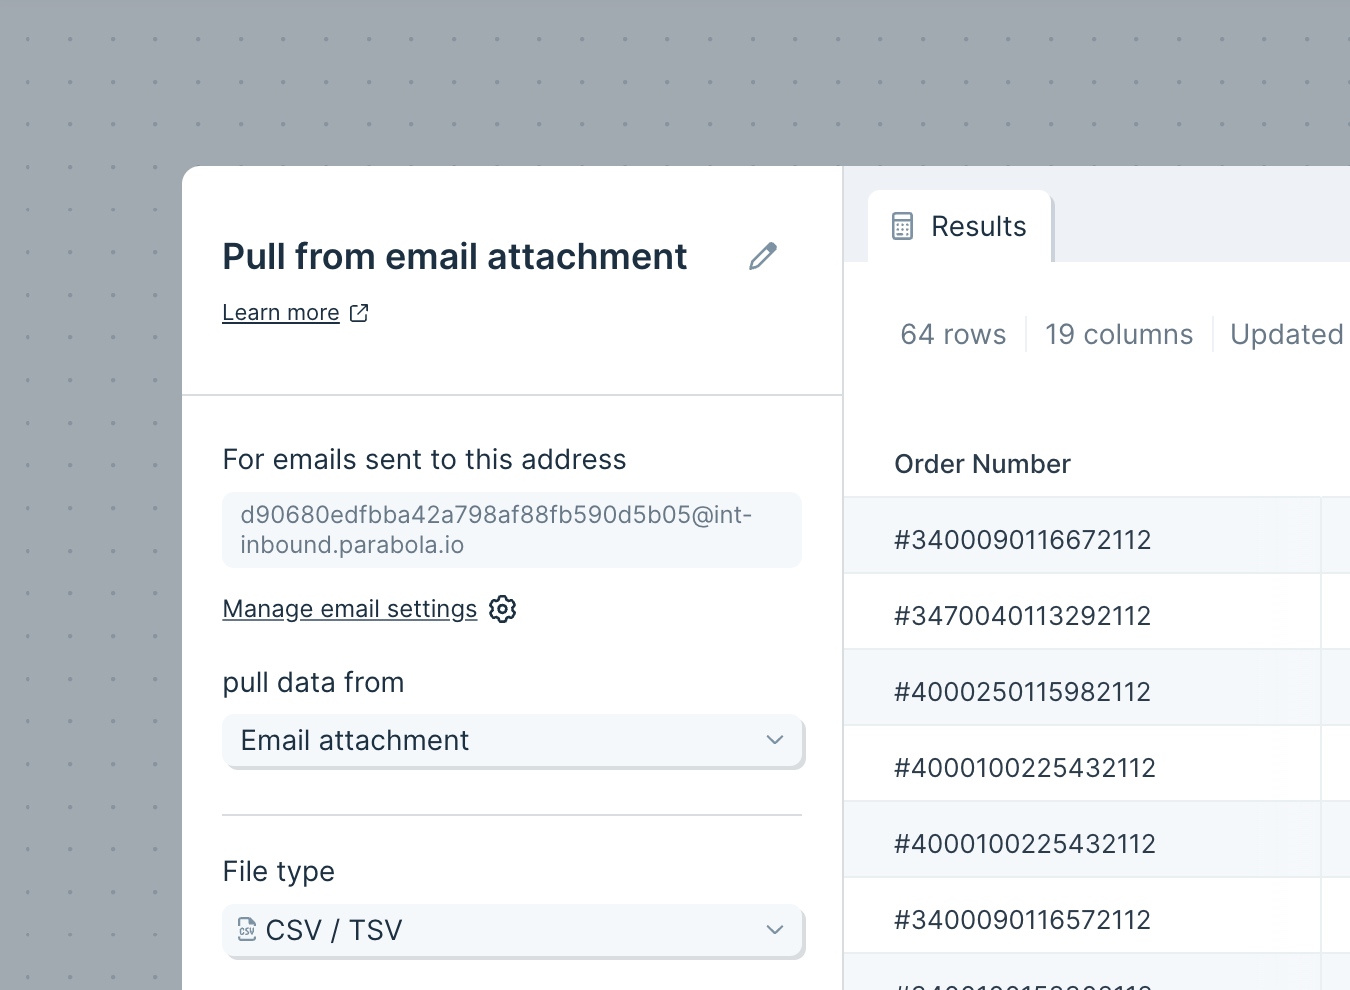
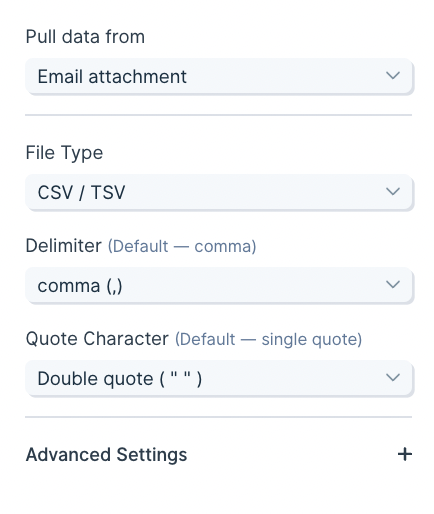
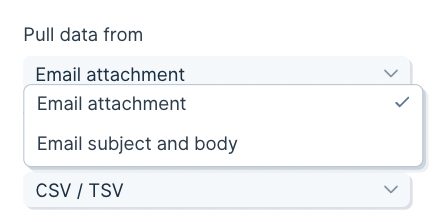
CSV / TSV. Other options: XLS / XLSX, PDF, JSON.
For CSV/TSV files, the Delimiter defaults to comma; tab and semicolon are also supported. The Quote Character defaults to double quote; single quote works too.
Auto-forward emails into Parabola
To forward email from outside your domain into Parabola, you’ll usually need to verify the@inbound.parabola.io address with the sending email service. The Gmail walkthrough below covers the typical flow.
1. Prepare the step in Parabola
1
Drag a new Extract from email step into your flow.
2
Configure it to pull in email content, not just attachments.
3
Click Update Results to save.
2. Set up forwarding in Gmail
1
In Gmail, click the gear icon and choose See all settings.
2
Open the Forwarding and POP/IMAP tab.
3
Click Add a forwarding address.
4
Paste the address from your Parabola step and click Next → Proceed.
3. Confirm the forwarding request via Parabola
1
Wait for Gmail’s verification email to trigger your flow.
2
Click View email content and find the auto-forwarding link.
3
Follow Parabola’s prompt to view the external URL.
4
On the Gmail confirmation page, click Confirm.
Gmail now recognizes the Parabola address as a valid forwarding destination.
4. Filter the emails Gmail forwards
1
In Gmail, go to Settings → Filters and Blocked Addresses → Create a new filter.
2
Set criteria like:
- From:
nycwarehouse@gmail.com - Subject:
New York City Warehouse Inventory - Has attachment: checked
3
Click Create filter, check Forward it to, choose your verified Parabola address, then click Create filter.
5. Clean up
If you added a temporary Extract from email step just to verify the forwarding address, delete it. Your real flow will run on filtered, auto-forwarded emails from now on.Troubleshooting
If email content isn’t showing up after a few minutes, open the email settings on the step (gear icon labeled view all flow email settings) and check whether Reject emails that do not contain valid attachments is on. If it is, look in your inbox for an email titled “Sorry, we were unable to process your email attachment.” Gmail’s verification link will be in that email’s body. Click it to verify the forwarding address.Run the flow once per attachment
By default, the flow runs against the first valid attachment. To process every attachment in a single email, open the Email trigger settings modal and choose Run the flow once per attachment.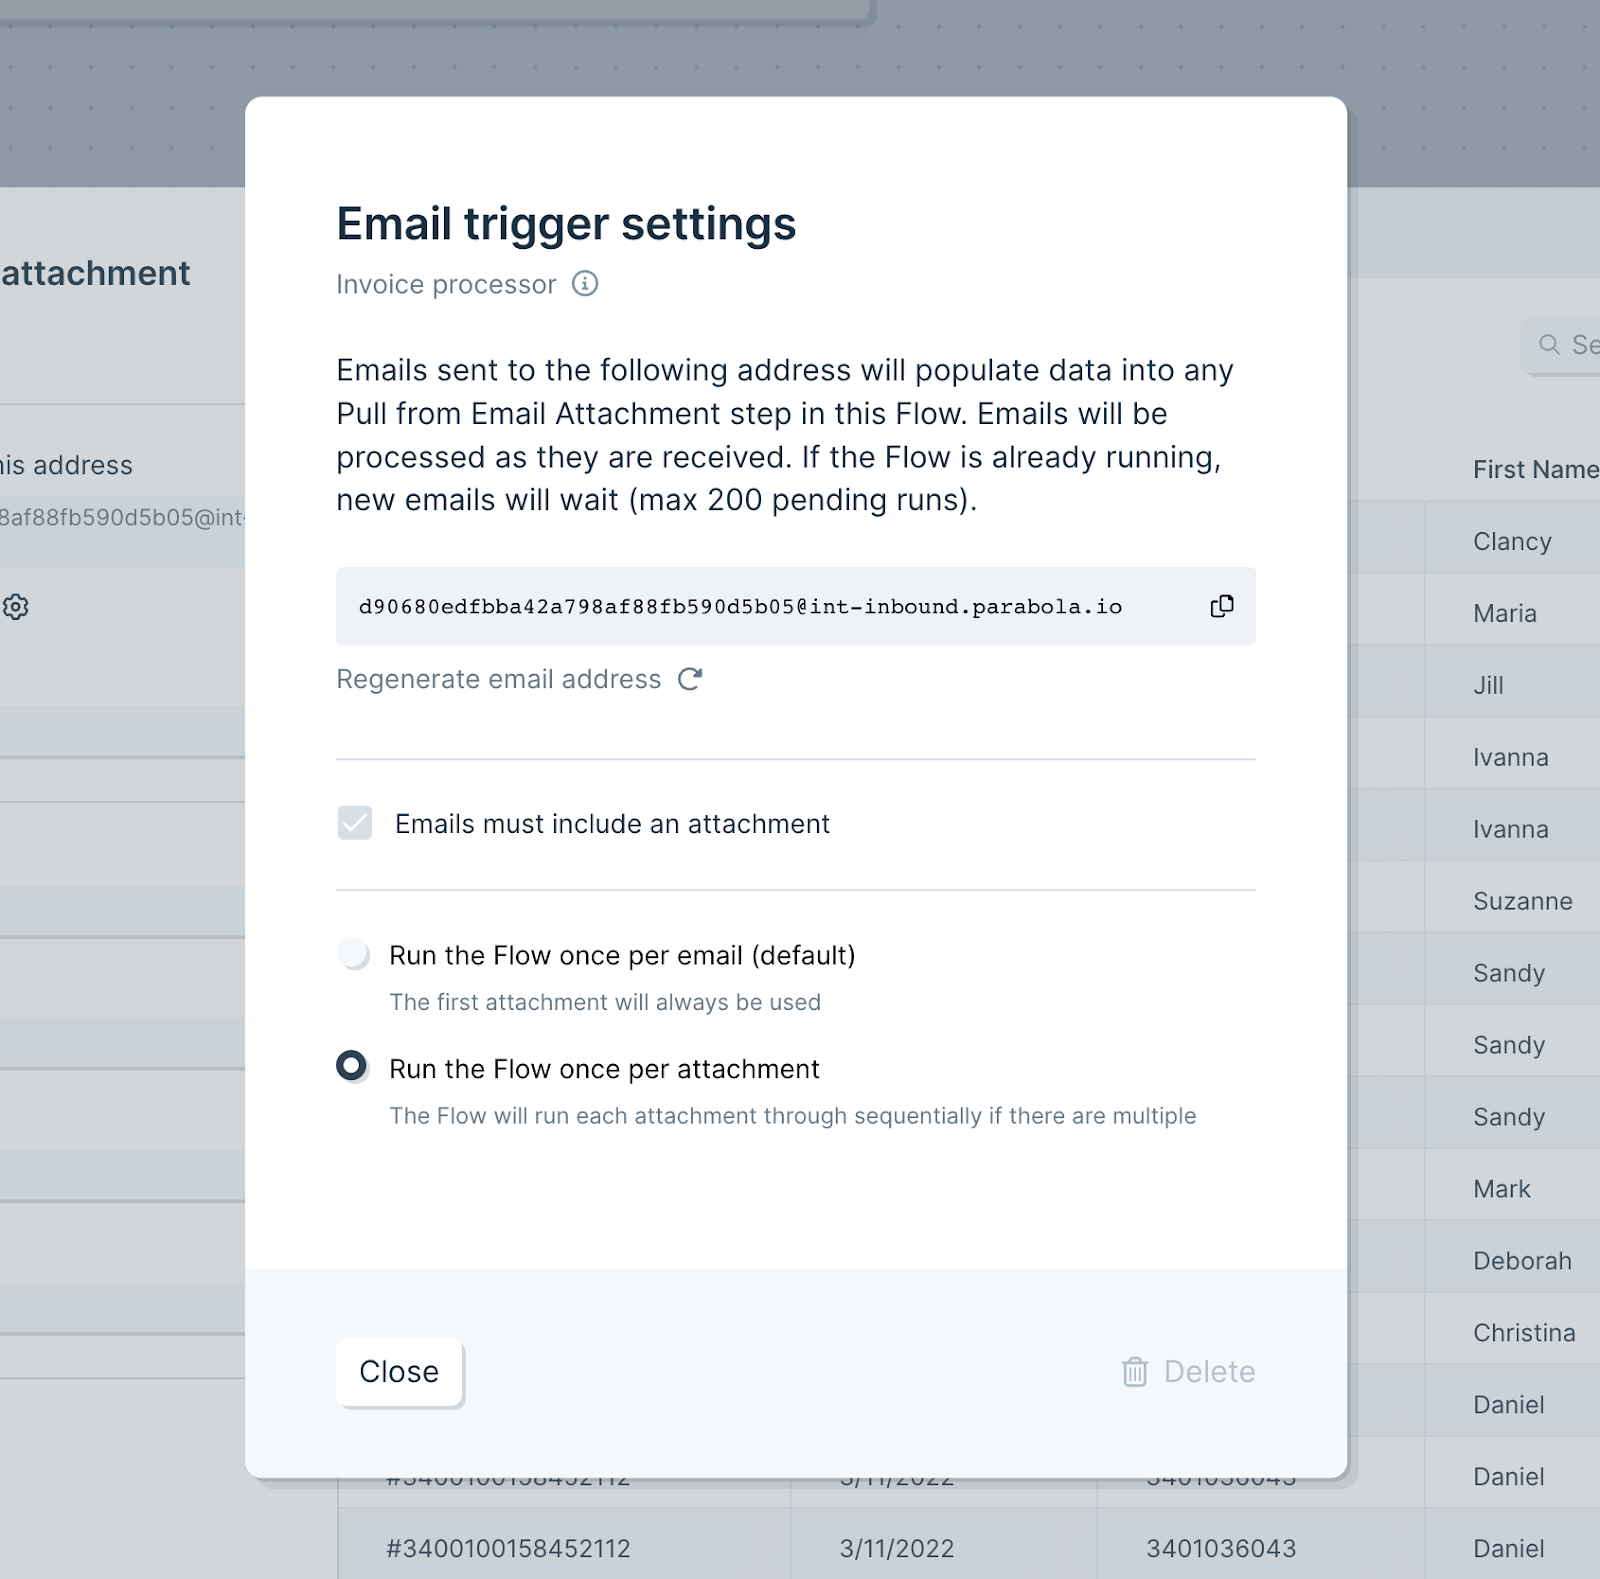
Pull from the email body
Beyond attachments, the step can pull metadata about the email. Default fields:- Subject
- Body (plain text)
- CC
- From
- Attached file name
- Body (HTML)
- Body (all URLs)
- Attached file URL
Pick an Excel sheet by position
For Excel attachments, the position is option lets you select a sheet by its index in the workbook instead of its name. Useful when the right data always lives in the same position but the sheet name varies. The dropdown shows the sheet count from the most recent file. If a future file has fewer sheets than expected, the step errors.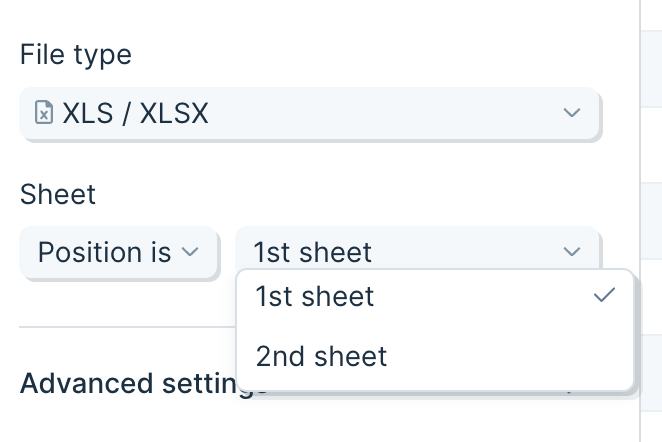
Tips
- The step runs every time a new file arrives, so you can trigger flows without a schedule or webhook.
- Multi-sheet Excel files default to sheet 1; pick any sheet by name or position.
- Maximum attachment size: 5 MB.
- Each run uses one file. Multiple Extract from email steps in the same flow all read from the same email.
- If a flow is mid-run when another email arrives, new emails queue (up to 1,000) and process in order.
- Emails without a valid attachment are rejected by default. Uncheck that setting in the email trigger management modal if you also want to handle attachment-less emails.
- For files linked from inside an email body (rather than attached), Extract from email can read the URL out, but it can’t download the file directly. Pass the URL into a Run another flow step, start the destination flow with Pull from file queue, and end it with Generate CSV file.
Extract from Excel files with AI
For messy Excel files where columns shift around or values aren’t laid out in a clean grid, Extract data with AI pulls tables and individual values reliably. The settings let you pull a table, individual values, or both:- Tables are columns and rows where the first row holds column names.
- Individual values are single fields that apply to the whole document — a date at the top, an invoice number, etc.
- Both columns and individual values accept extra context (descriptions, examples, instructions) to improve accuracy.

- Text — anything
- True / False — returns “True” or “False”; useful for checkmarks
- Number — strips trailing zeros
- Currency — converts the currency to a number
- Date — uses
2022-09-27T18:00:00.000format - Signature — converts signatures to text
- List of options — picks from a list you provide
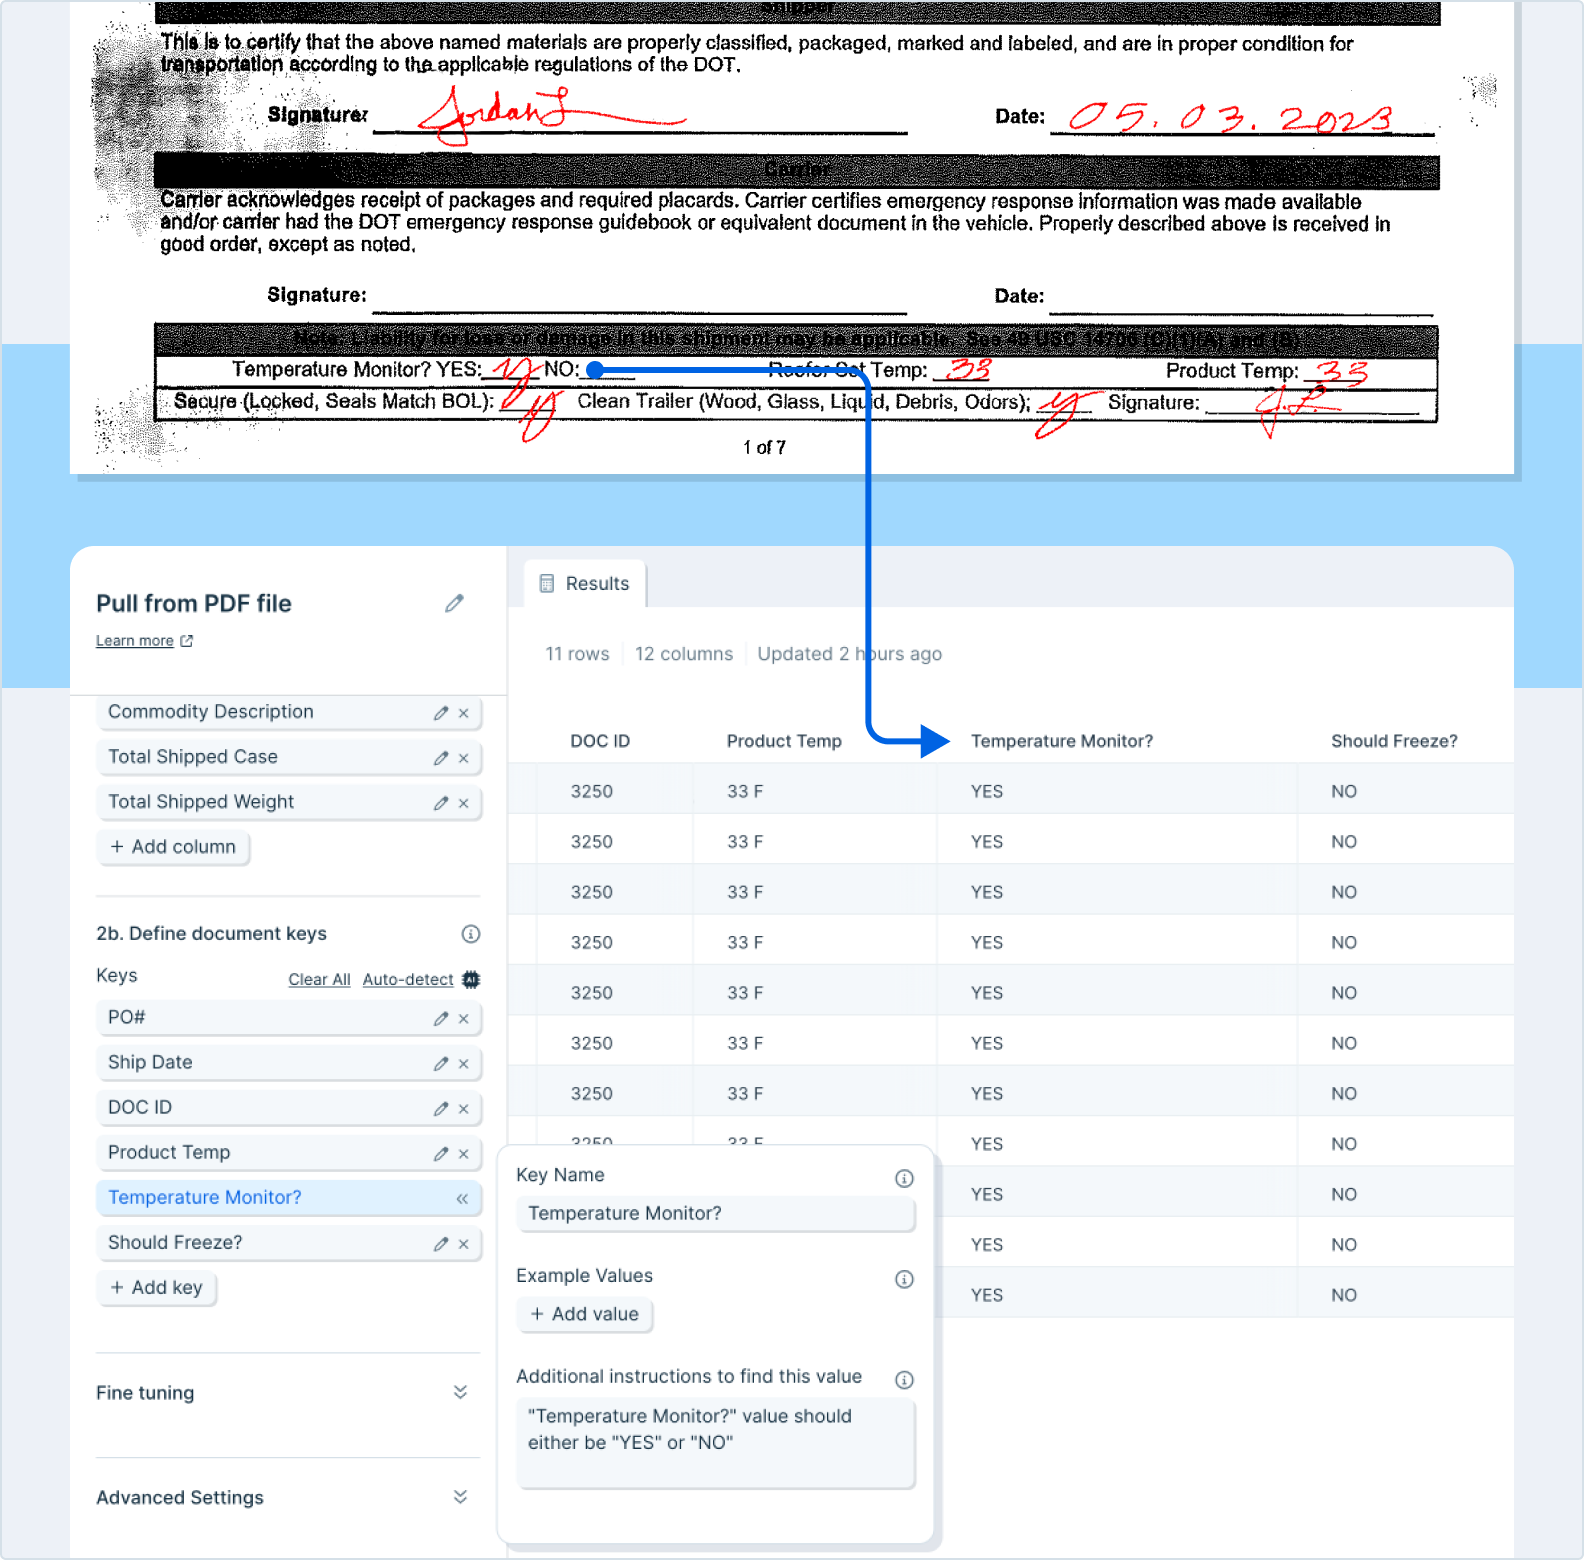
Extract from PDF files
- Columns repeat down the document — line items, rows in a table.
- Keys are document-level values that appear once and apply to the whole document — a total, an invoice date.
- The AI sometimes flips the two. If a value isn’t pulling correctly, try the other option.
- Both accept extra context to improve accuracy.
Pick a parsing method
Auto-detected table (default). Parabola scans the PDF and labels likely tables and columns. Best for documents with clear, headered tables. Quickest setup; works best when the file has headers. You can add columns or keys manually after. Custom table. Define the structure by hand if auto-detect didn’t catch it. Name the table and add columns with + Add Column. Best for multi-table documents and tables that span multiple pages — more setup, more control. Extract all data (OCR-first mode). Returns all text from the PDF using OCR. Use only when the first two methods fall short. Return formats:- All data — every value, one per row
- Table data — tables split by page, each with a table ID
- Key-value pairs — labeled items like
SKU: 12345 - Raw text — one cell per page, useful for follow-up AI parsing
Extract values
For document-level fields like invoice number or PO date, add them as keys with + Add key. Each key becomes its own column with the value repeated across every row.- Names can be descriptive — they don’t have to match the PDF text exactly.
- Examples are the highest-leverage way to improve accuracy.
- “Additional instructions to find this value” is optional but helpful for tricky cases. Example: to split an order ID like
ABC:123into two columns, instruct the parser to “Take the order ID and extract all of the characters before the ’:’ into a new column.”
Fine tuning
Add overall context and instructions in the fine-tuning text box. Specific examples and clear scenarios beat vague guidance. The chat panel on the left can help you draft the prompt.Advanced settings
Text parsing approach. Default is “Auto.” Other options:- OCR — slower, better for handwriting
- Markdown — generally faster, often works better on nested-column documents
- Keep, Remove, or Autodetect — Autodetect lets the parser pick pages
- The first / the last / these — set a number for “first” or “last,” or list specific pages (e.g.,
1, 10, 16)
Notes
- Fewer pages parsed = faster runs.
- Multiple tables in one file usually need multiple PDF steps — one per table.
- File limit: under 500 MB and 30 pages.
- PDFs cannot be password protected.
- Always audit AI-parsed results before relying on them.
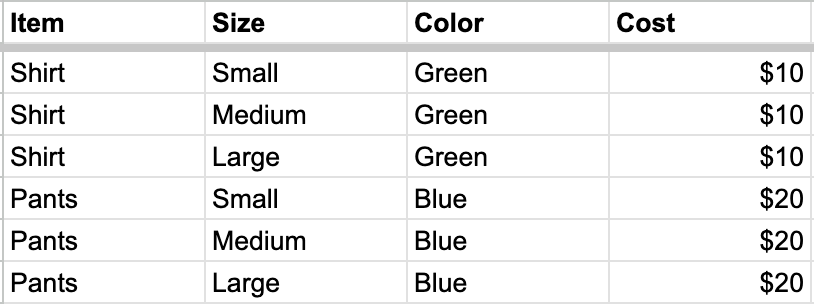
Child columns
Mark a column as a “Child column” when its values don’t repeat with the parent column — for example, sizes within a product: Before: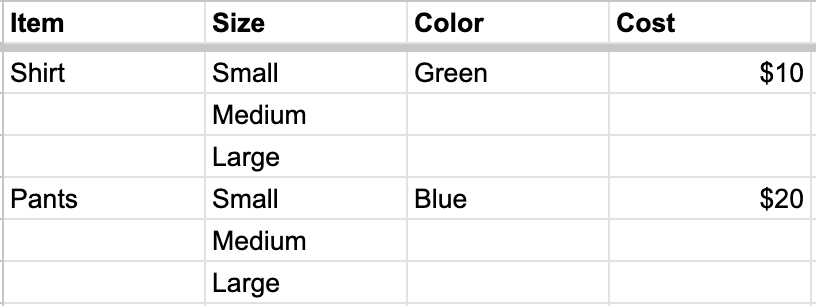
PDF attachments via email
The same PDF parsing options apply when you receive PDFs as email attachments. Configure them on the Extract from email step the same way as on the standalone Extract from PDF step.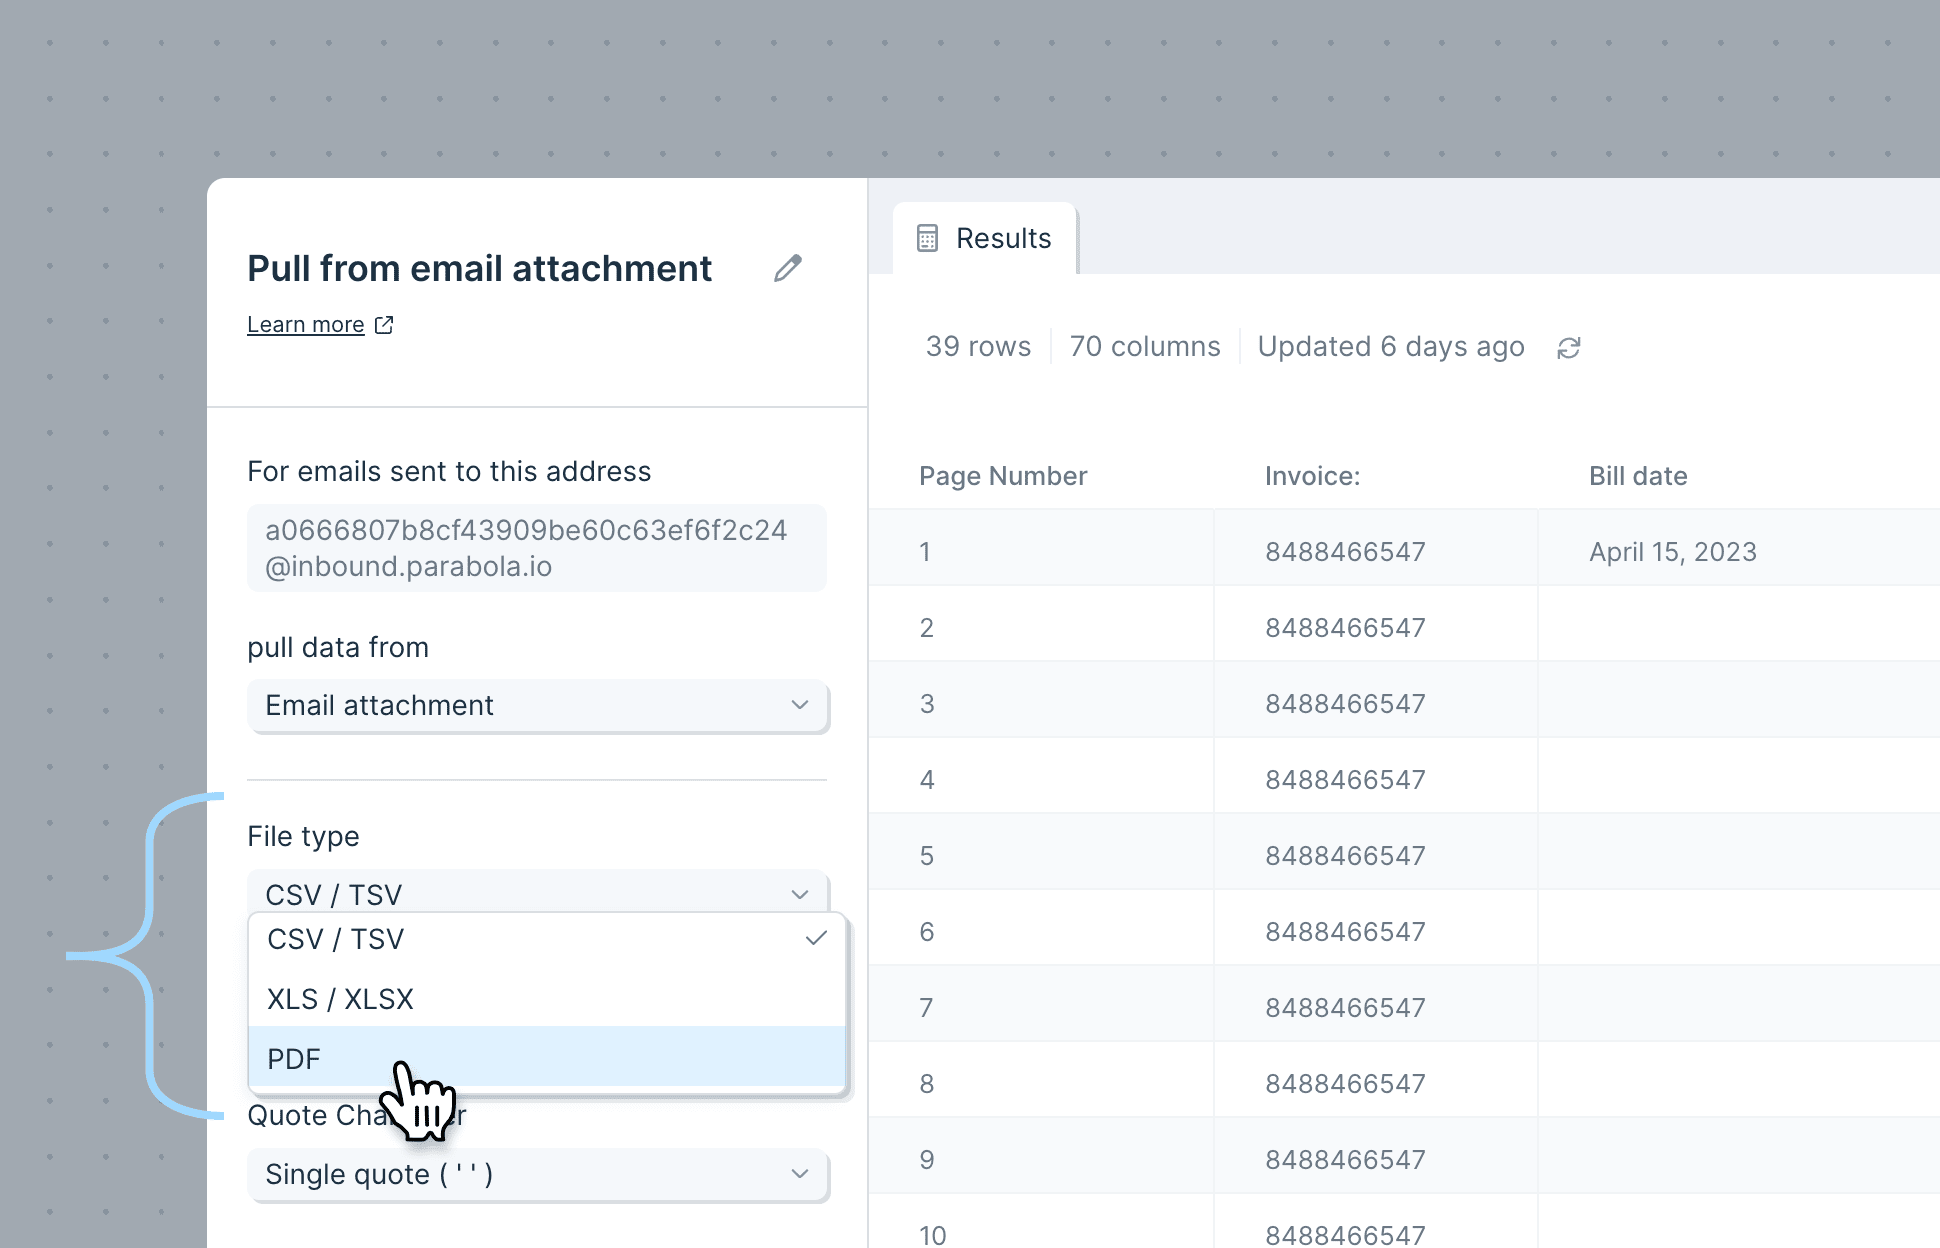
Related steps
- Extract from PDF — upload a single PDF and parse it without email forwarding
- Pull from file queue — batch-process many files via URL
- Email a file attachment — send the parsed result back out as a file
- Send emails by row — email per-row results after extraction
- Run another Parabola flow — chain a parsing flow off another flow
- Extract with AI — pull additional fields from already-parsed text