Unpivot columns
The Unpivot columns step will take every column that you choose and line them up into a single column called "Value". A new column will be made next to it called "Type" that holds the value of the column header that data points used to be in.
Input/output
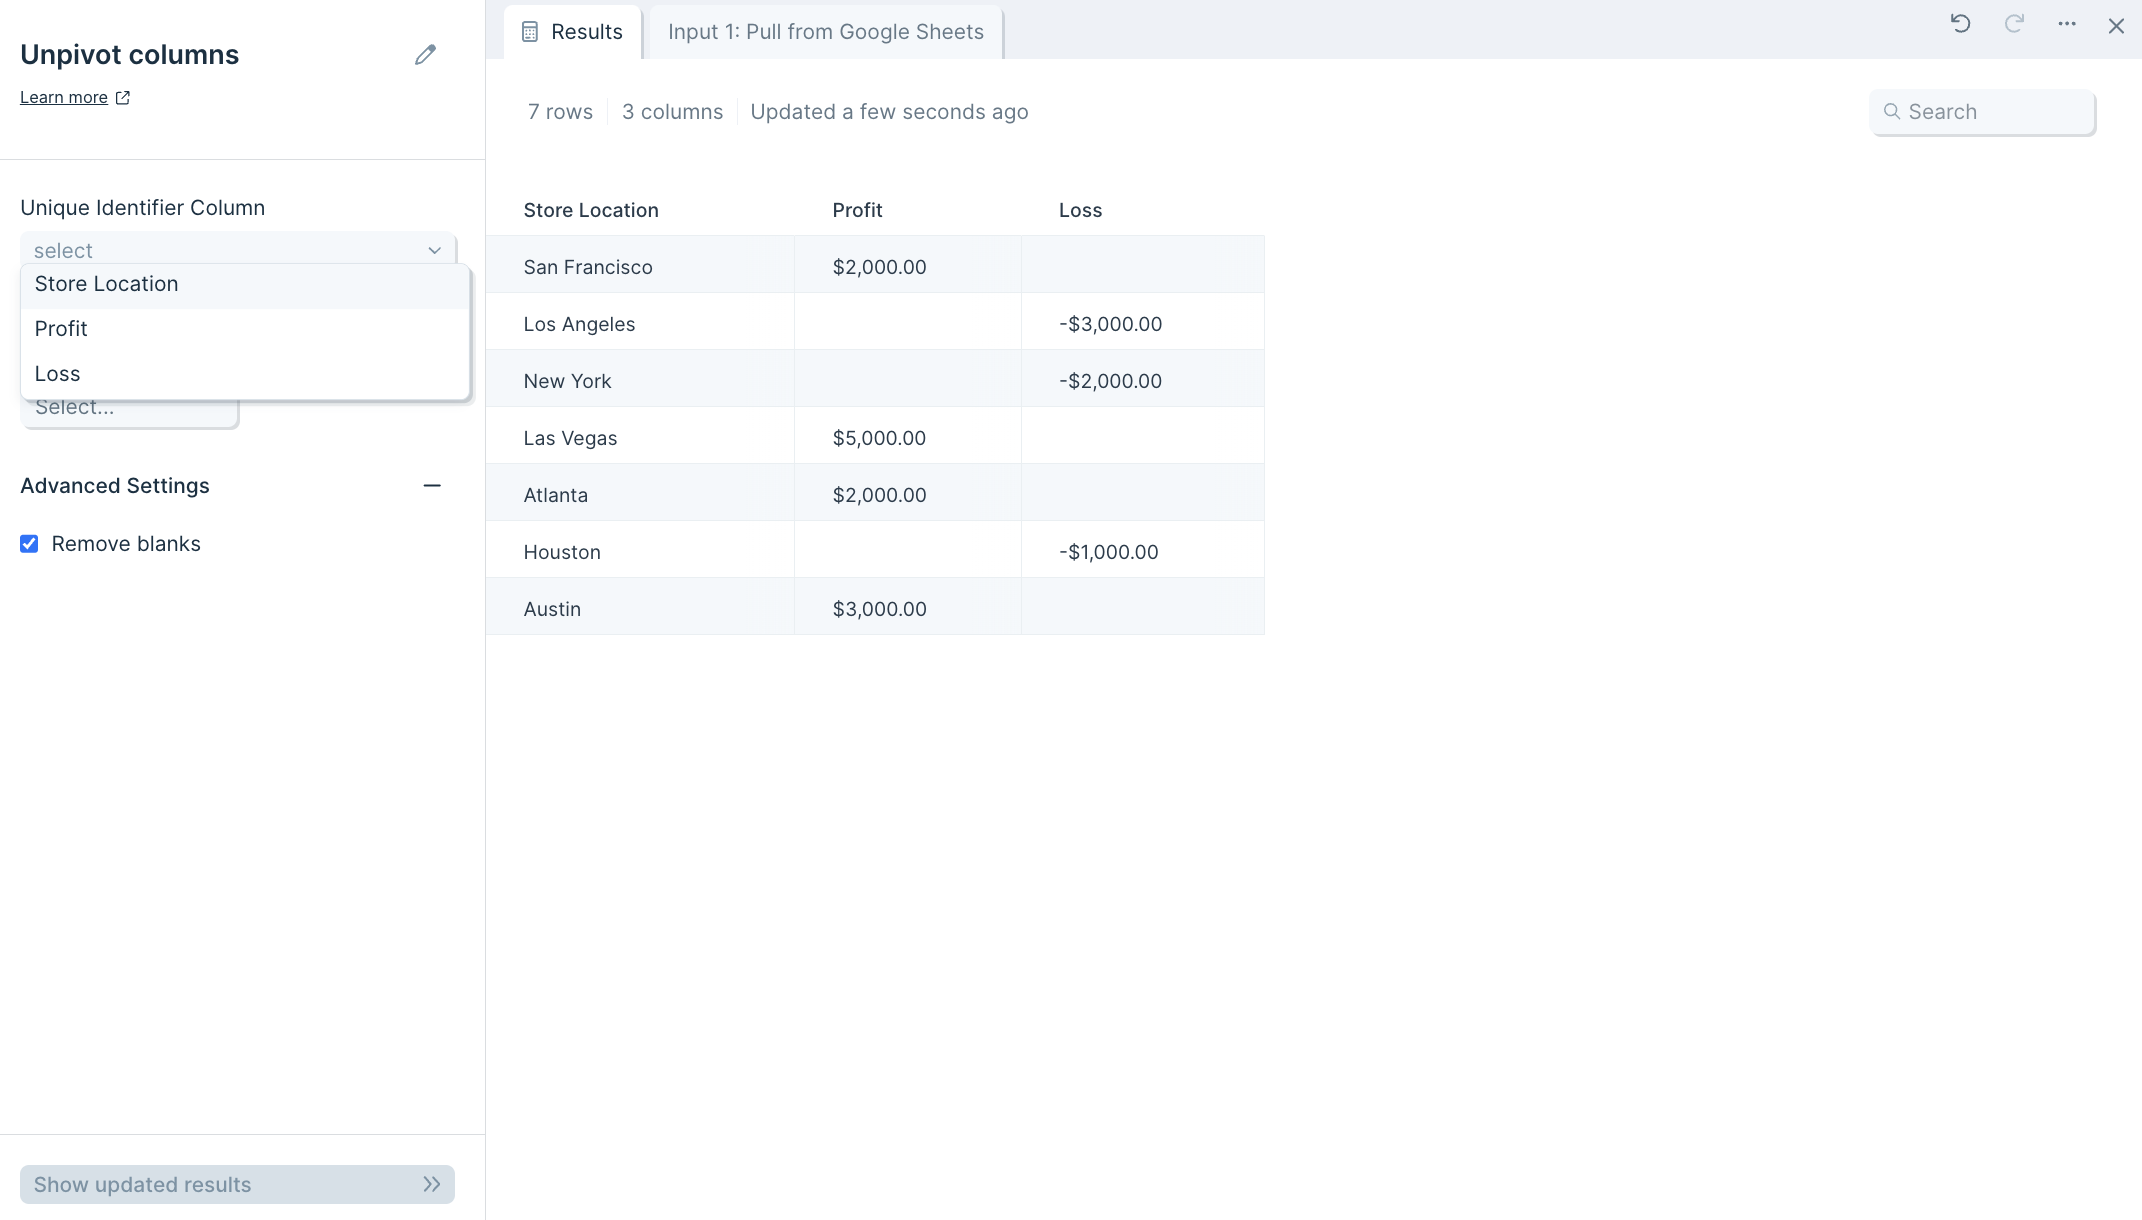
The input data we'll use for this step is a table of three columns: "Store Location", "Profit", and "Loss".

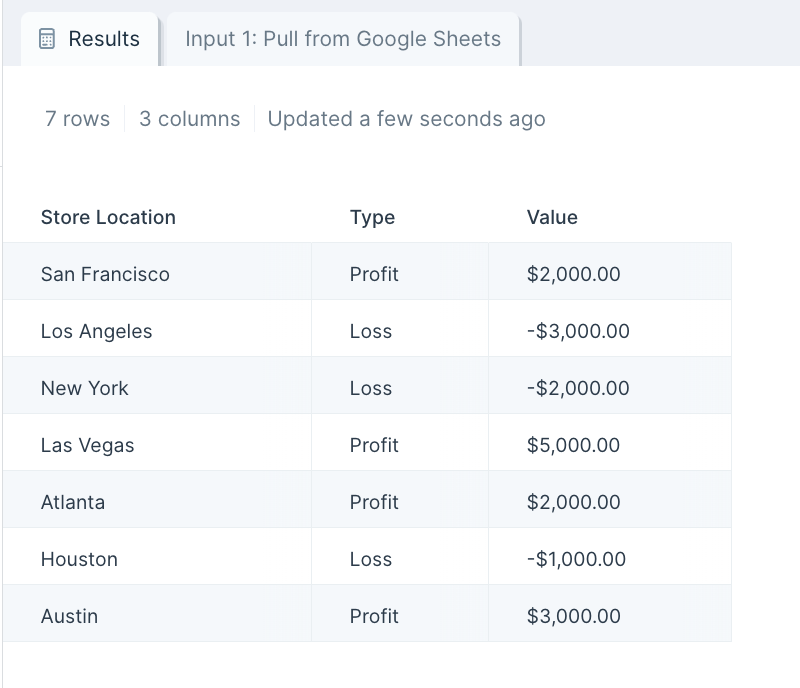
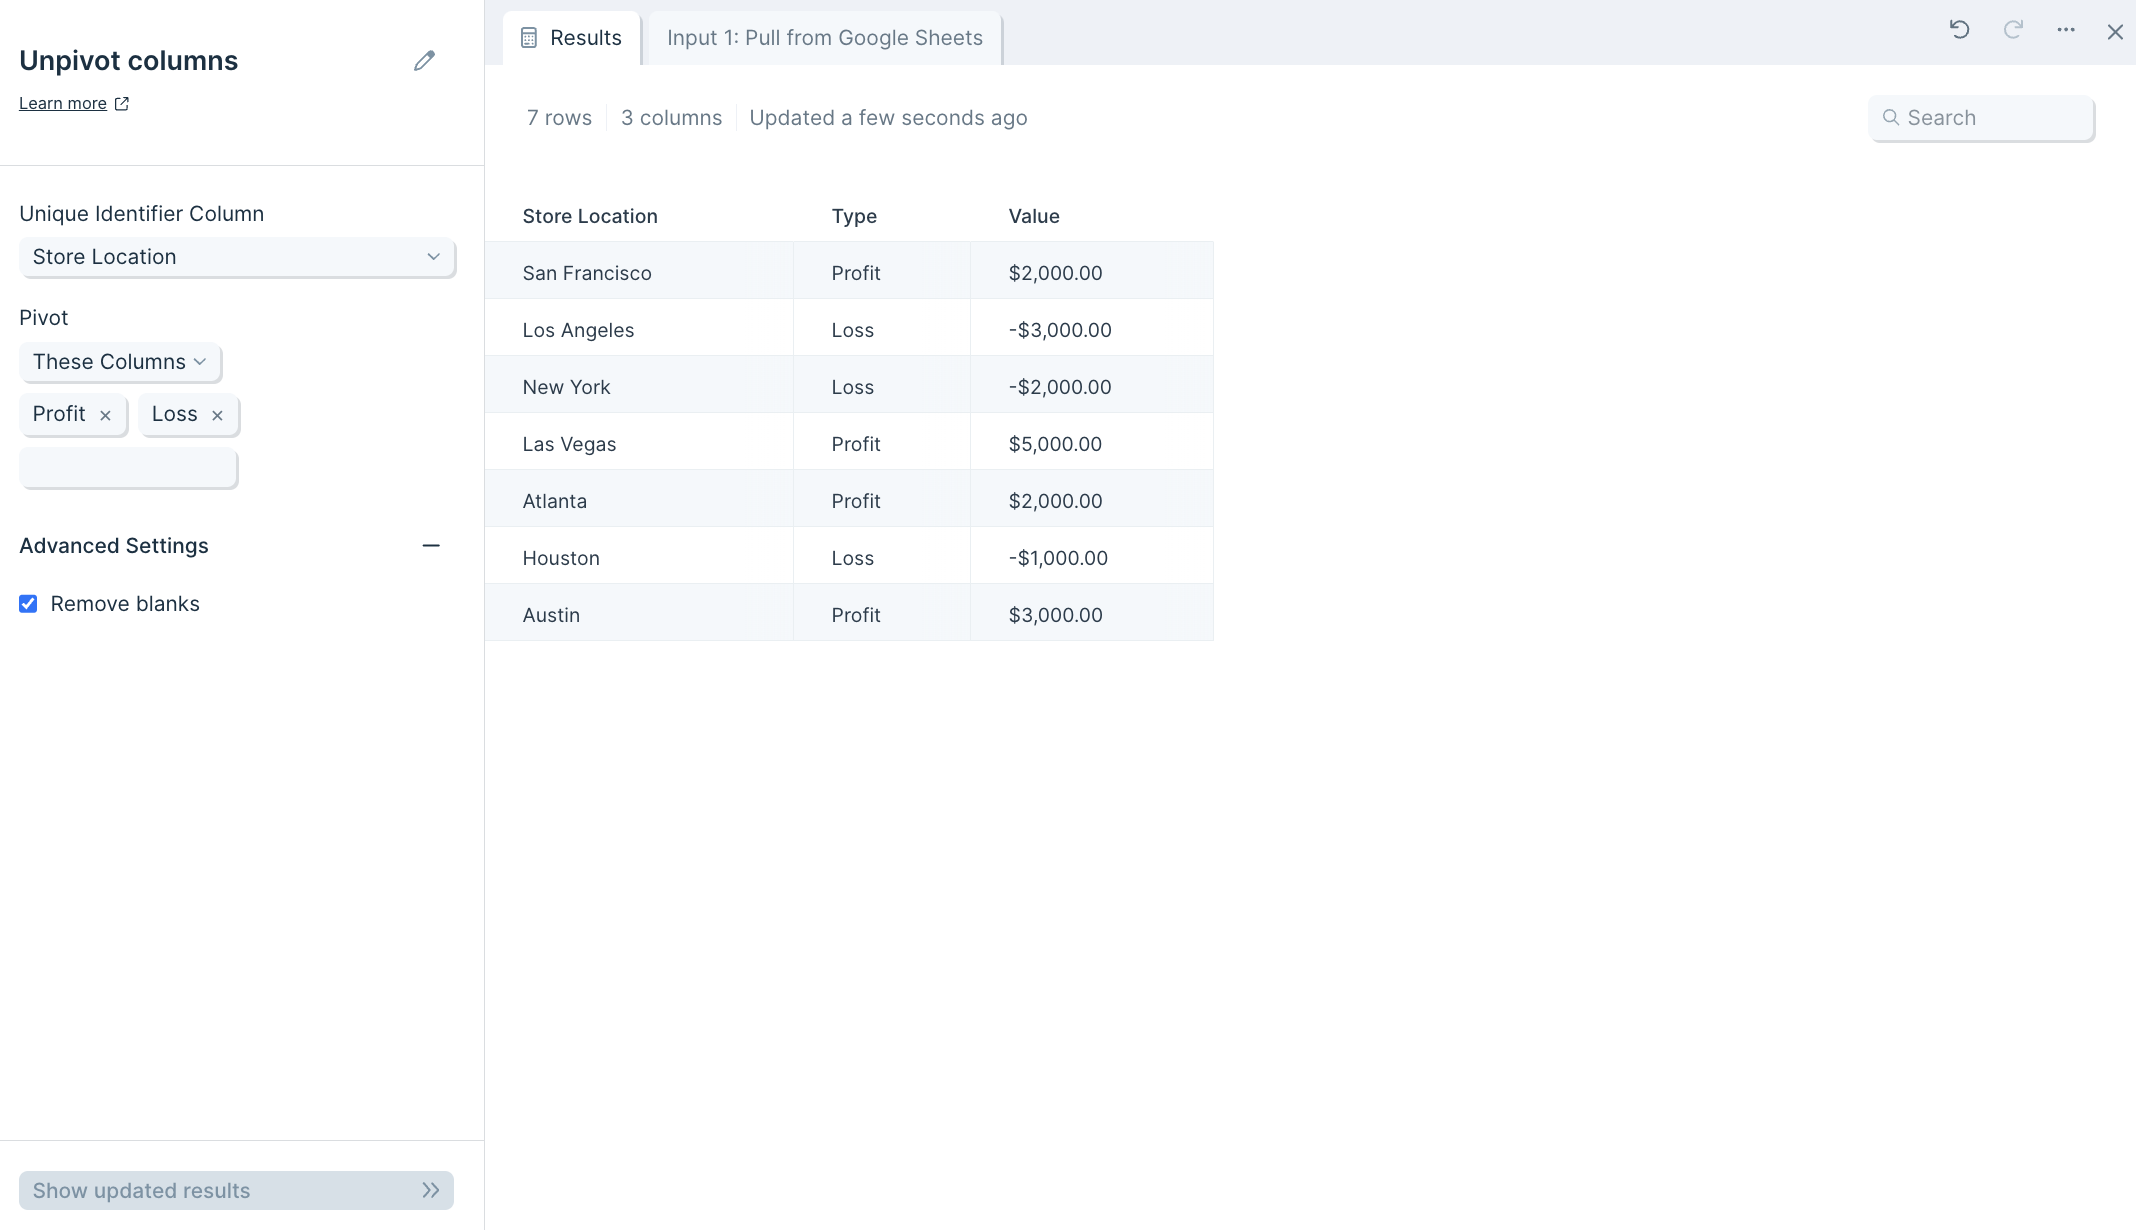
Below is a screenshot of our output data after using this Unpivot columns step. It has taken our columns "Profit" and "Loss" and merged them into a single column called "Value". The "Type" column holds the value of the column header these values came from.
Custom settings
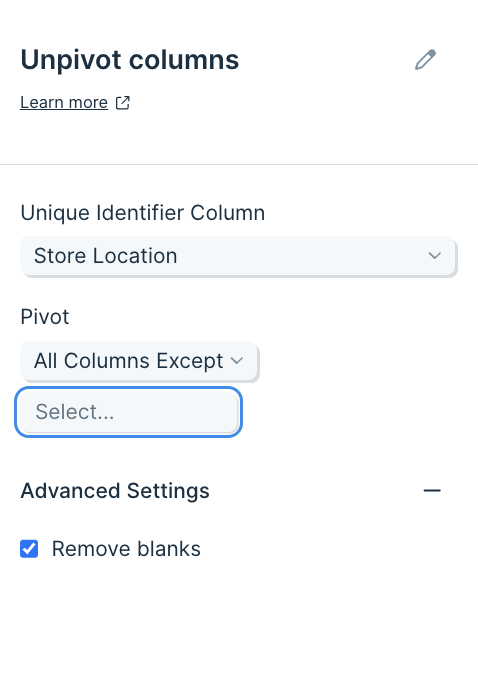
After you connect your data into this step, select the dropdown menu of Unique Identifier Column to choose the column (type of data) you'd like to use as an identifier for this data set. This should be the column you don't want pivoted, and will be used as a key if the data needs to be pivoted back into shape. This could be a customer ID, store name, store location, customer full name, or more.
Then, select the remaining column headers (data categories) that you'd like to merge the values of those columns into a single column.
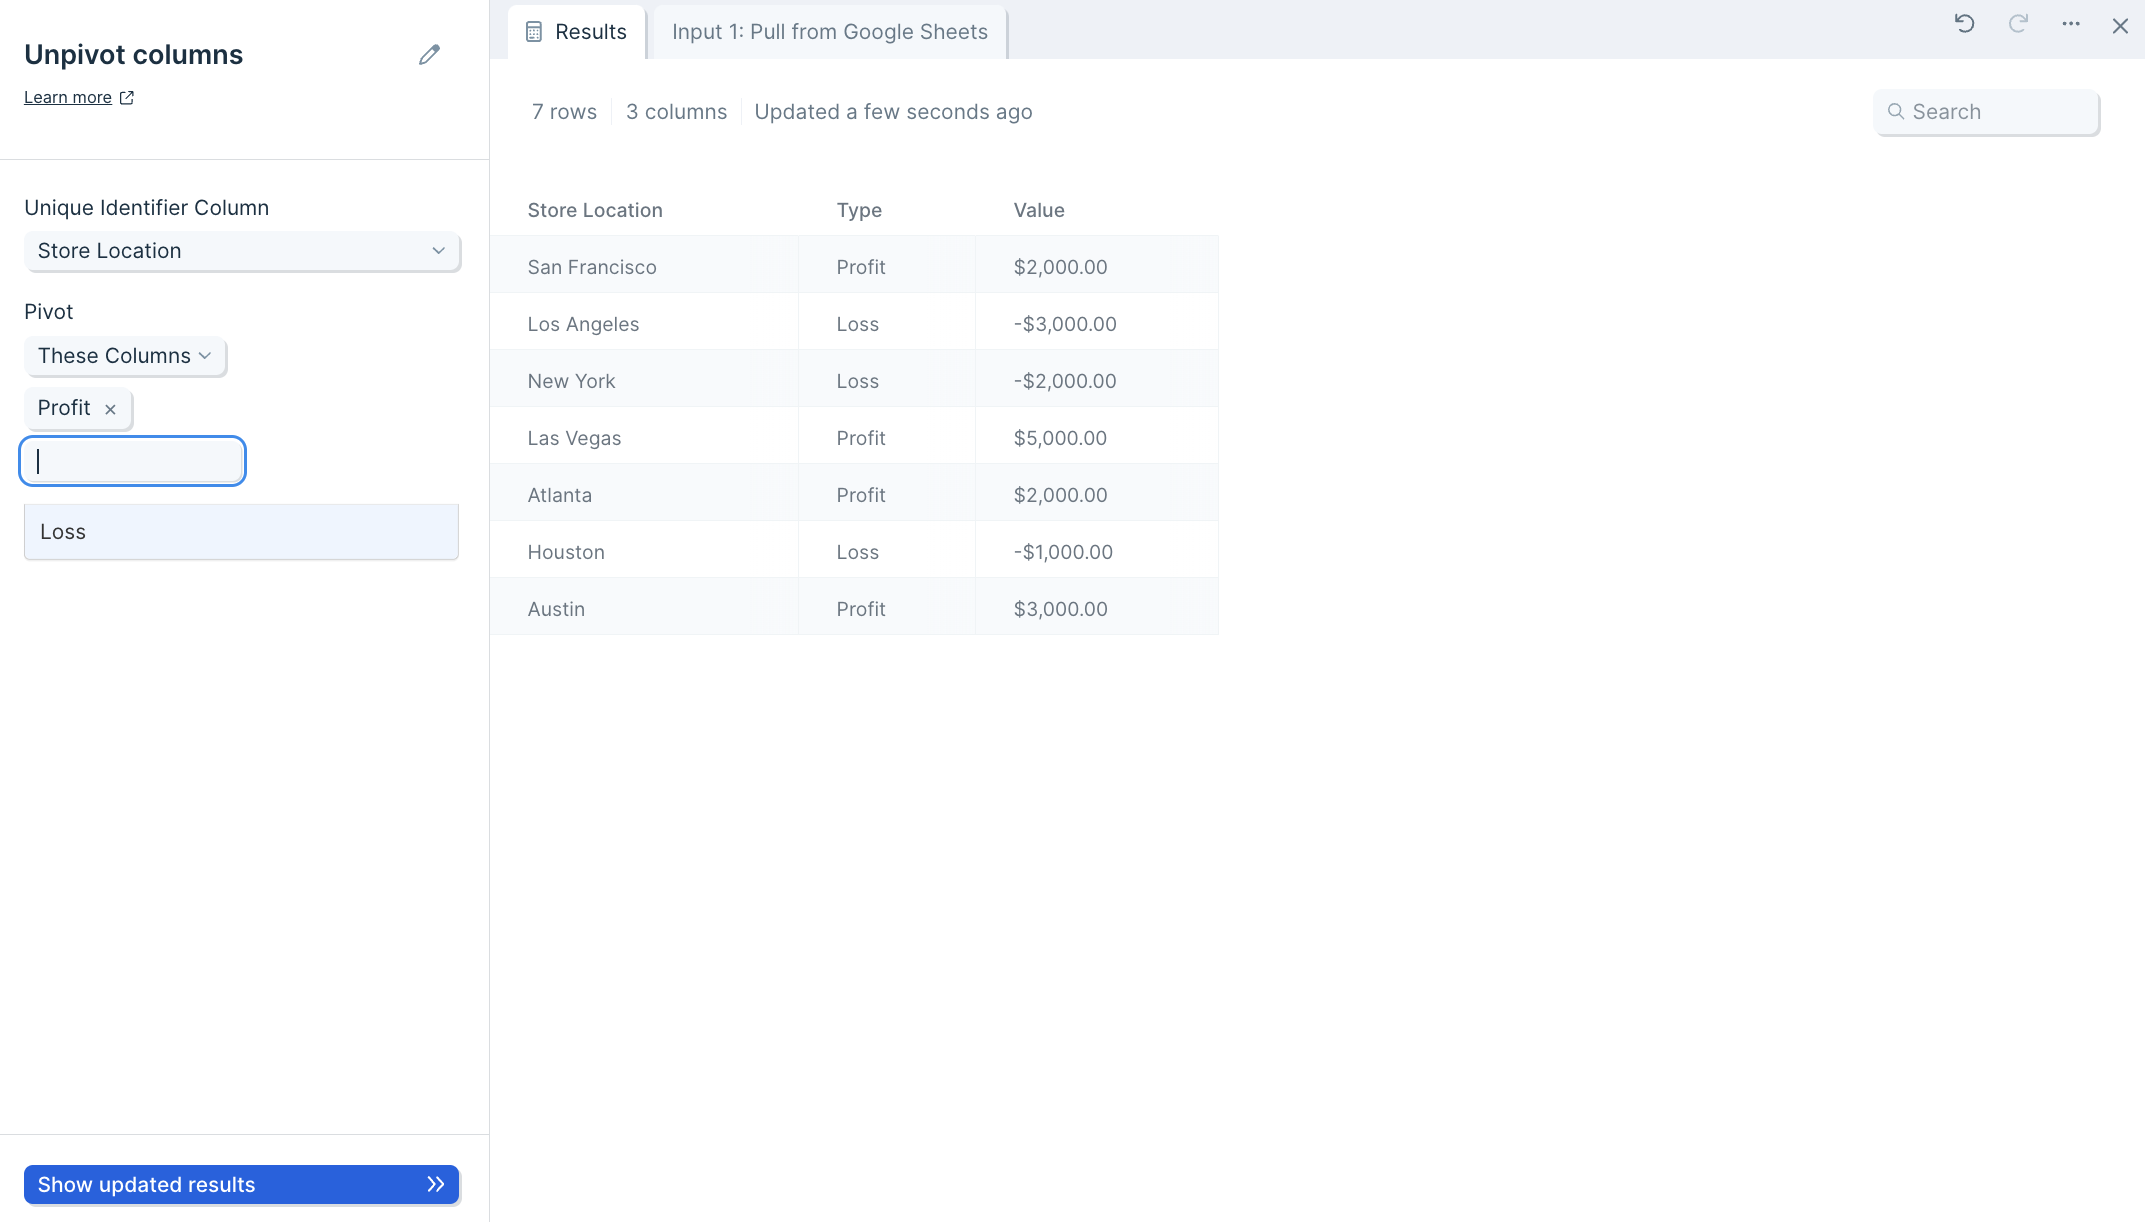
Finish by clicking Show Updated Results to save the step's settings.
Helpful tips
- Optionally, in the Pivot These Columns section, you can choose to select the columns to exclude from the unpivot operation.