Input/output
We’ll use the below input table for this step to process. It contains four columns including one labeled ‘Subsidiary’ that contains several blank cells.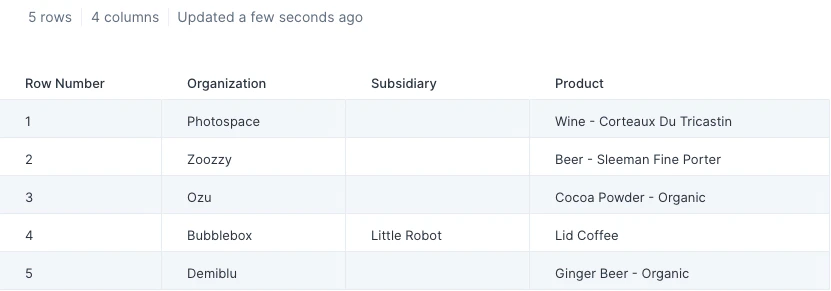

Custom settings
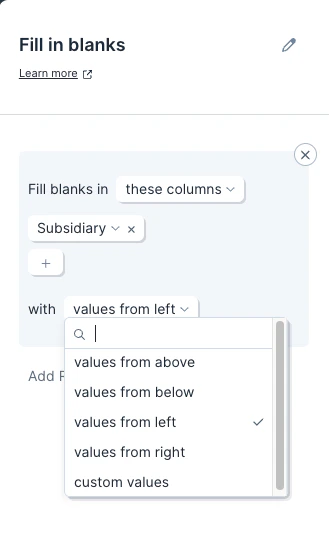
Once you connect data to the Fill in blanks step, you will first need to select which column we should fill in blanks for. By default, this step will fill in blanks with values from above. To change this, click on ‘values from above’ and select another option from the available dropdown:- values from above
- values from below
- values from left
- values from right
- custom values