What is NetSuite?
NetSuite is a cloud-based enterprise resource planning (ERP) software suite that offers a range of business management tools, including accounting, inventory management, customer relationship management (CRM), and more. It is a popular choice for businesses of all sizes, particularly those that operate across multiple locations or have complex financial and operational needs.Pull from NetSuite
The Pull from NetSuite integration enables users to connect to any NetSuite account and pull in saved search results that have been built in the NetSuite UI. Multiple saved searches, across varying search types, can be configured in a single flow. The following document outlines the configuration requirements in NetSuite for creating the integration credentials, defining relevant role permissions, and running the integration in Parabola.NetSuite configuration process
The following configuration steps are required in NetSuite prior to leveraging the Parabola integration:- Create or select a
web services onlyrole that can be used by Parabola - Create or select a user that will be used for the integration in NetSuite. Ensure the role from the step above is applied to this user record
- Create a new integration in Netsuite
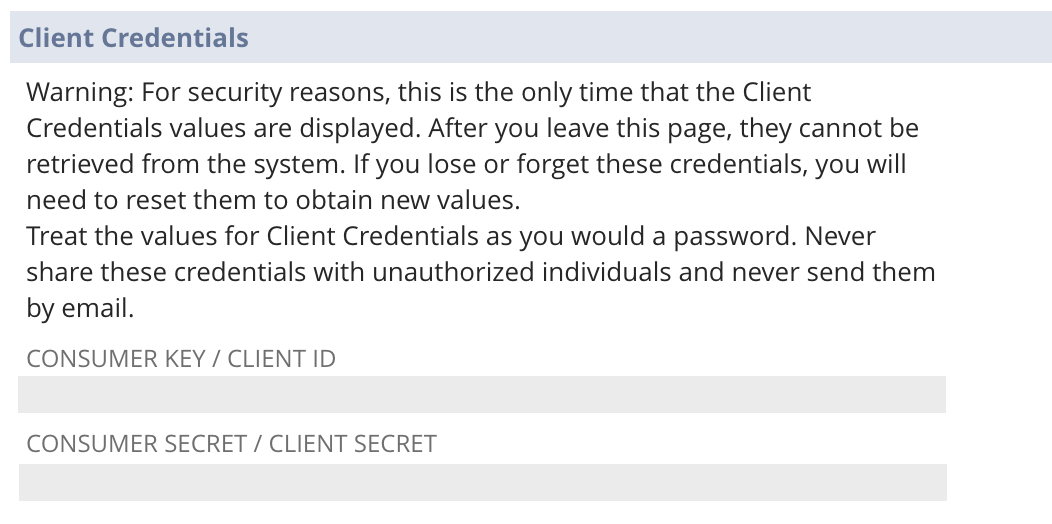
- This will result in the creation of your
consumer keyandconsumer secret - Create a new set of access tokens that reference the user, role, and integration specified above
- This will result in the creation of your
token idandtoken secret
account id, which is obtained from your NetSuite account’s url. Ex: https://ACCOUNTID.app.netsuite.com/
The following document will review how to create each of the items above.
Creating a NetSuite role
The permissions specified on the role applied to your integration will determine which saved searches, transactions, lists, and results you’ll be able to access in Parabola.It is important for you to confirm that the role you plan to use has access to all of the relevant objects as required.
The following permissions are recommended, in addition to any specific transaction/list/report specific you may require.
In addition to the below permissions, we also recommend adding the permissions listed in this document.
Transactions
- Any specific transaction types required: sales orders, purchase orders, transfer orders, etc.
Find transaction
Reports
- Any specific report types required
Lists
- Any specific lists required: items, locations, companies, customers, etc.
Perform search,persist search, andpublish search
Setup
- Log in using Access Tokens
- SOAP Web Services
- Any specific custom record objects required
web services only role is selected.
Creating a NetSuite integration
Video walk-though of the setup process:Specify an integration name, ensure the status is set to
active, and select the token-based authentication option.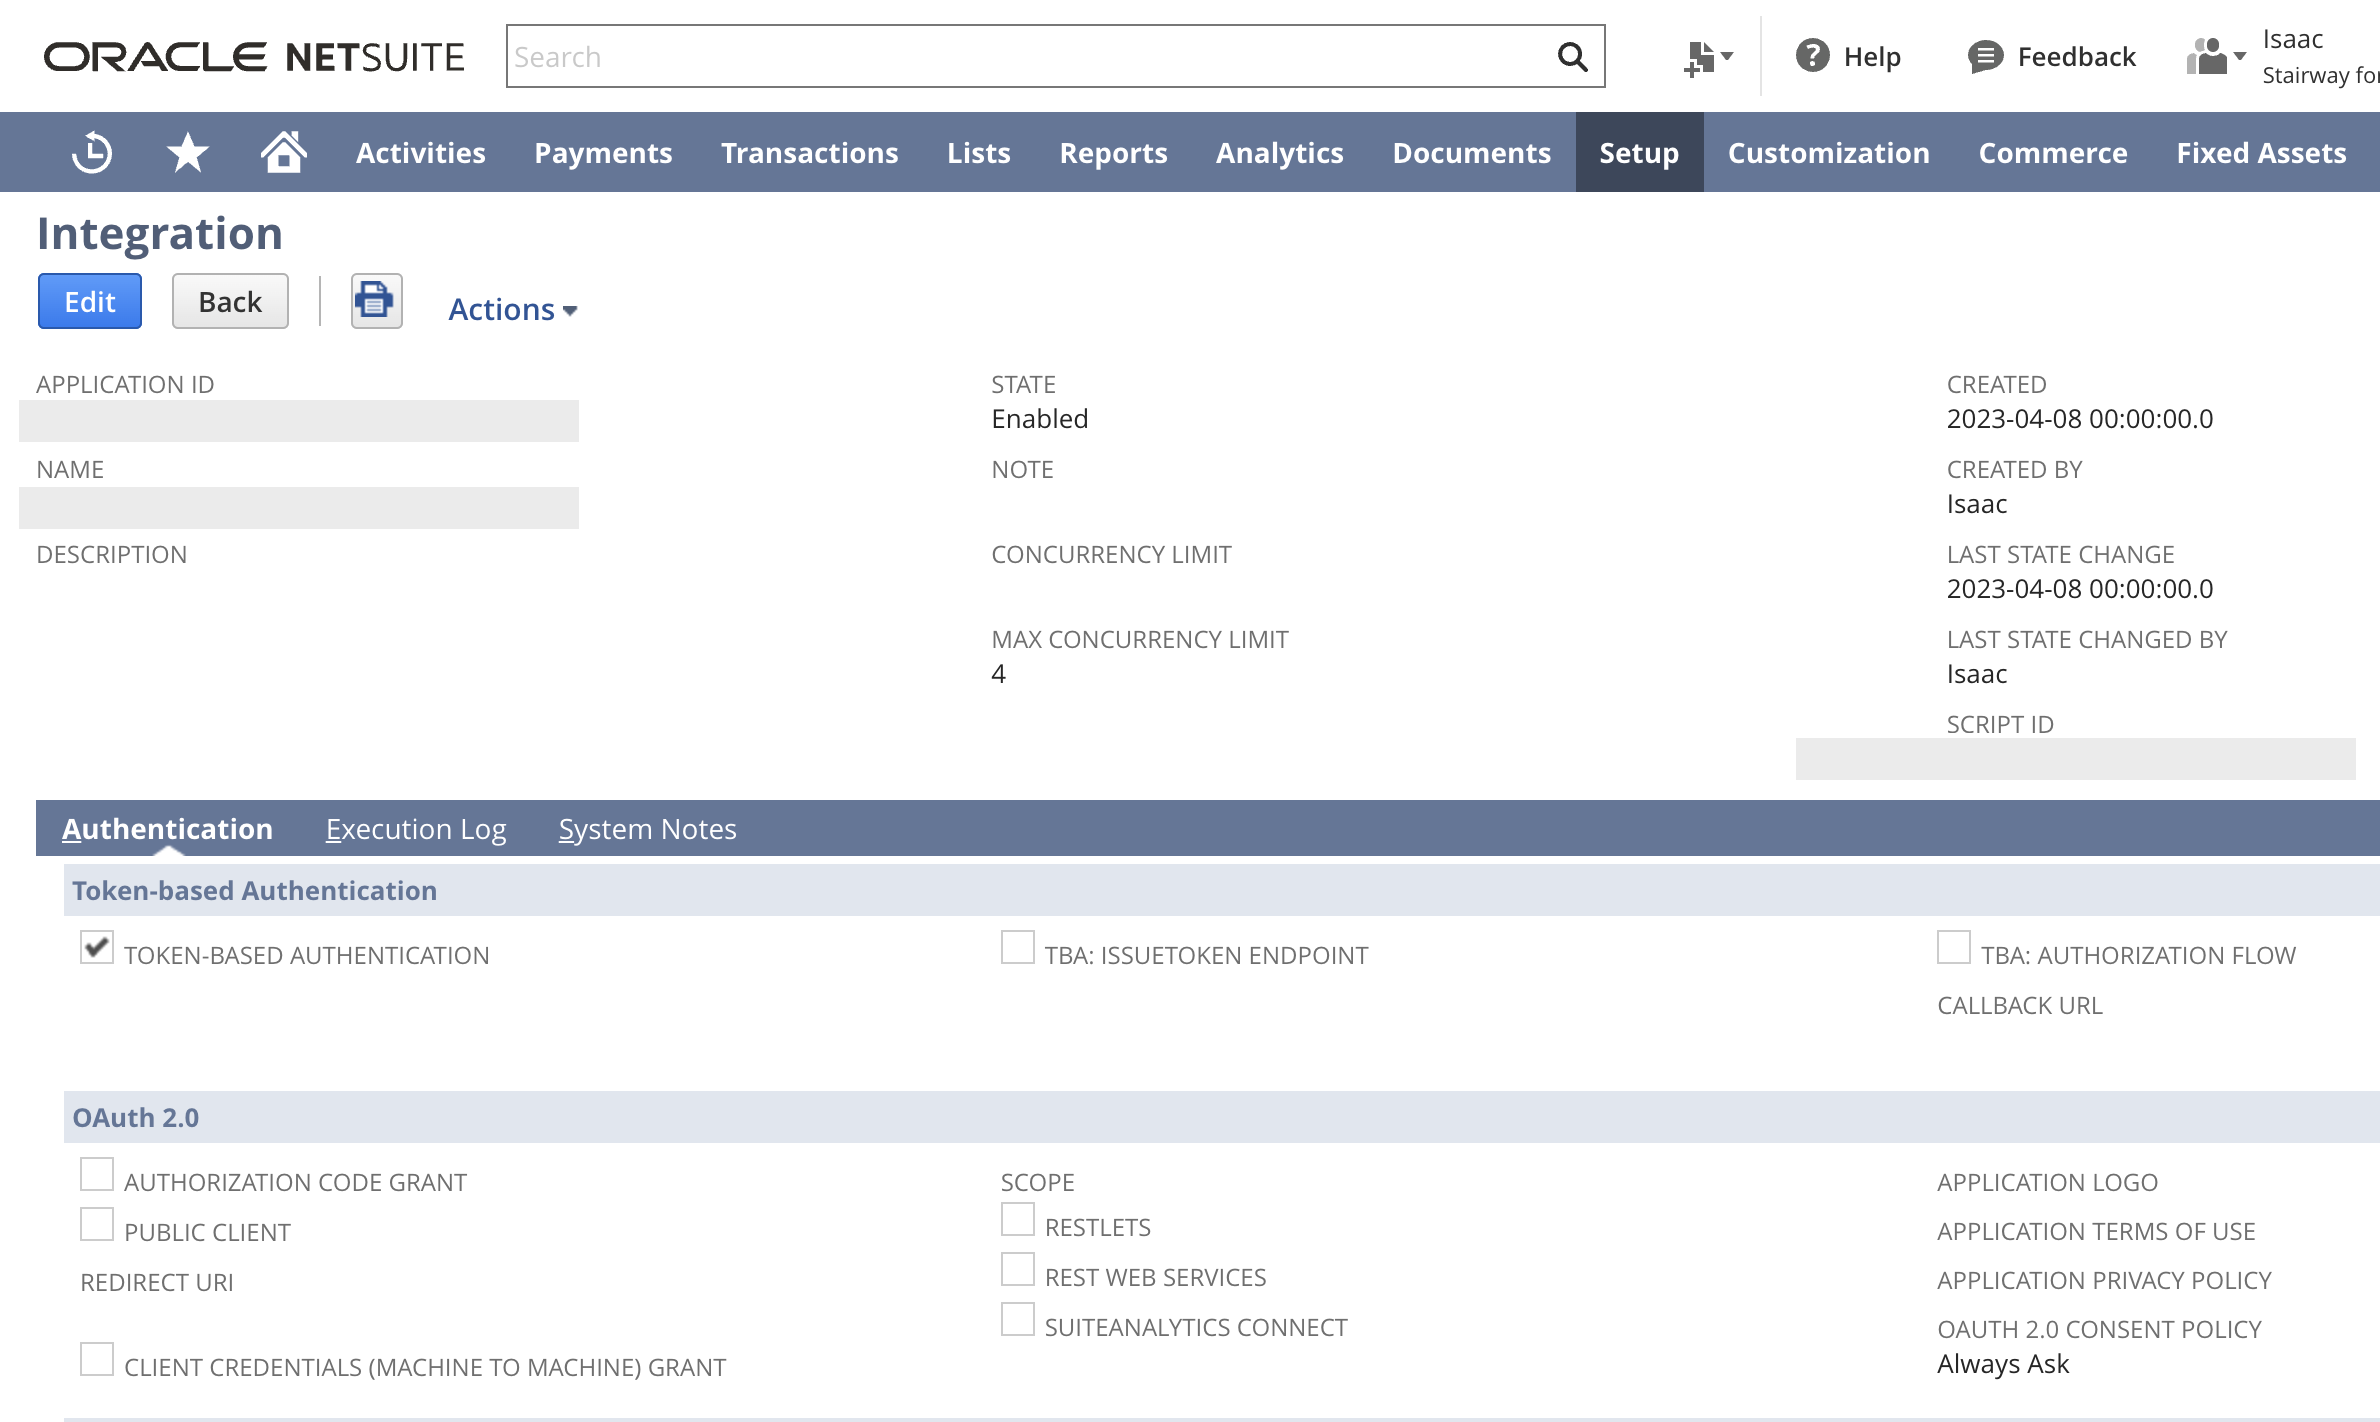
consumer key and consumer secret will be generated upon saving the record. Record these items, as they will disappear once you leave this page.
Creating a new access token
Once the role, user, and integration have been created, you’ll need to generate the tokens which are required for authentication in Parabola. Follow the path below in the NetSuite UI to create a new token record.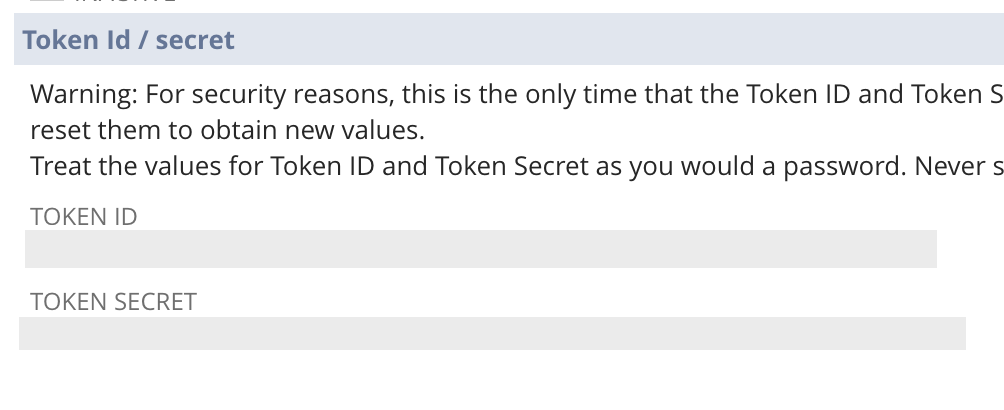
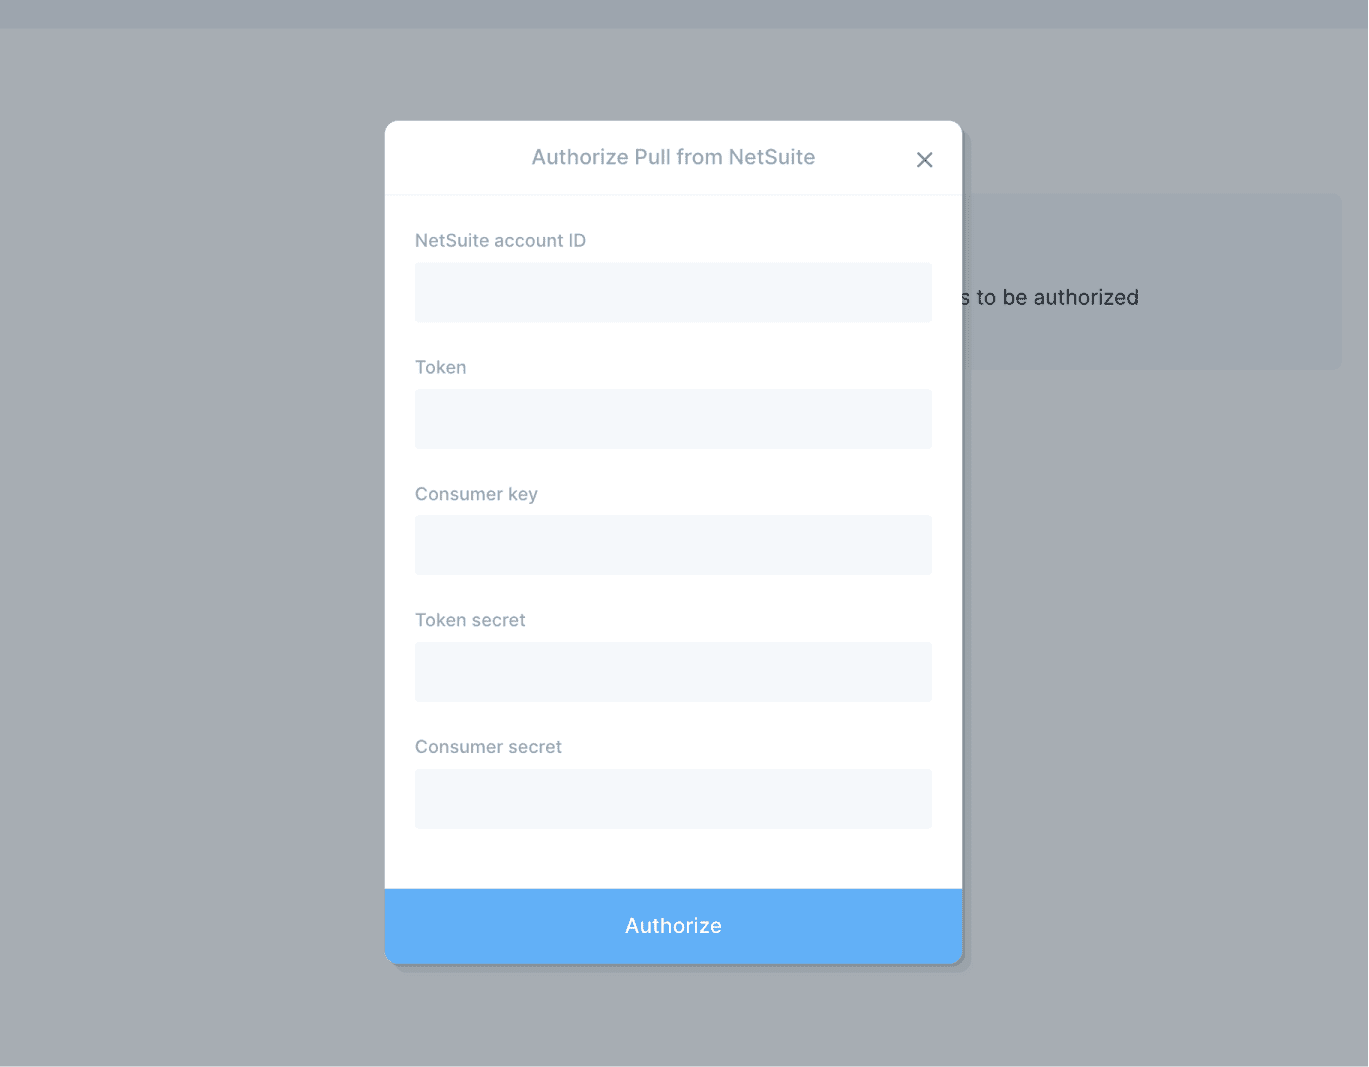
Configure your settings in Parabola
Gather the credentials created from each step earlier in the process and
navigate to the Pull from NetSuite step in Parabola.
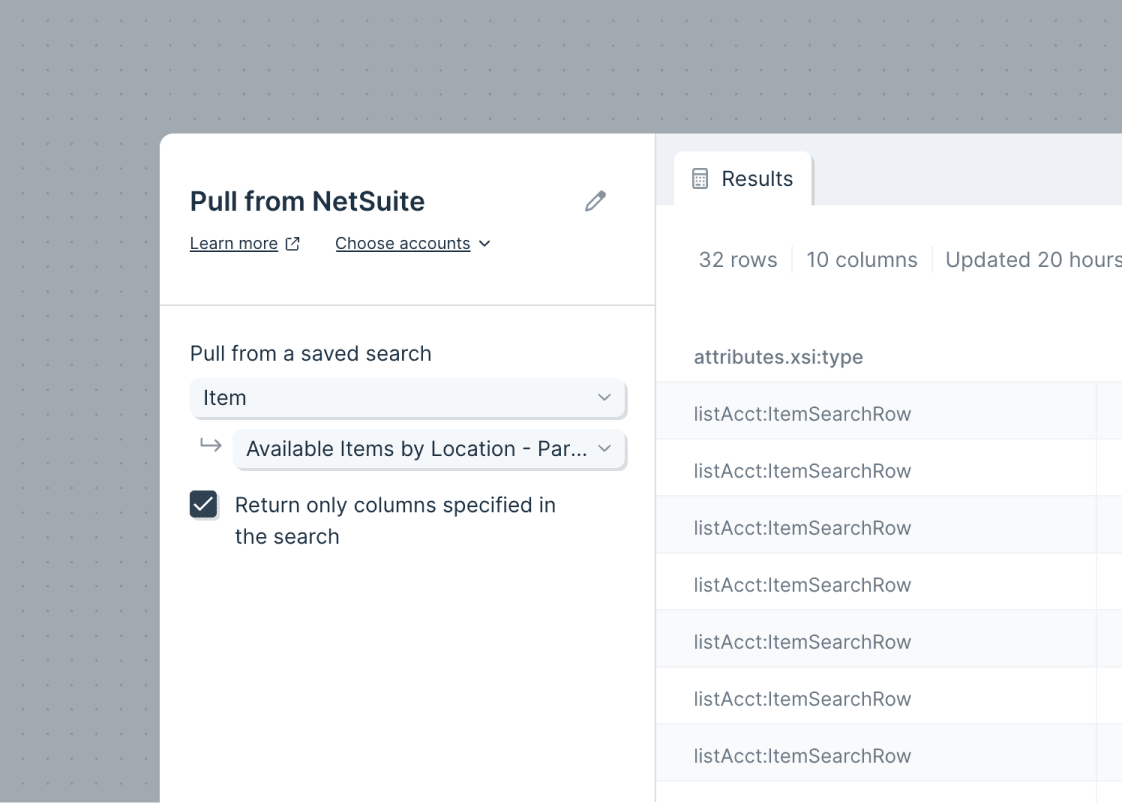
Return only columns specified in the search checkbox enables a user to determine if all available columns, or only the columns included in the original search, should be returned. This setting is helpful if you’d like to return additional data elements for filtered records without having to update your search in NetSuite.
Helpful Tips
- The Pull from NetSuite step integrates directly with the saved search function. Based on permissions, users have the ability to access all saved searches from the NetSuite UI within Parabola.
- If no saved search options are returned for a specific transaction type, please validate your user and role have access to the specific object you’re attempting to access.
- Users will need permissions within NetSuite to create new integrations, manage access tokens, edit roles, etc. in order to generate the credentials required for this integration
- Formula fields within saved searches will not be returned
- Saved searches which include summary results are not supported
- Ensure the user/role configured for the integration has sufficient permissions to access all necessary saved searches and results
Usage notes
- Users will need permissions within NetSuite to create new integrations, manage access tokens, edit roles, etc. in order to generate the credentials required for this integration
- Formula fields within saved searches will not be returned
- Saved searches which include summary results are not supported
- Ensure the user/role configured for the integration has sufficient permissions to access all necessary saved searches and results
- The following transaction searches are not supported in SOAP web services (see NetSuite documentation for details):
- Blanket Purchase Order
- CCard Refund
- Commission
- Credit Card
- Currency Revaluation
- Customer Payment Authorization
- Deprecated Custom Transaction
- Finance Charge
- Fulfillment Request
- GL Impact Adjustment
- Inventory Count
- Inventory Distribution
- Inventory Status Change
- Inventory Worksheet
- Liability Adjustment
- Ownership Transfer
- Payroll Adjustment
- Payroll Liability Check
- Period End Journal
- Purchase Contract
- Request For Quote
- Revenue Arrangement
- Revenue Commitment
- Revenue Commitment Reversal
- Revenue Contract
- Sales Tax Payment
- Statement Charge
- Store Pickup Fulfillment
- System Journal
- Tax Liability Cheque
- Tegata Payable
- Tegata Receivable
- Transfer
- Vendor Request For Quote
Send to NetSuite
Connection
The same credentials and role configured for pulling data from NetSuite can be leveraged within Parabola’s Send to NetSuite step. One key difference for posting data to NetSuite is ensuring the role has full access to REST Web Services
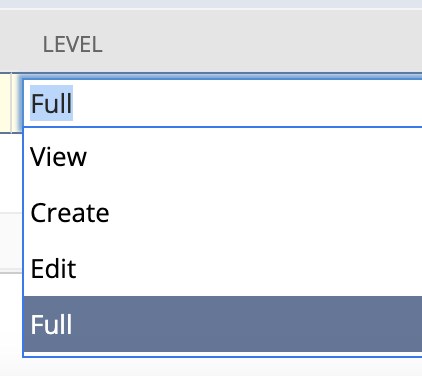
- Transactions > Sales Orders > Full Access
Using the step
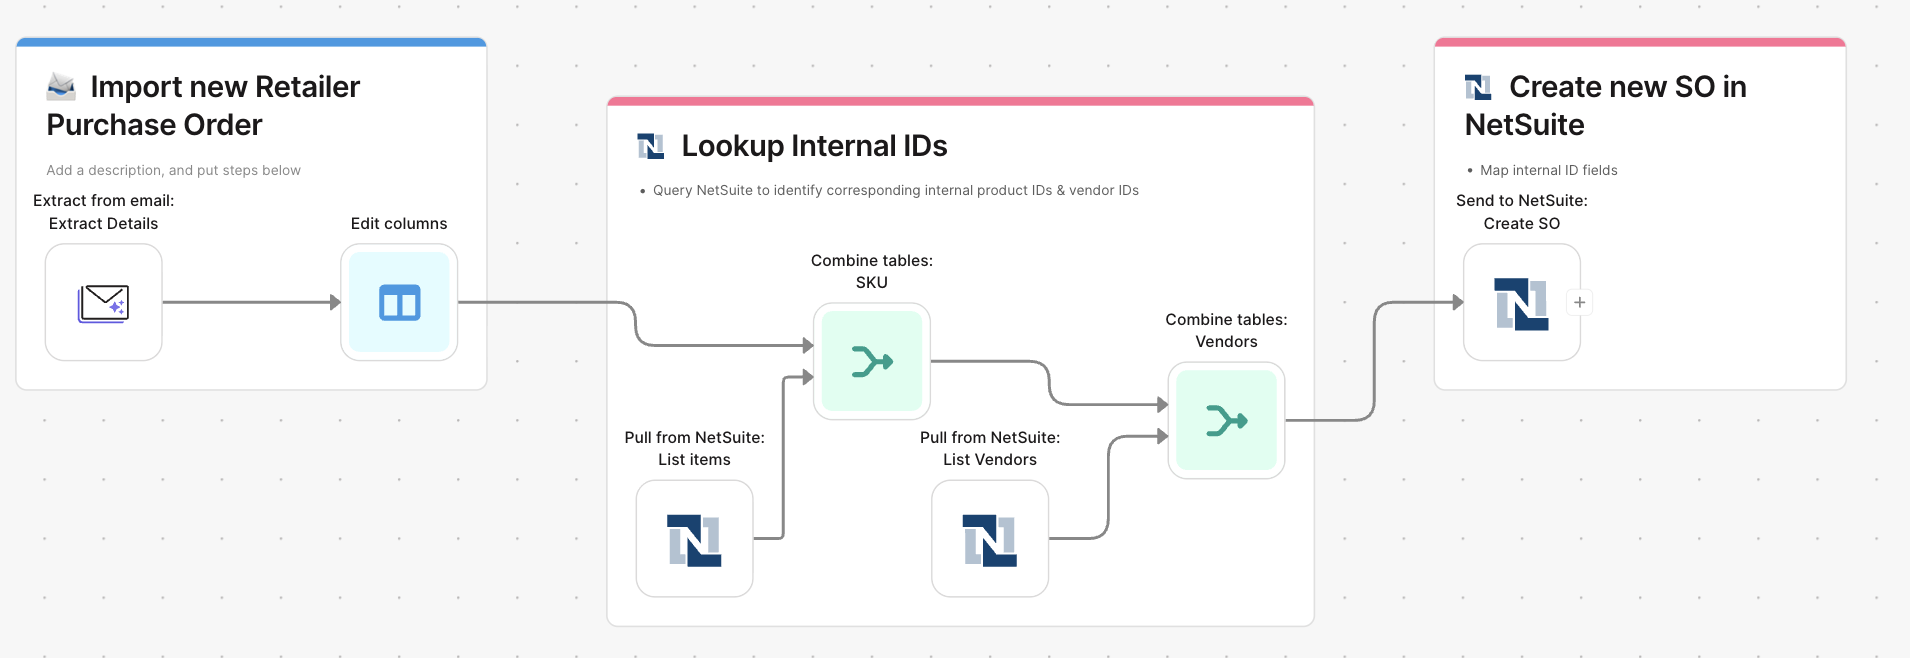
Creating and updating fields within NetSuite requires providing the internal IDs for relevant objects (items, sales orders, customers, subsidiaries, etc) as opposed to providing the human readable names you’re familiar with (SKUs, order numbers, customer names, etc). It is a best practice to leverage Pull from NetSuite step or reference file within your flows to gather the internal IDs for reference prior to using the Send to NetSuite step to prevent errors. Use case example: Creating new sales orders based on a PDF Purchase Order from a customer flow inputs:- An extract from email step that parses a new purchase order PDF from a customer
- This step extracts the order number, customer name & address, each ordered SKU, the quantity, and the relevant order/ship dates
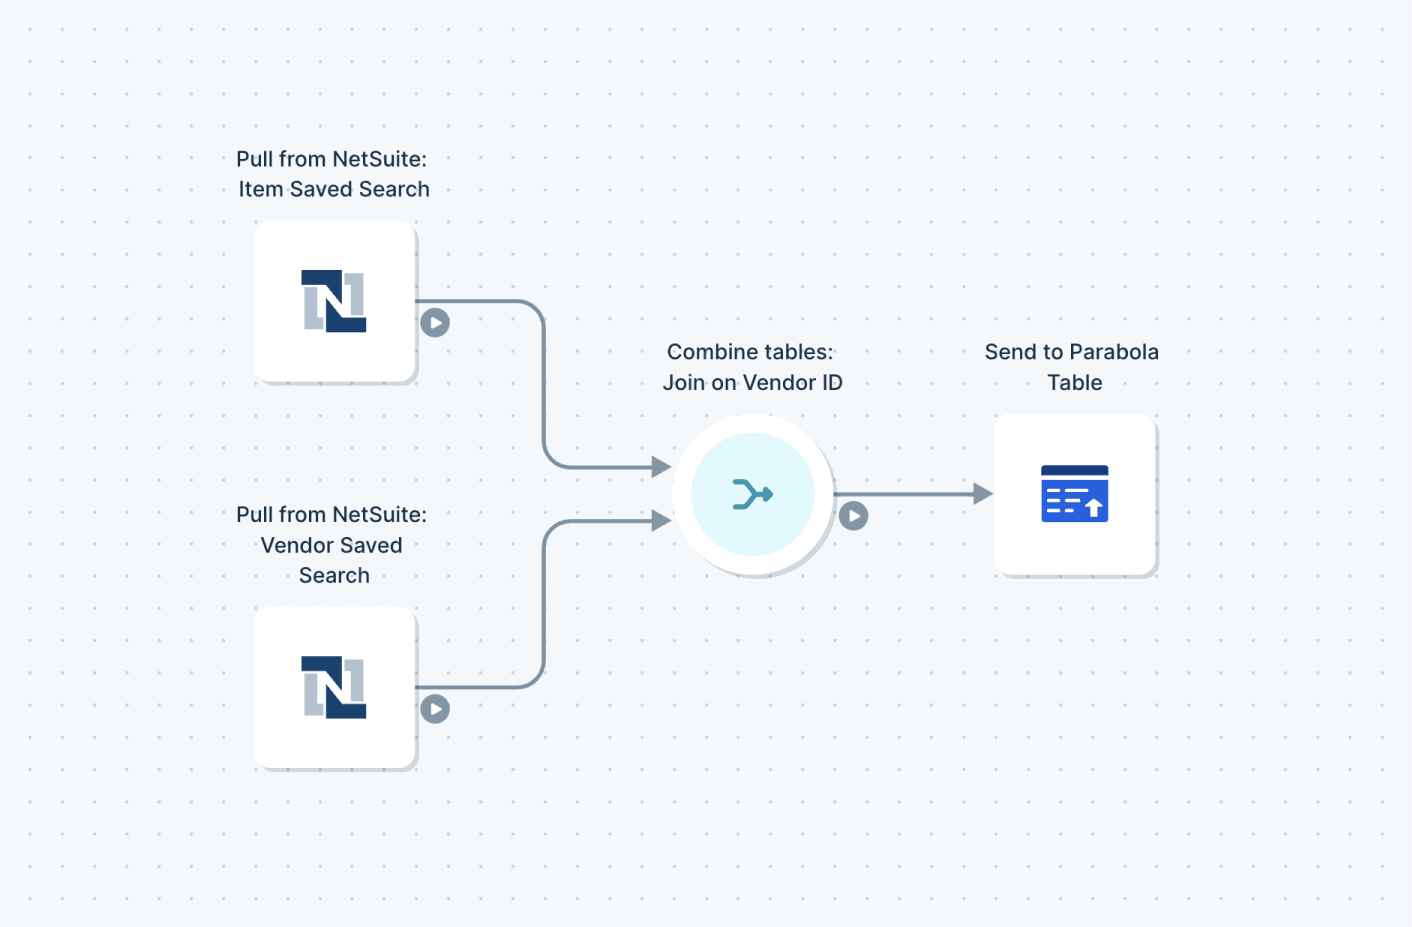
- Pull from NetSuite steps that list master data references including name and internal ID:
- Customers
- Items
- Combine the parsed PDF data with the NetSuite reference searches based on the SKU name & Customer Name
- Your dataset should now include the relevant internal ID for each object (Item, Customer, Location)
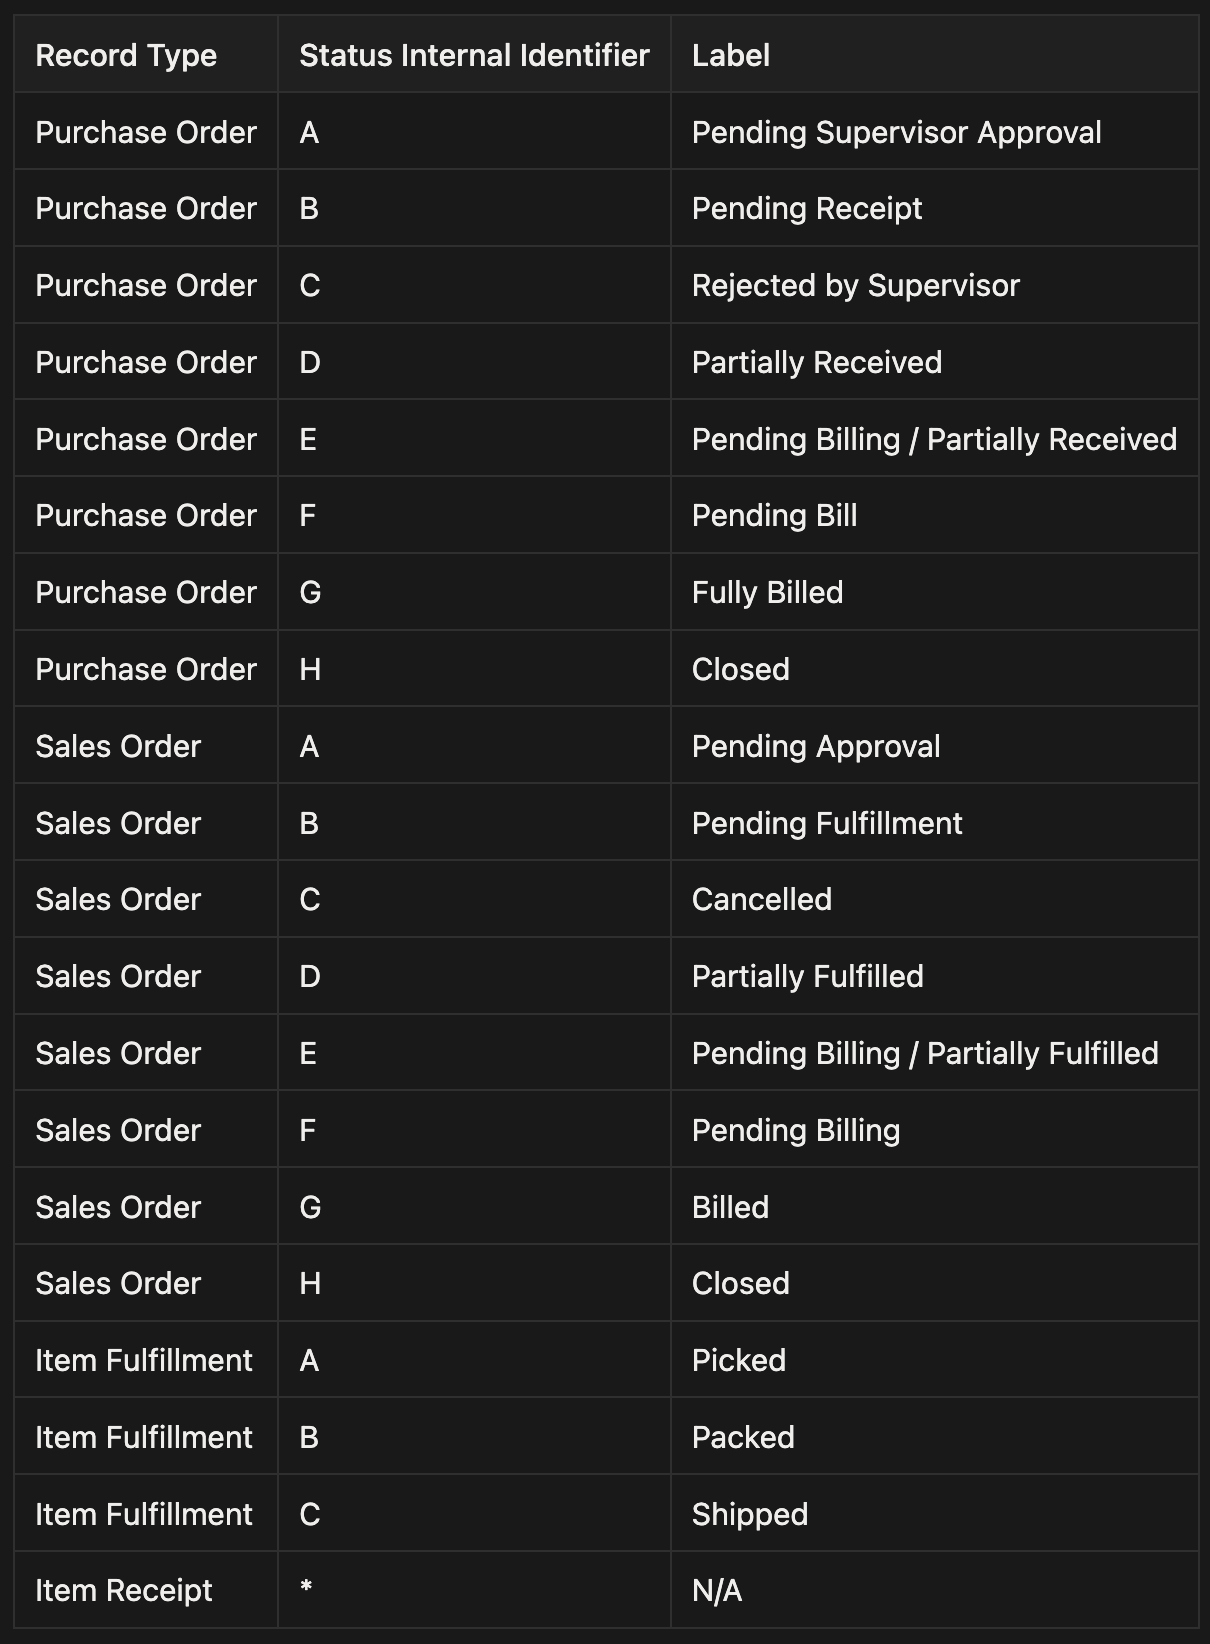
- Connect your data to a Send to NetSuite step - Select the action “Create” and the object “Sales Order” - Configure the mandatory fields for entity ID (customer), item internal ID, status, etc.
- Use Pull from NetSuite steps with saved searches for items, customers, vendors, or locations and reference them in flows to look up internal IDs
- The NetSuite Entity field relates to Vendor on POs and Customer on SOs