Looker integration
What is Looker?
Looker is a business intelligence and data-analytics platform built around SQL: it connects directly to your SQL databases, translates its modeling layer (LookML) into efficient SQL queries, and lets teams explore, analyze, and visualize data without writing codeIt enables teams to create interactive dashboards, generate real-time insights, and share reports seamlessly. Looker integrates with various data sources, making it a powerful tool for data-driven decision-making across different industries.
How to use Parabola's Looker integration
Parabola's Looker integration allows businesses to automate data workflows and enhance reporting capabilities.
- Import and process Looker data automatically for real-time insights
- Transform and filter Looker analytics to create actionable reports
- Sync Looker data with other business tools for deeper analysis and automation
Learn more about Parabola’s Looker integration below.
Pull from Looker
Use the Pull from Looker step to run Looks and pull in that data from Looker.
Connect your Looker account
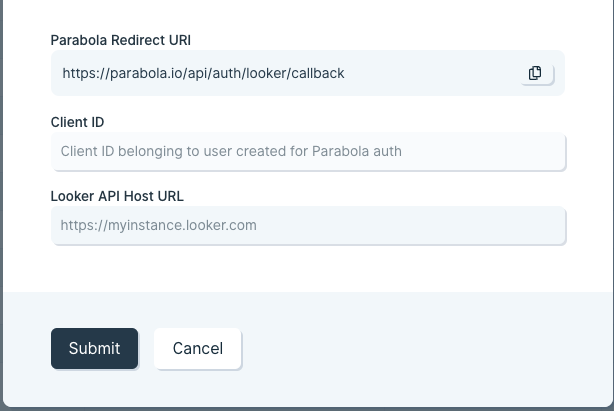
To connect to Looker, you’ll need to enter your Looker Client ID and your Looker API Host URL before authenticating:

Finding your Client ID and Looker API Host URL
These steps only need to be followed once per Looker instance! If someone else on your team has done this, you can use the same Client ID that they have set up.
Your Looker permissions in Parabola will match the permissions of your connected Looker account. So you will only be able to view Looks that your connected Looker account can access.
- Create a new user in Looker dedicated to authenticating with Parabola. You can skip this step if you are going to use an existing user.
- The user will need to have User or Admin permissions in Looker in order to be able to find Looks and run them.
- Click on the Edit button next to the user entry and click on Edit Keys next to the API3 Keys header to generate credentials.
- Copy the Client ID, and go to the API Explorer in the Applications section of your Looker sidebar.
- In the API Explorer, search for the Register OAuth App API call, click on it, and then click Run it.
- In the API call run section, paste your Client ID in the first field, then set "redirect_uri" to the Parabola Redirect URI from this screen and “enabled” to true. It should look like this:
{
"redirect_uri": "https://parabola.io/api/auth/looker/callback", "display_name": "Parabola OAuth Connection",
"description": "",
"enabled": true,
"group_id": ""
} - Run the call, and it should return a 200 OK response.
- Paste your Client ID into the modal in Parabola.
- Find and paste your Looker API Host URL into Parabola. This is usually the base URL that you see when accessing Looker, such as: https://company.cloud.looker.com
- Click Submit and you will see a modal that will ask you to login to your Looker account and authenticate the connection the Parabola.
Custom settings
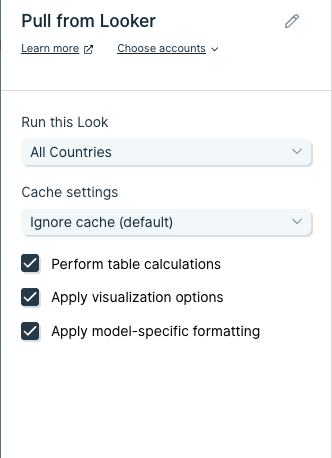
Once your step is set up, you can choose the Look that you want to run from the Run this Look dropdown:

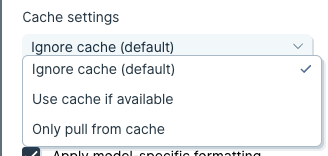
There are also Cache settings that you can adjust:

- Ignore cache (default) - Ignores the cache that Looker has and asks for new data every time.
- Use cache if available - Looker checks if the cache is recent enough and runs the Look if the data seems stale, otherwise it returns data from the Looker cache.
- Only pull from cache - Looker only gives data back from their cache even if the data is out of date.
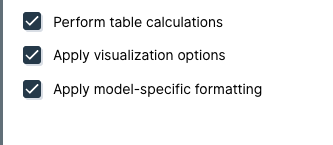
There are also additional settings that you can adjust within the step:

Perform table calculations: Some columns in Looker are generated from user-entered Excel-like formulas. Those calculations are not run by default in the API, but are run by default within Looker. This setting tells Looker to run those calculations.
Apply visualization options: Enable if you want things like the column names to match the names given in the Look, as opposed to the actual names of the columns in the source data.
Apply model-specific formatting: Requests the data in a way that respects any formatting rules applied to the data model. This can be things like date and time formats.
Common issues and how to troubleshoot
You may sometimes see a 404 error from the Pull from Looker step. Some common reasons for that error are:
- The Look may not exist in the Production environment and needs to be pushed to production.
- The authenticated user may not have the right permissions to run the Look and needs to get access in Looker.
- The Look may have been deleted.