What is Amazon Redshift?
Amazon Redshift is a cloud-based data warehouse that enables teams to store, analyze, and process large-scale datasets efficiently. It offers fast query performance, scalability, and integration with other AWS services—making it a popular choice for business intelligence and analytics.Pull from Redshift
The Pull from Redshift step connects to and pulls data that is stored in your Amazon Redshift database. Amazon Redshift is a data warehouse product within the AWS ecosystem.Connect your Amazon Redshift database
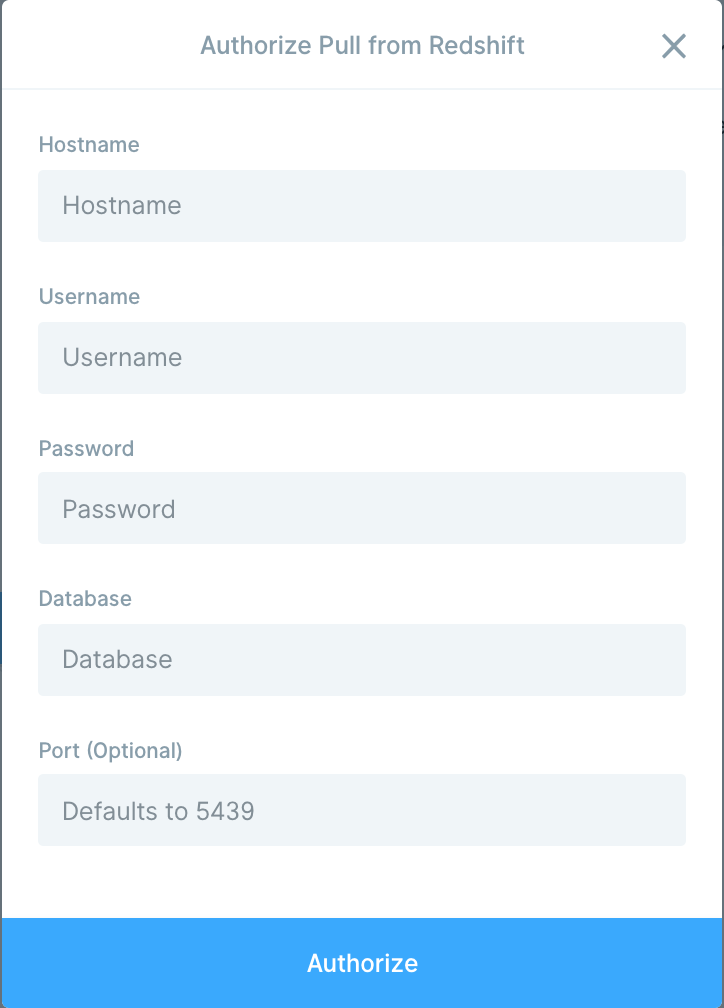
Double-click on the Pull from Redshift step and click Authorize. Enter the following connection details:- Hostname
- Username
- Password (optional)
- Database
- Port (optional; defaults to 5439)
Troubleshooting authentication errors
Here are some common error messages you might see when authorizing the Redshift integration, along with steps to resolve them. Error:Error occurred fetching tables:connect ECONNREFUSED <ip address>:5439
What it means:
Your Redshift cluster is not publicly accessible.
How to fix it:
Parabola requires network access to your Redshift cluster. You’ll need to update your Redshift configuration to make it a public cluster or ensure that Parabola’s IP addresses are whitelisted in your VPC security group.
Error:
Error occurred fetching tables: getaddrinfo EAI_AGAIN testdata123
What it means:
Your Redshift credentials are incorrect.
How to fix it:
Double-check that you entered the correct username and password for your Redshift database. If you use IAM authentication or rotating credentials, confirm that the credentials are still valid.
Error:
Error occurred fetching tables: getaddrinfo ENOTFOUND testdata123
What it means:
The hostname provided is invalid or unreachable.
How to fix it:
Verify that you entered the full and correct Redshift endpoint, which should look like:
example-cluster.abc123xyz.us-east-1.redshift.amazonaws.com
Do not include the database name or protocol (for example, https://) in the hostname field.
Choose what to import
Once connected, you’ll see a dropdown menu where you can select a table from your Redshift database. By default, Parabola pulls the entire table using the query:Get help from AI
When working in the ‘Query (optional)’ field, you’ll see two buttons that connect directly to AI chat:- “Help write query”: Use this when you want AI to draft a query for you. Describe the data you want in plain language (for example, “Show me the last 30 days of shipped orders”), and AI will write the SQL.
- “Optimize query”: Use this after you’ve written a query. AI can help fix errors, improve performance, or enhance the query based on your instructions. This is especially useful if you run into SQL syntax errors.
Send to Redshift
The Send to Redshift step lets you insert, update, upsert, or replace entire tables in your Amazon Redshift database.Connect your Amazon Redshift database
Double-click on the Send to Redshift step and click “Authorize”. Enter the following connection details:- Hostname
- Username
- Password (optional)
- Database
- Port (optional; defaults to 5439)
Troubleshooting authentication errors
Here are some common error messages you might see when authorizing the Redshift integration, along with steps to resolve them. Error:Error occurred fetching tables: connect ECONNREFUSED <ip address>:5439
What it means:
Your Redshift cluster is not publicly accessible.
How to fix it:
Parabola requires network access to your Redshift cluster. You’ll need to update your Redshift configuration to make it a public cluster or ensure that Parabola’s IP addresses are whitelisted in your VPC security group.
Error:
Error occurred fetching tables: getaddrinfo EAI_AGAIN testdata123
What it means:
Your Redshift credentials are incorrect.
How to fix it:
Double-check that you entered the correct username and password for your Redshift database. If you use IAM authentication or rotating credentials, confirm that the credentials are still valid.
Error:
Error occurred fetching tables: getaddrinfo ENOTFOUND testdata123
What it means:
The hostname provided is invalid or unreachable.
How to fix it:
Verify that you entered the full and correct Redshift endpoint, which should look like:
example-cluster.abc123xyz.us-east-1.redshift.amazonaws.com
Do not include the database name or protocol (for example, https://) in the hostname field.
Configuring your step
Once connected, you’ll see two dropdown menus:1
Select the desired operation: Create records, Update records, Create or Update (Upsert), Replace entire table
2
Select the table you’d like to send data to.
Operations
Choose an operation to define how your data is written to Redshift. The available options are:- Create records — Inserts new rows
- Update records — Updates existing rows and inserts new ones as needed
- Create or Update (Upsert) — Updates existing rows only
- Replace entire table — Deletes all rows in the selected table, then inserts new ones below the header row.
Create records
The Create records operation creates new rows in your Redshift table. After selecting Create records, you’ll be prompted to map your Parabola columns to columns in your Redshift table.You can leave some column mappings blank.
Before running the flow, ensure it’s acceptable to insert new rows—especially if your table does not enforce unique keys.
Update records
The Update records operation modifies existing rows without inserting new ones. You’ll need to specify:- The Unique Identifier Column in Database — the primary key in Redshift
- The Unique Identifier Column in Results — the column in Parabola that contains matching unique values
Your Redshift table must have a primary key defined for this dropdown to appear.
Create or Update (Upsert)
The Create or Update (Upsert) operation updates rows if a match is found, and inserts new rows if not. Just like Update, you’ll need to define both the Unique Identifier Column in Database and the Unique Identifier Column in Results so Parabola can match rows to update.Replace entire table
The Replace entire table operation clears all rows in your target table and replaces them with new rows from your flow.The table schema (your header columns) remains intact. This option is useful when you need to fully refresh your dataset (for example, daily aggregates or full snapshot loads).
How this step handles data types
Unlike other database exports that send all values as strings, Send to Redshift automatically casts each value according to your target table’s schema.This ensures that numeric, boolean, and date fields are inserted with the correct types—reducing errors during data loads. If a value cannot be cast correctly, the step will error and the flow run will fail.
Troubleshooting
Amazon Redshift can sometimes produce error messages that are vague or hard to interpret—especially when inserting data with mismatched types. Below are some real-world examples you might encounter:Error running insert operation: invalid input syntax for type real: "Test Product"Error running insert operation: value "1000000" is out of range for type smallintError running insert operation: function 2937 returned NULL
1
Check your column mappings. Make sure each column in Parabola maps to a compatible Redshift field type.
2
Inspect column types directly in Redshift. Use a query like SELECT column_name, data_type FROM information_schema.columns WHERE table_name = ‘your_table’;
3
Convert data types in advance. Use steps like Format numbers, Format dates, or Add text column to match the schema before export.
4
Run smaller test batches to pinpoint which rows are failing.
How this step handles errors
When your flow runs, the step attempts to export all rows in batches.If a row fails to export, the entire export will fail! Any rows that were created/updated before the failure are undone so that you can safely try the entire flow run again. After processing all rows, the step will show:
- Success — if every row was exported successfully
- Error — if one or more rows failed
Helpful tips
- The names of your columns in Parabola must match the field names in your Redshift table. Use a Rename columns step beforehand if needed.
- Null (blank) values are sent as NULL.
- We recommend mapping all columns to avoid schema mismatches.
- To remove unmapped columns, use an Edit columns step before exporting.