
Airtable integration
What is Airtable?
Airtable is a cloud-based platform that combines the flexibility of a spreadsheet with the power of a database. It allows teams to organize, track, and collaborate on data using customizable tables, views, and automation features. Airtable is widely used for project management, content planning, and business operations, making it a versatile tool for teams of all sizes.
How to use Parabola's Airtable integration
Parabola's Airtable integration helps businesses automate data workflows and streamline operations.
- Import and sync Airtable records automatically
- Transform and filter Airtable data for better organization
- Combine Airtable data with other business tools for enhanced reporting and automation
Learn more about Parabola’s Airtable integration below.
Pull from Airtable
Use the Pull from Airtable step to pull in your data from your Airtable databases.
On August 1, 2023, Airtable will no longer allow users to generate new API keys. If you have a Pull from Airtable step that was authorized before July 27th, 2023 (using an API key for authentication), it will continue to pull in data until February 1, 2024. After that date, the step will no longer function. To migrate your step to the new authentication method, open the step, click "Choose Accounts" -> "Add new account". Once that authentication has been added to one step in your Flow, you can switch other Airtable steps to use it as well.
Connect your Airtable account
To connect to your Airtable account, click the blue Authorize button.
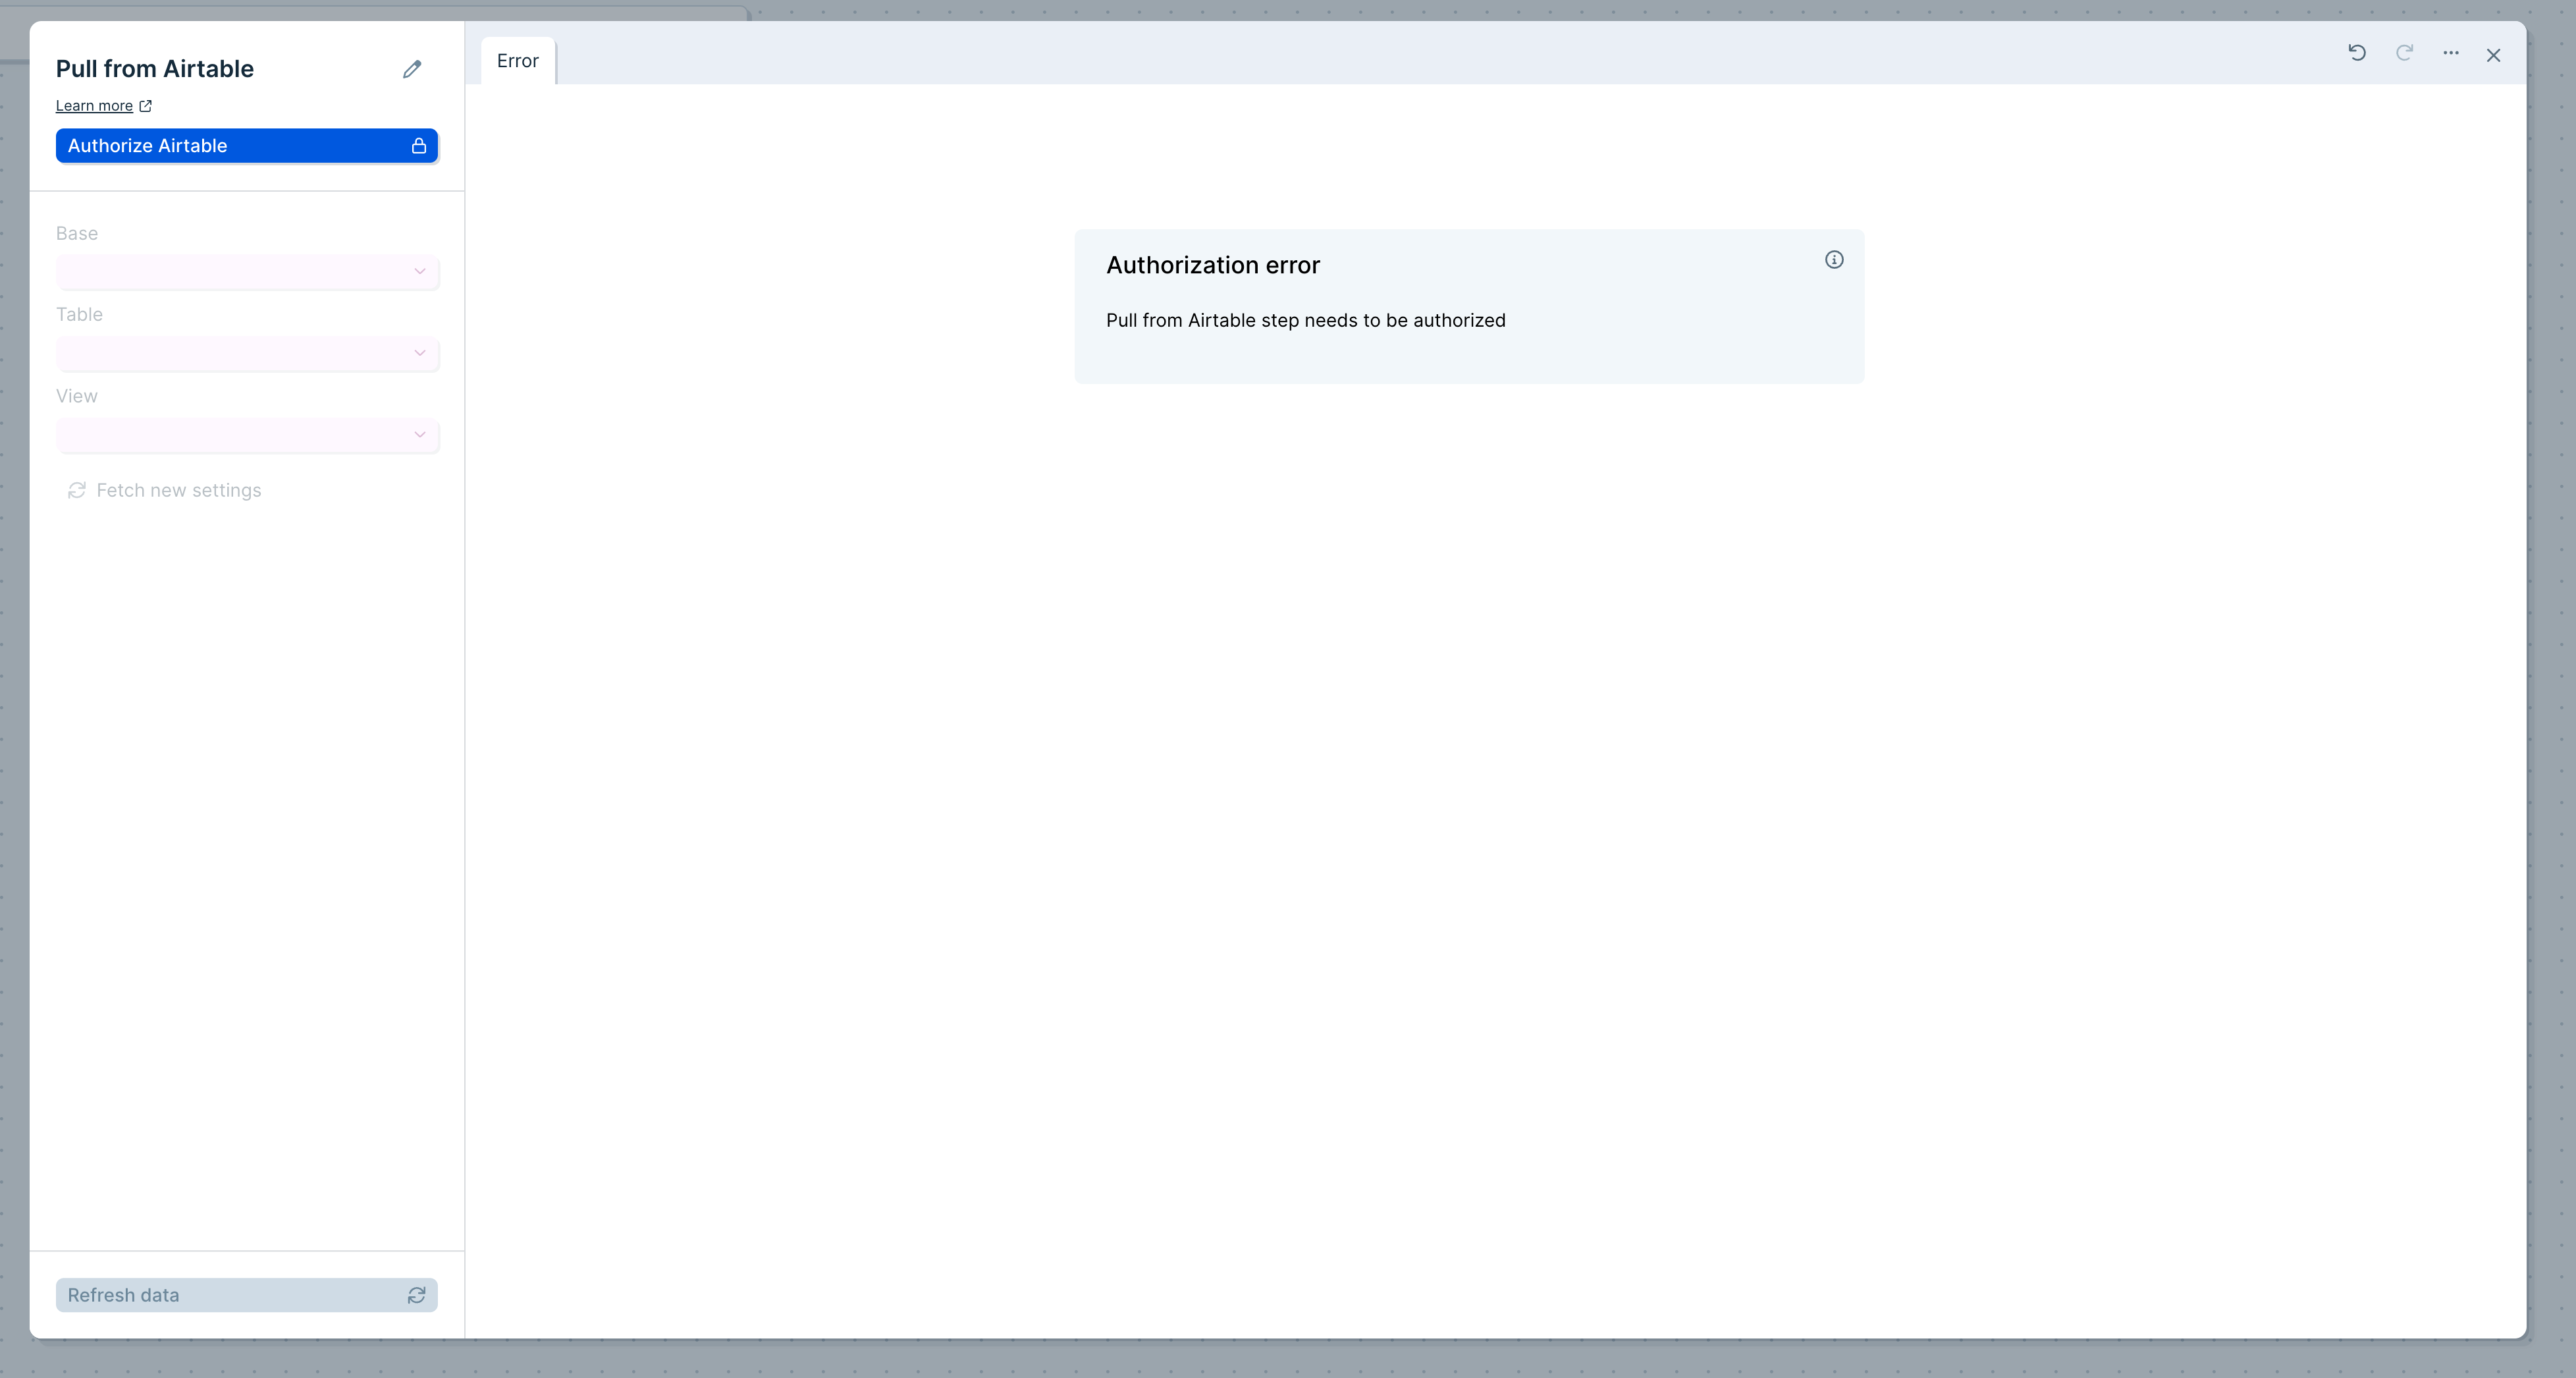
Clicking Authorize will launch a window where you can sign in to Airtable and confirm which bases you would like Parabola to have access to. Any base that you do not select from this menu will not be available to pull data from.
Custom settings
Once connected, you can select the Base, Table and View from your Airtable bases. In the example below, we are pulling data from our Shopify Orders base and our Orders table using the Grid view.
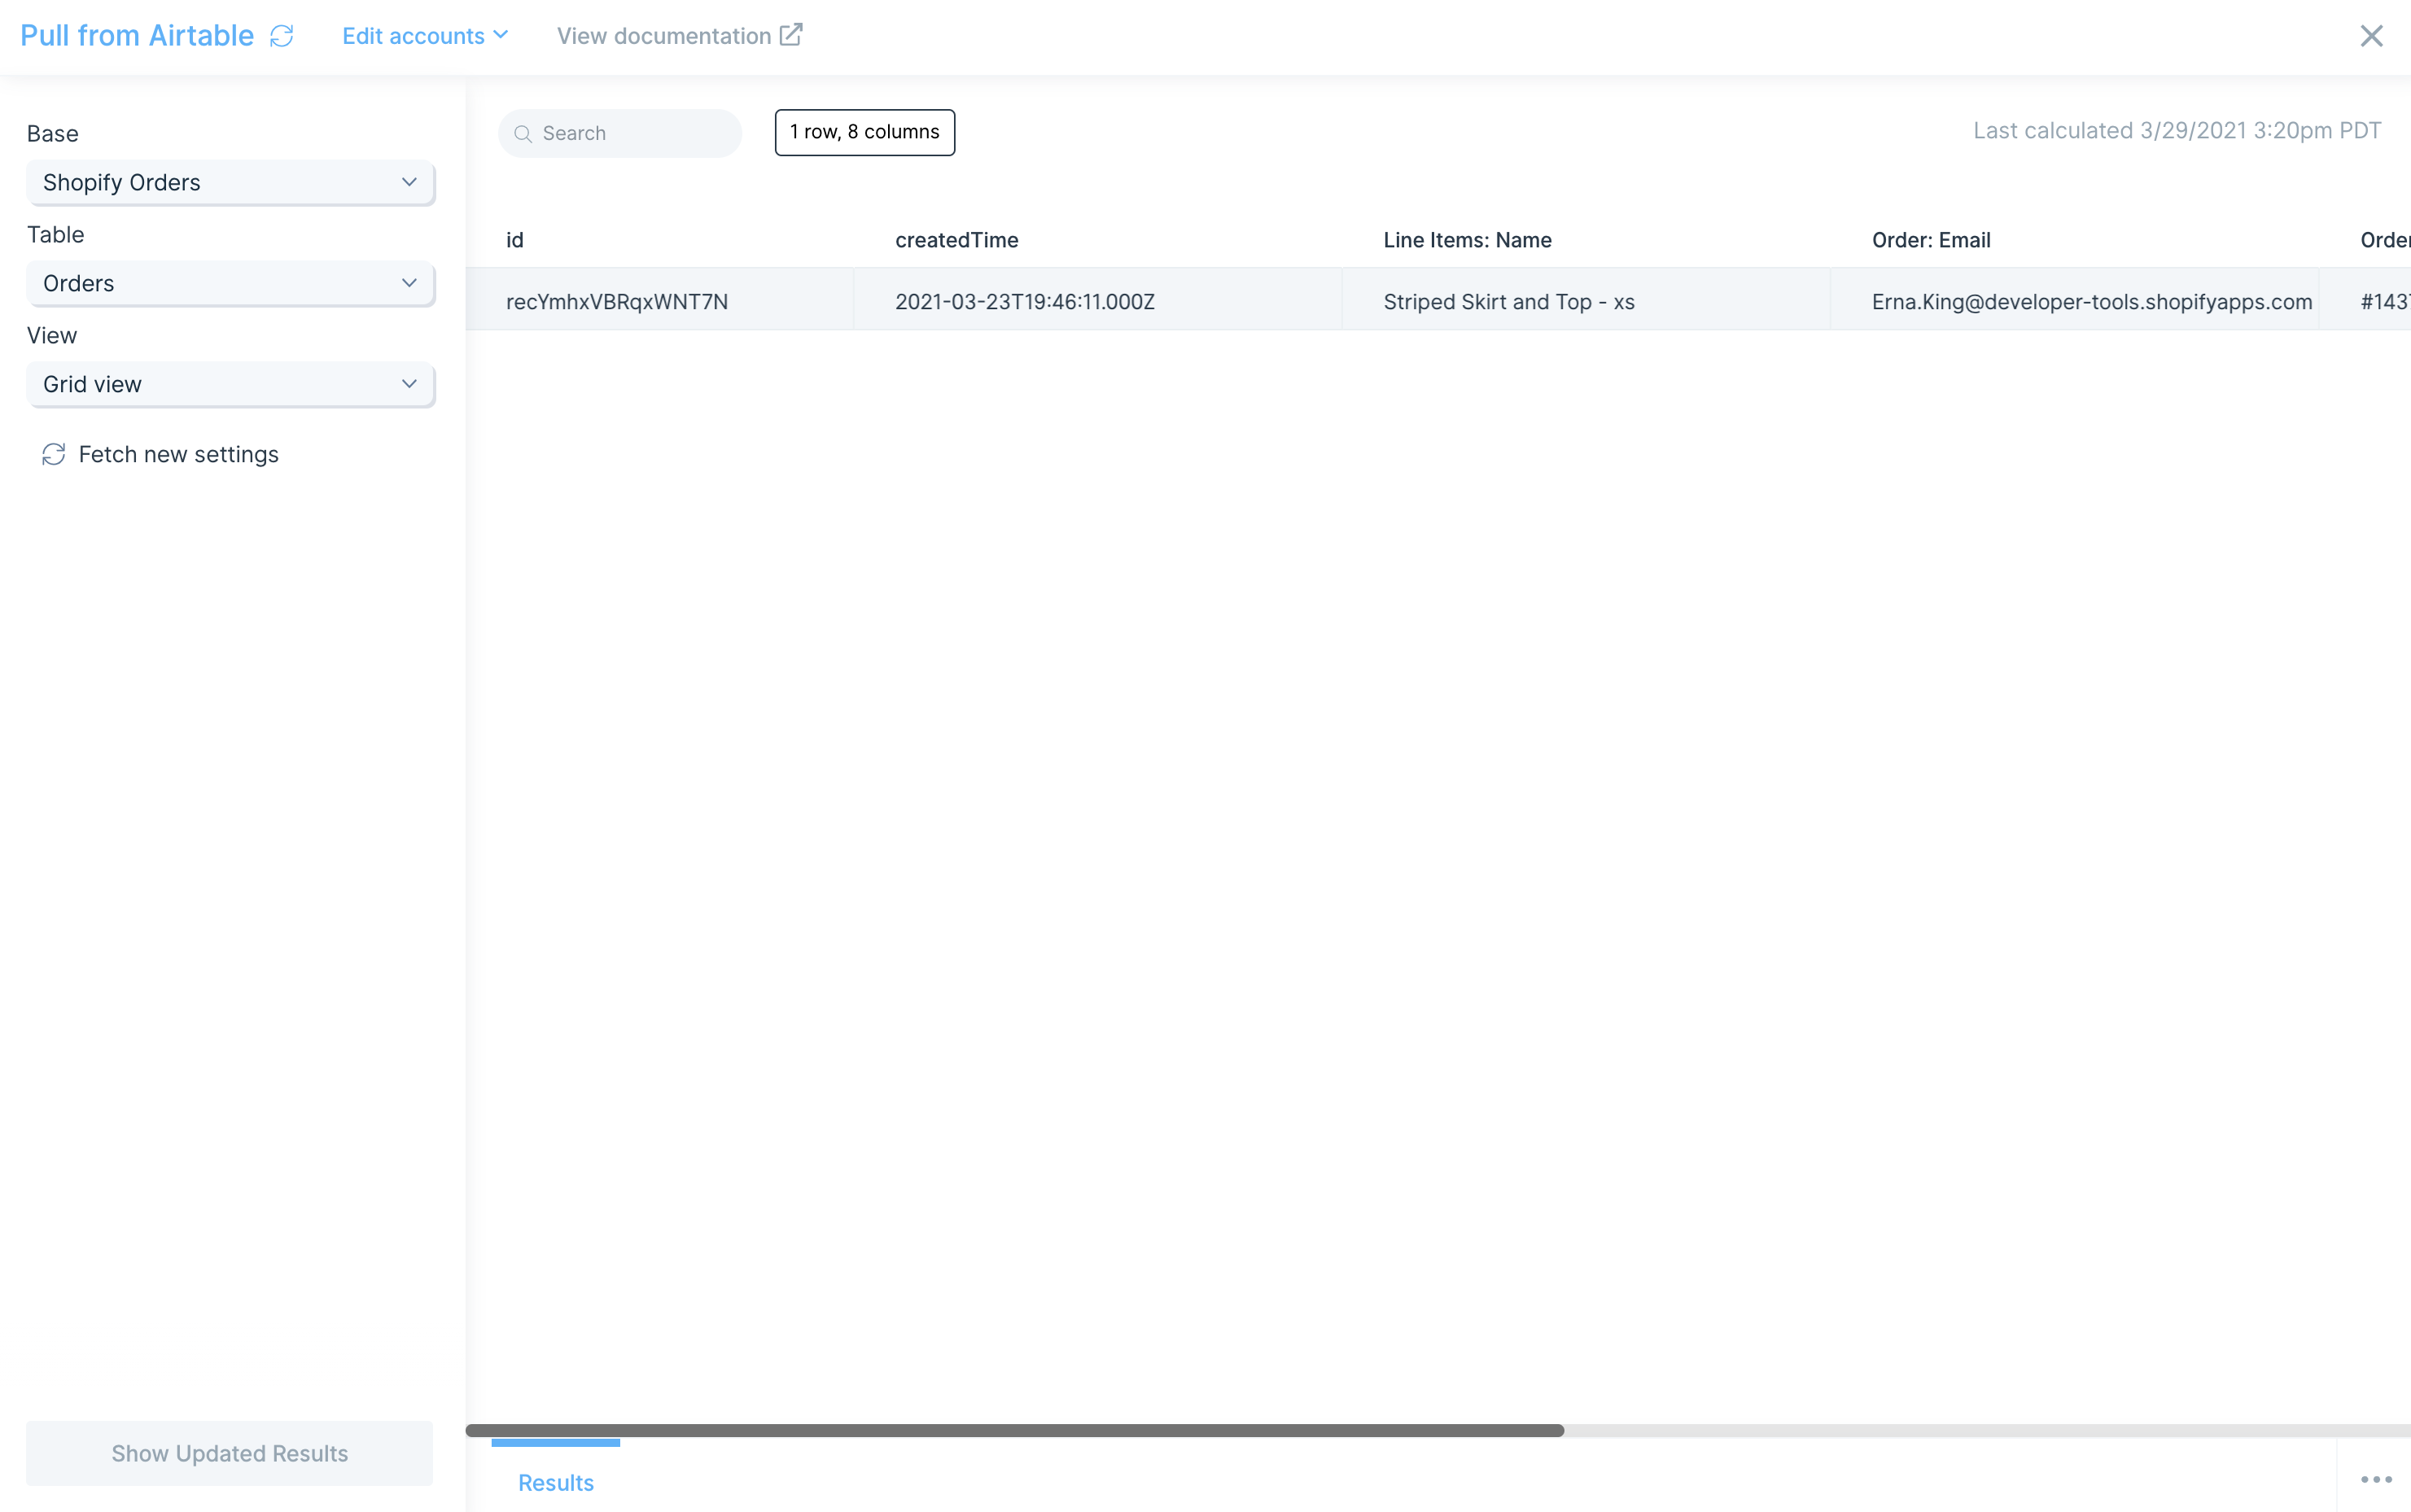
You can also click Fetch new settings to reload any bases, tables, or views since your data was last imported.
Helpful tips
Linked Records
If your base uses linked records to connect tables, those values will be pulled in as record ids. To get the complete data associated with those records, use another Pull from Airtable step to import the related table. Using the Combine tables step, you can merge the tables together based on a shared record id.
Good to know
If a column has no values in it, that column will not be imported. There must be at least one value present in a row for the column itself to come through.
If a column has a duration in an h:mm format, Airtable exports duration value in millisecond units, parses incoming duration value using minutes. For example, Airtable sends 0:01 as 60.
Send to Airtable
Use the Send to Airtable step to create, update, or delete records in your Airtable base. Just map the fields in your Airtable base to the related columns in Parabola.
On August 1, 2023, Airtable will no longer allow users to generate new API keys. If you have a Send to Airtable step that was authorized before July 27th, 2023 (using an API key for authentication), it will continue to pull in data until February 1, 2024. After that date, the step will no longer function. To migrate your step to the new authentication method, open the step, click "Choose Accounts" -> "Add new account". Once that authentication has been added to one step in your Flow, you can switch other Airtable steps to use it as well.
Connect your Airtable account
To connect to your Airtable account, click the blue Authorize button.

Clicking Authorize will launch a window where you can sign in to Airtable and confirm which bases you would like Parabola to have access to. Any base that you do not select from this menu will not be available to pull data from.
Custom settings
Once connected, you can chose to create records, update records, or delete records from the base and table of your choosing.
Creating records
In the example below, we are adding order #2001 to our Orders table within our Shopify Orders base.
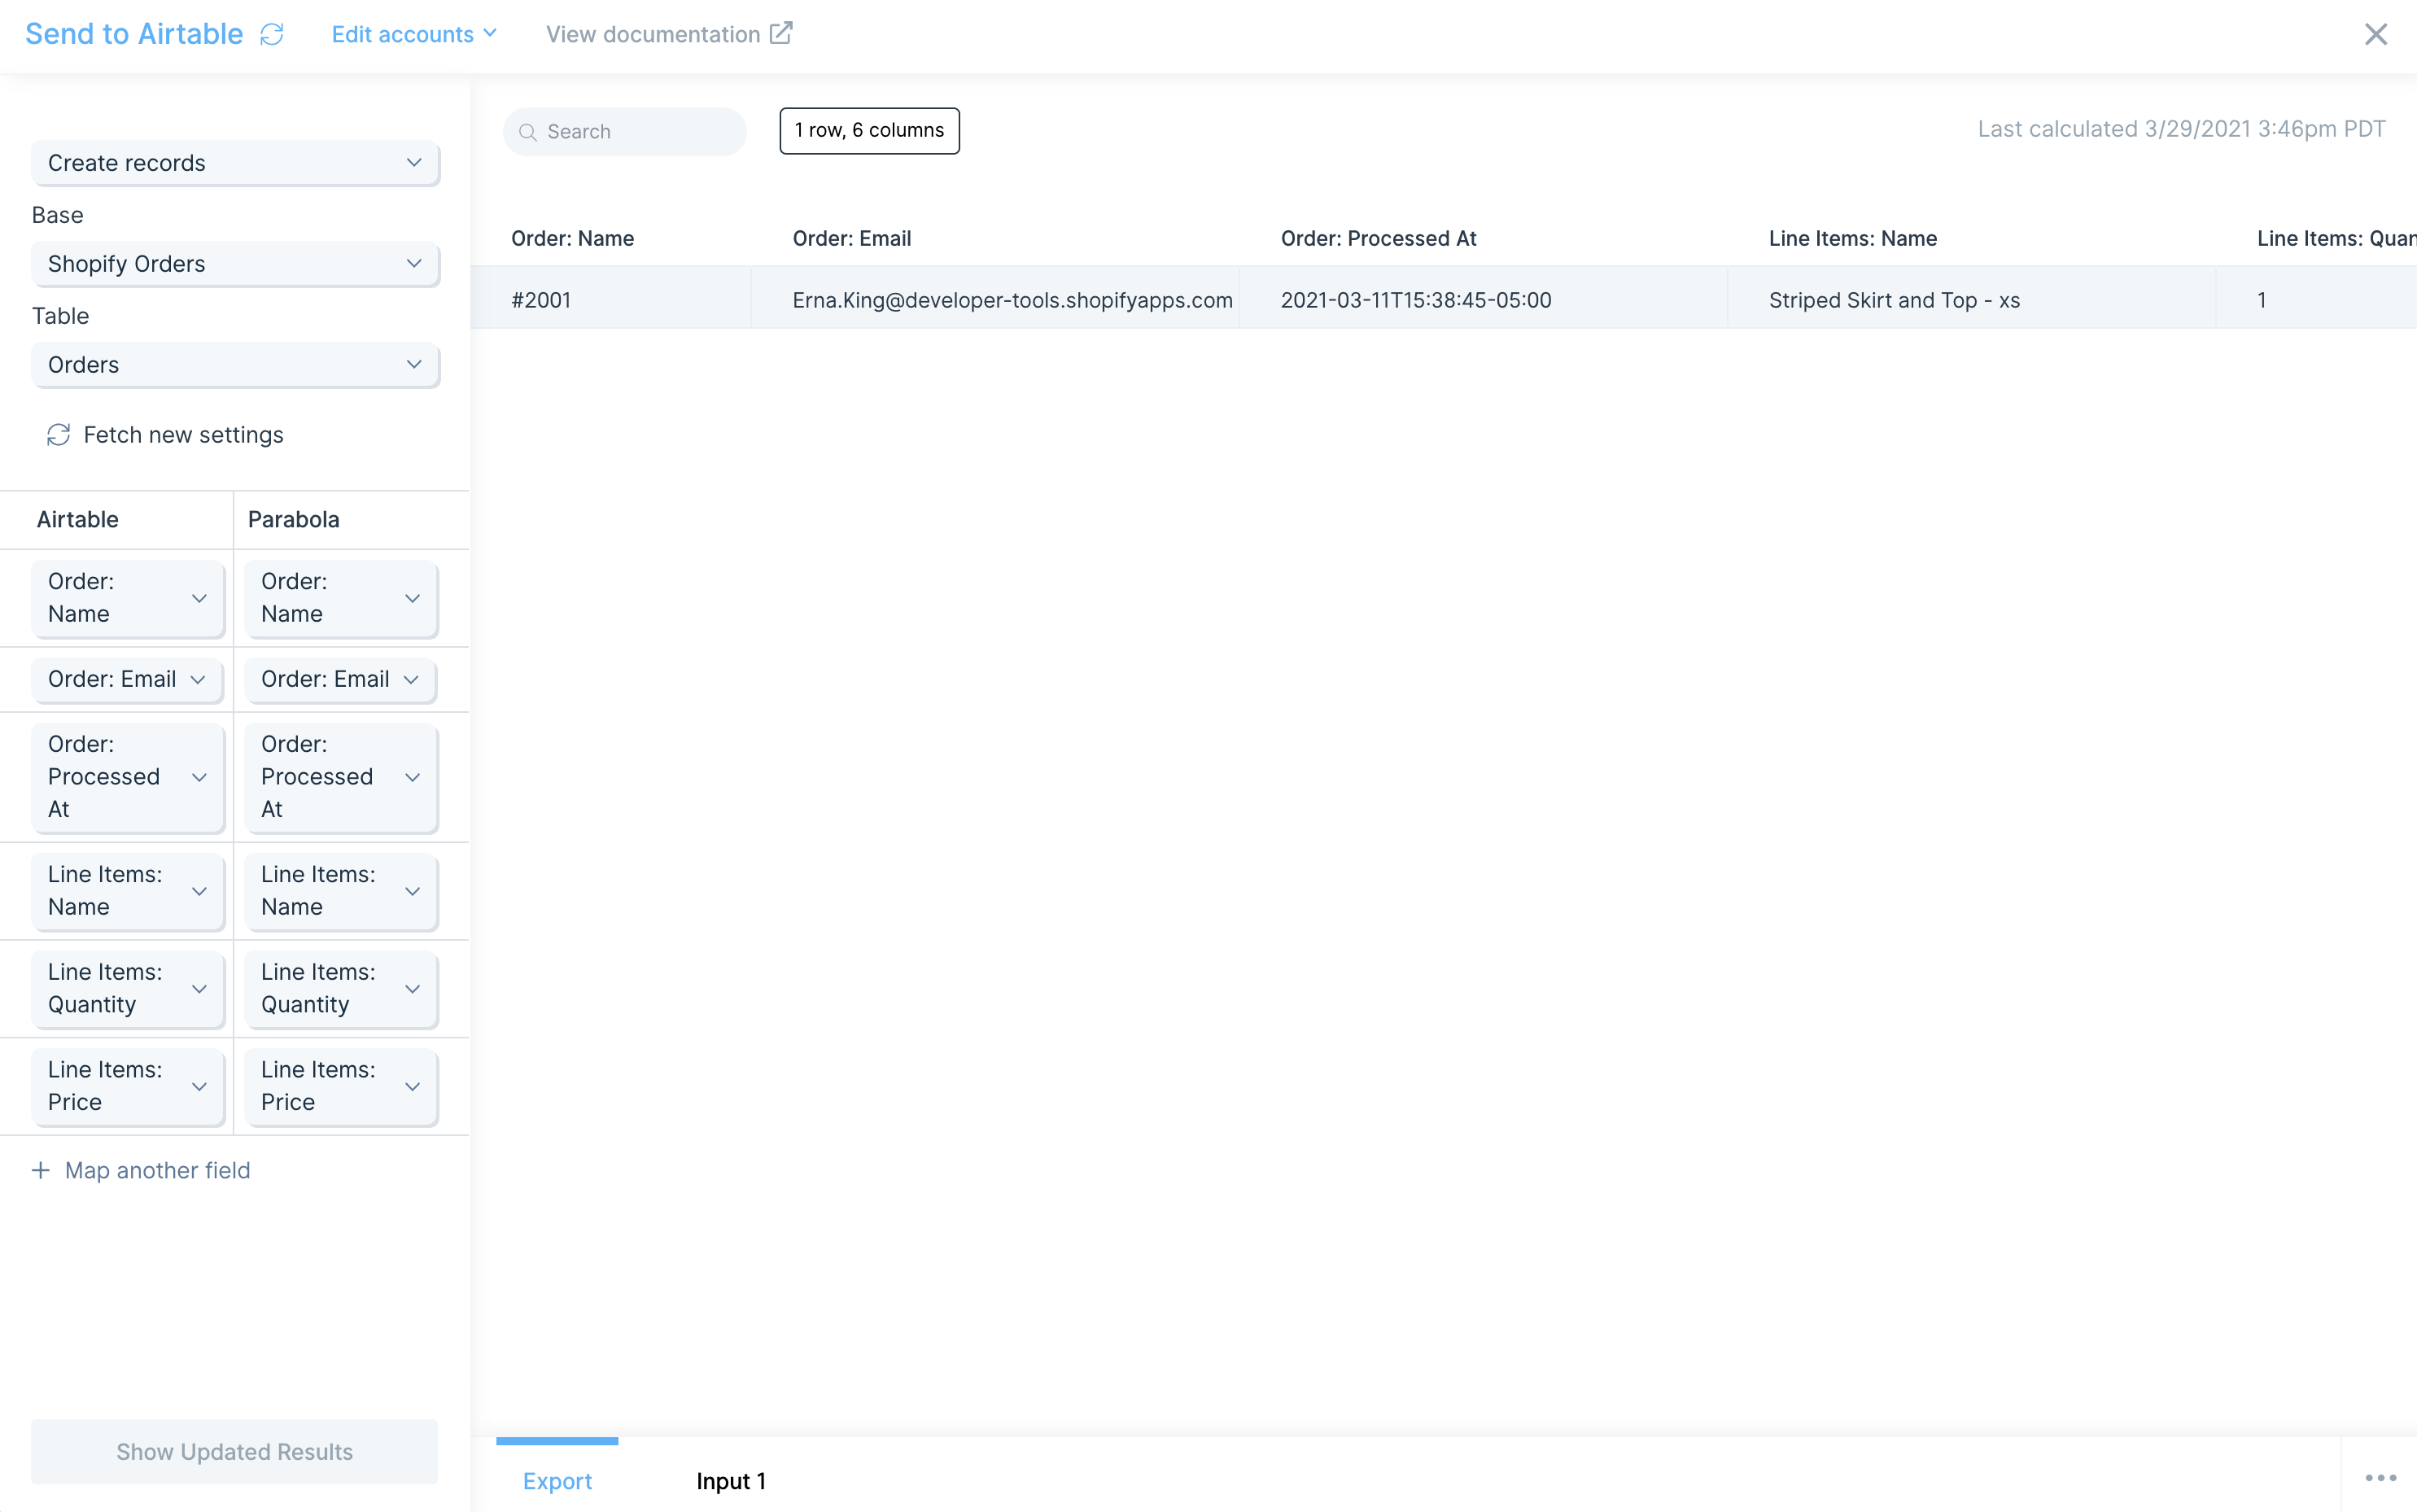
Note how the Airtable fields are displayed on the left-hand side. Each of the columns from your Airtable base appears. On the right-hand side, map the values from our Parabola data to be added into those fields.
Updating records
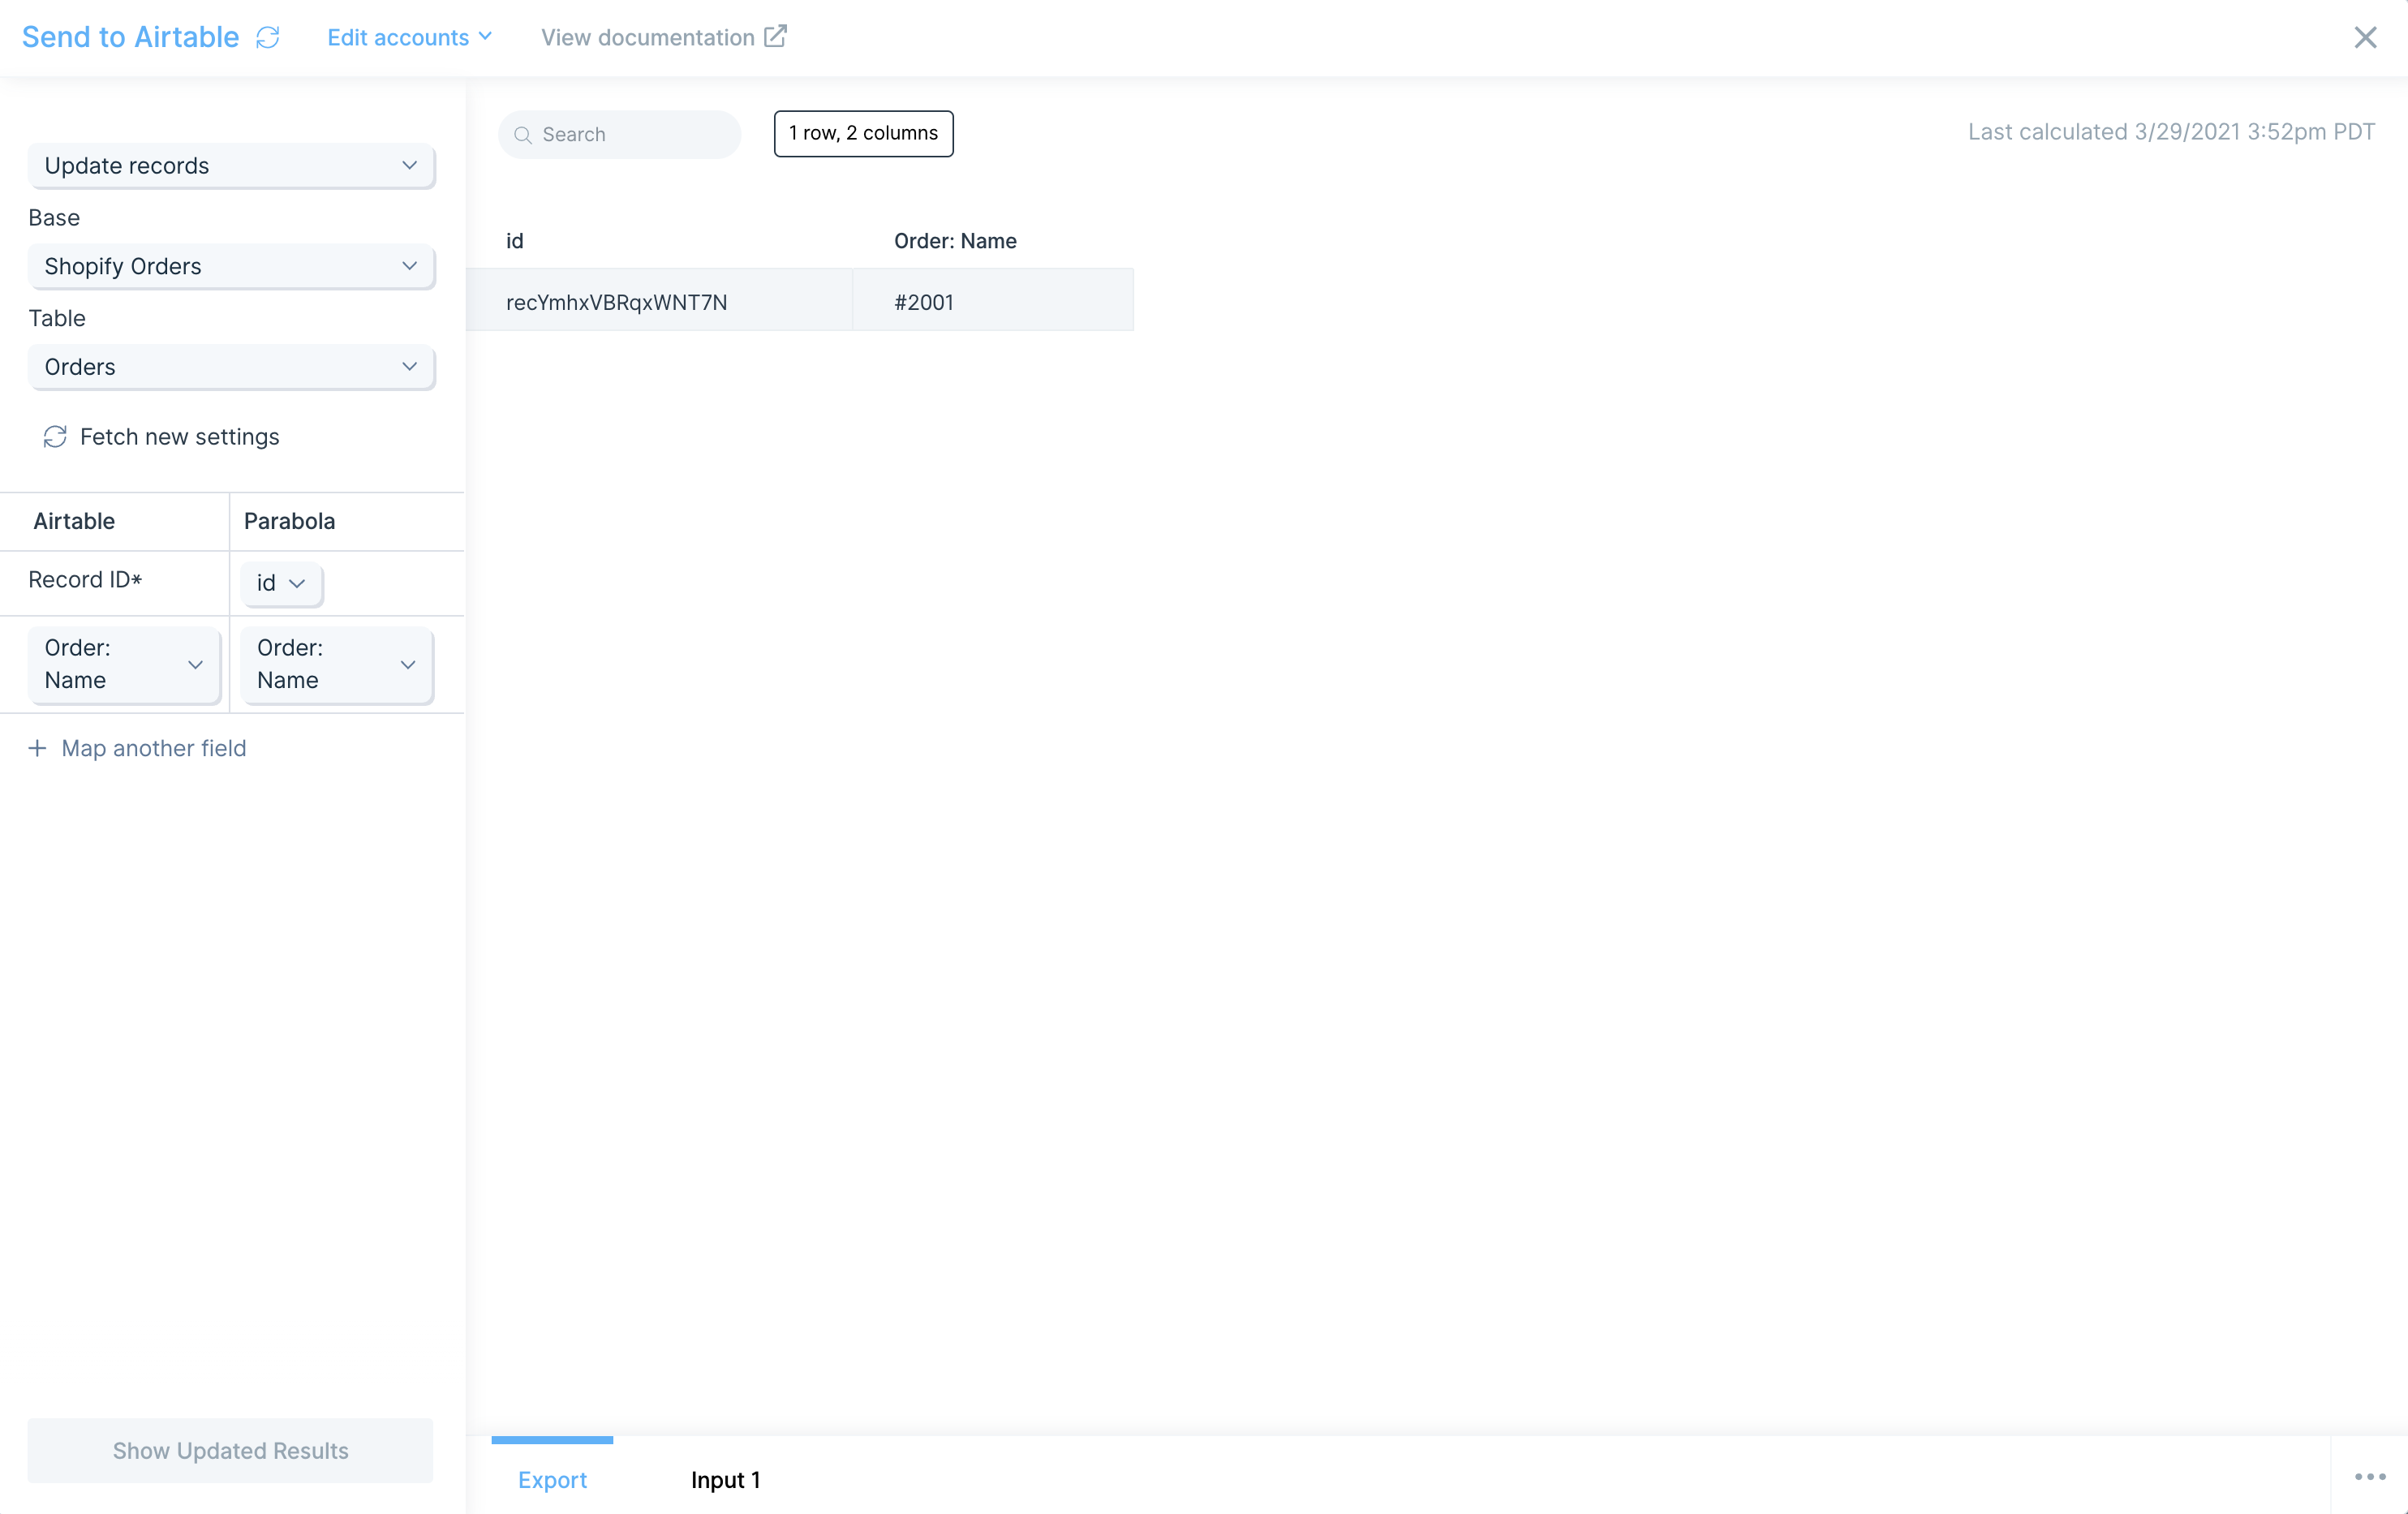
You can also target a specific record to be updated. Map the Record ID* to the id column in Parabola that contains that data. You can also chose the specific fields you want to update.
In this example, we are updating the Order: Name of record recYmhxVBRqxWNT7N.
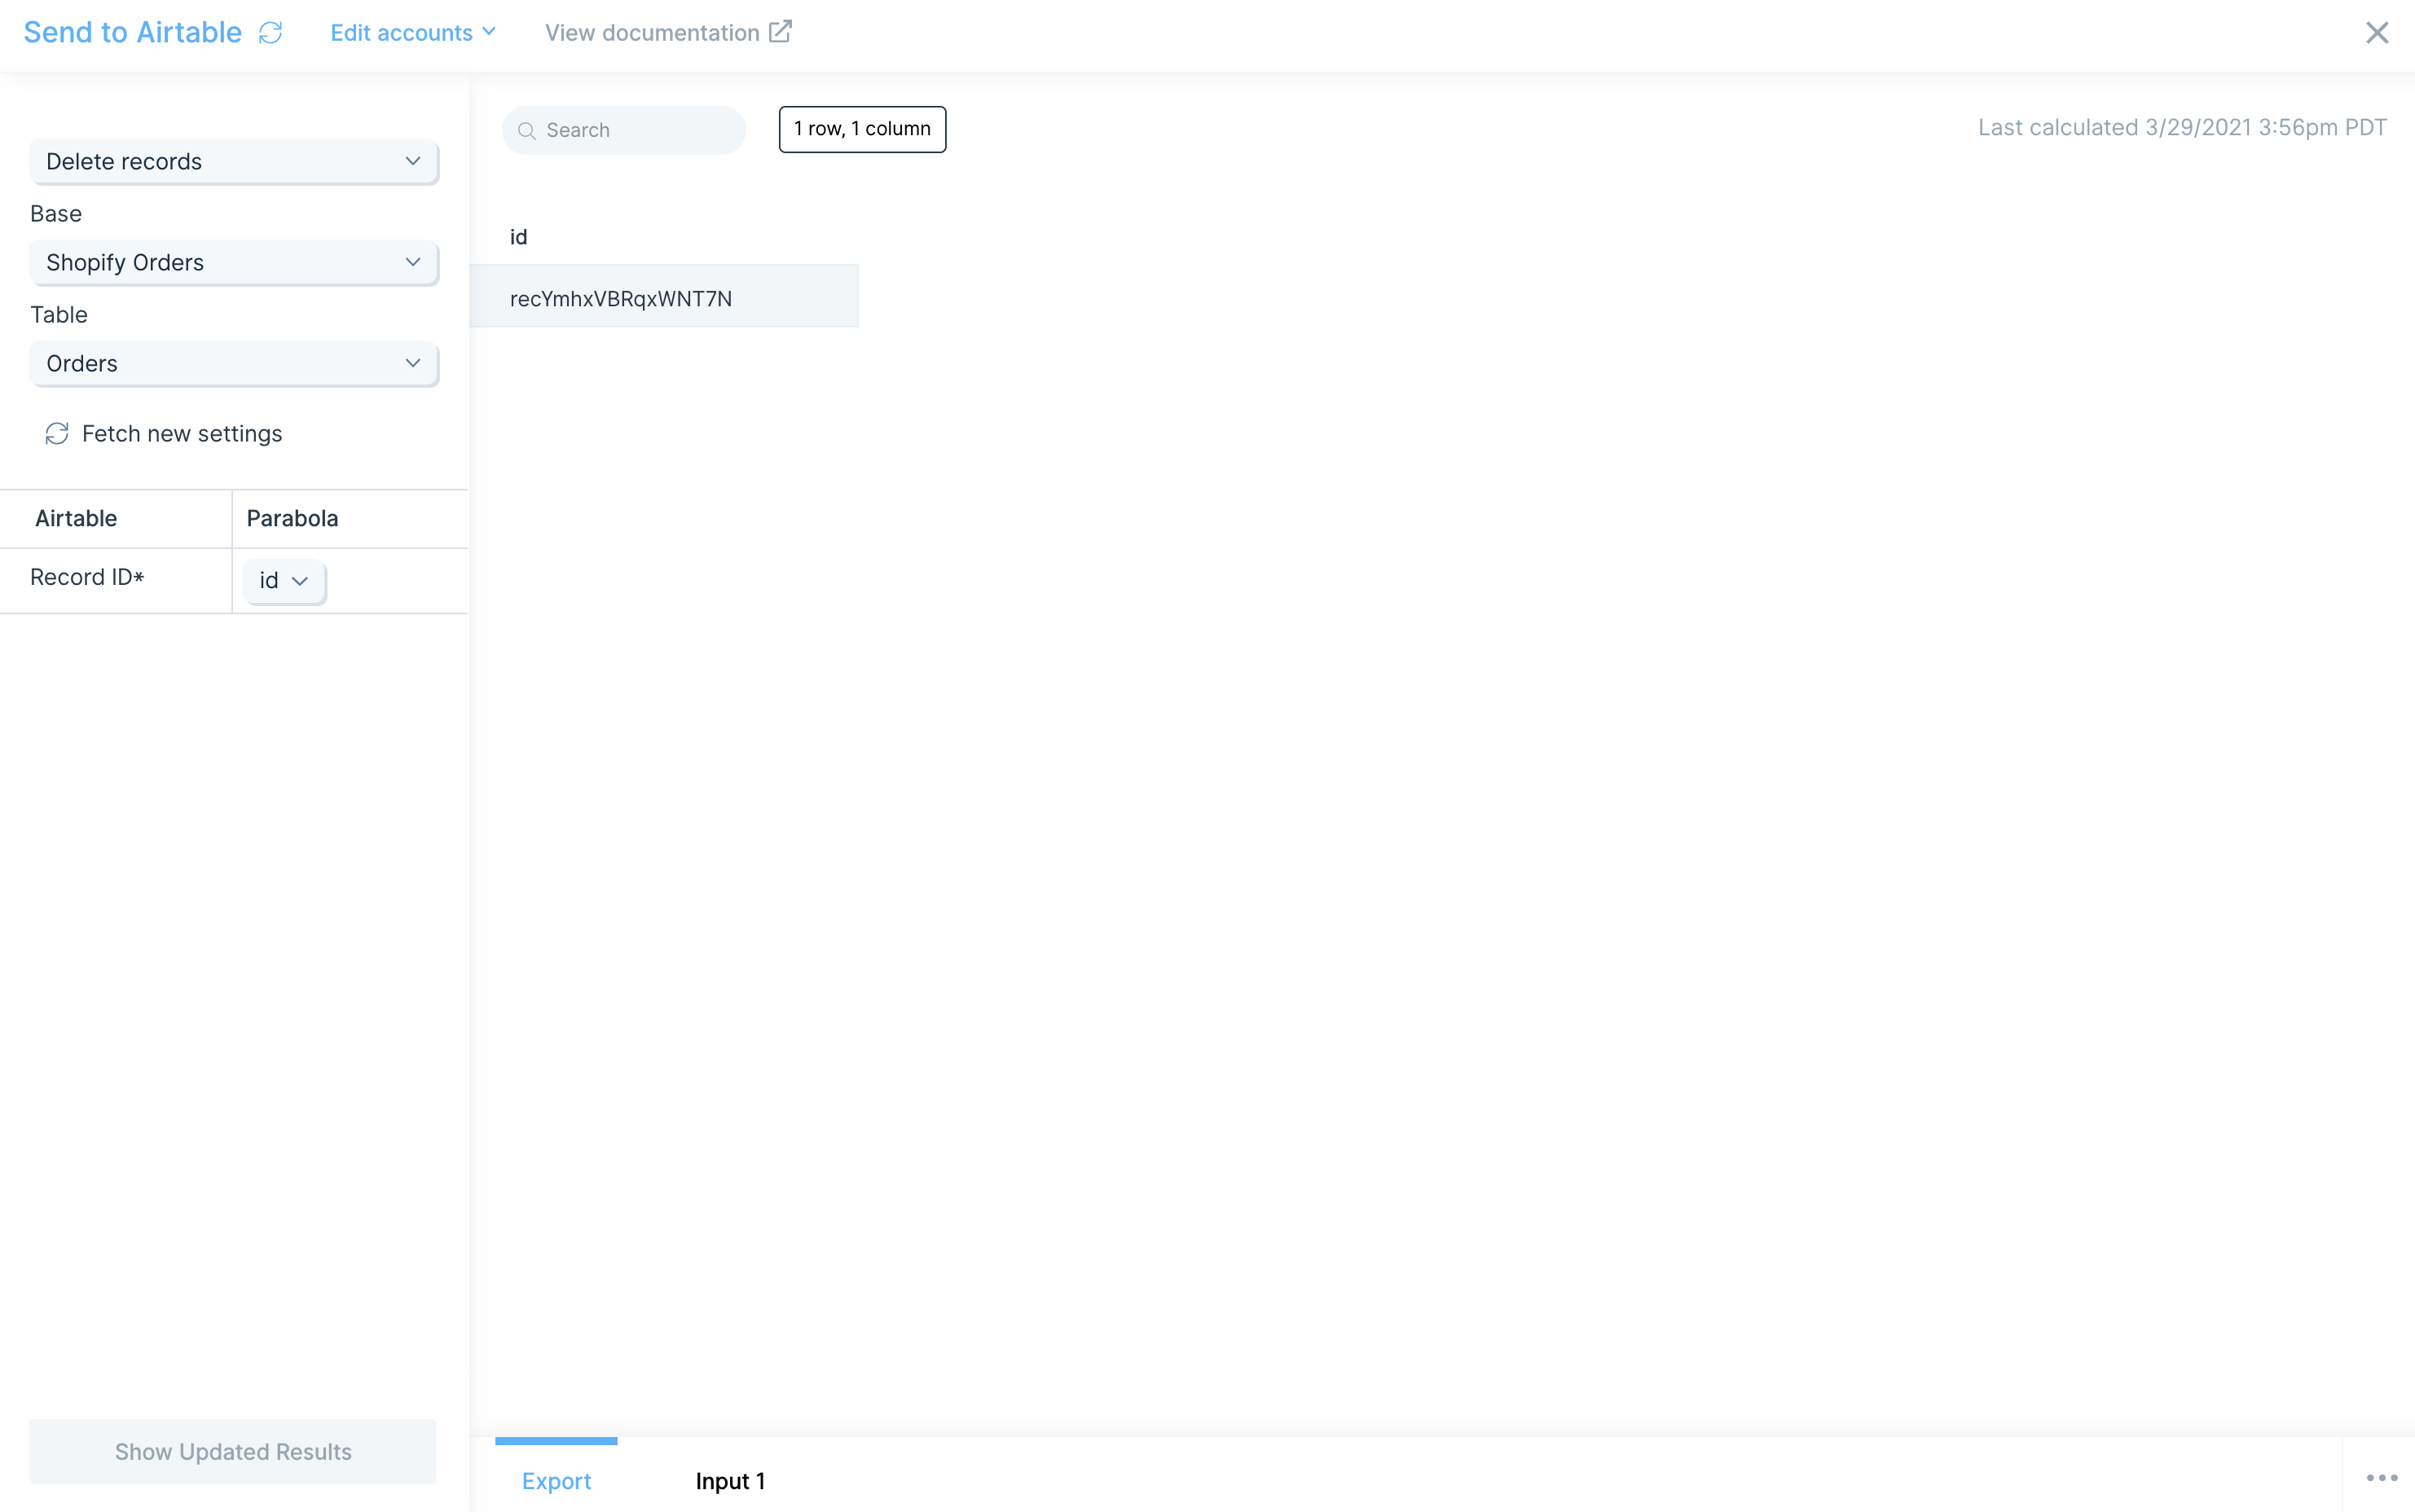
Deleting records
To delete a record, simply map the Record ID* to the id column in Parabola. In this example, we are deleting record recYmhxVBRqxWNT7N.
Helpful tips
Percentages
Convert your percentages to decimal values using before sending data to Airtable. For example, if your data contains 0.51%, convert that to 0.0051 and adjust your precision values in Airtable. By default, Airtable may interpret that as 0.01%.
Single select/Multi select
You can automatically pass the values of your select options to set those values in your Airtable base. If you enter a select option that does not exist, Airtable will automatically create new select option for that value.
Duration using h:mm format
Airtable parses incoming duration value using minutes. For example, if your duration is 60 milliseconds, Airtable will parse that value as 1:00.
Checkboxes
Set a value of true to toggle a checkbox in your table. Set a value of false to un-toggle a checkbox in your table.
Collaborators
When updating Airtable column with field type collaborator, you can pass in an id or email value. Passing a name value will return an error of "Cannot parse value".