Pull from Fulfil
The Pull from Fulfil step brings live data from your Fulfil ERP into Parabola so you can transform it, blend it with data from other systems, and trigger alerts on custom logic.How to authenticate
Fulfil uses API key authentication.1
Generate an API key in Fulfil (steps below).
2
In Parabola, add the Pull from Fulfil step to your flow.
3
Click Authenticate and paste your API key.
4
Update the tenant field with your organization’s subdomain. You can find it in the URL when accessing Fulfil—for
https://acme.fulfil.io, the tenant is acme.Creating a Fulfil API key
1
Navigate to your Fulfil ERP main page by replacing with your subdomain:
https://{tenant}.fulfil.app/client/#/2
Click your username in the top right, then click Preferences.
3
Select Manage personal access tokens.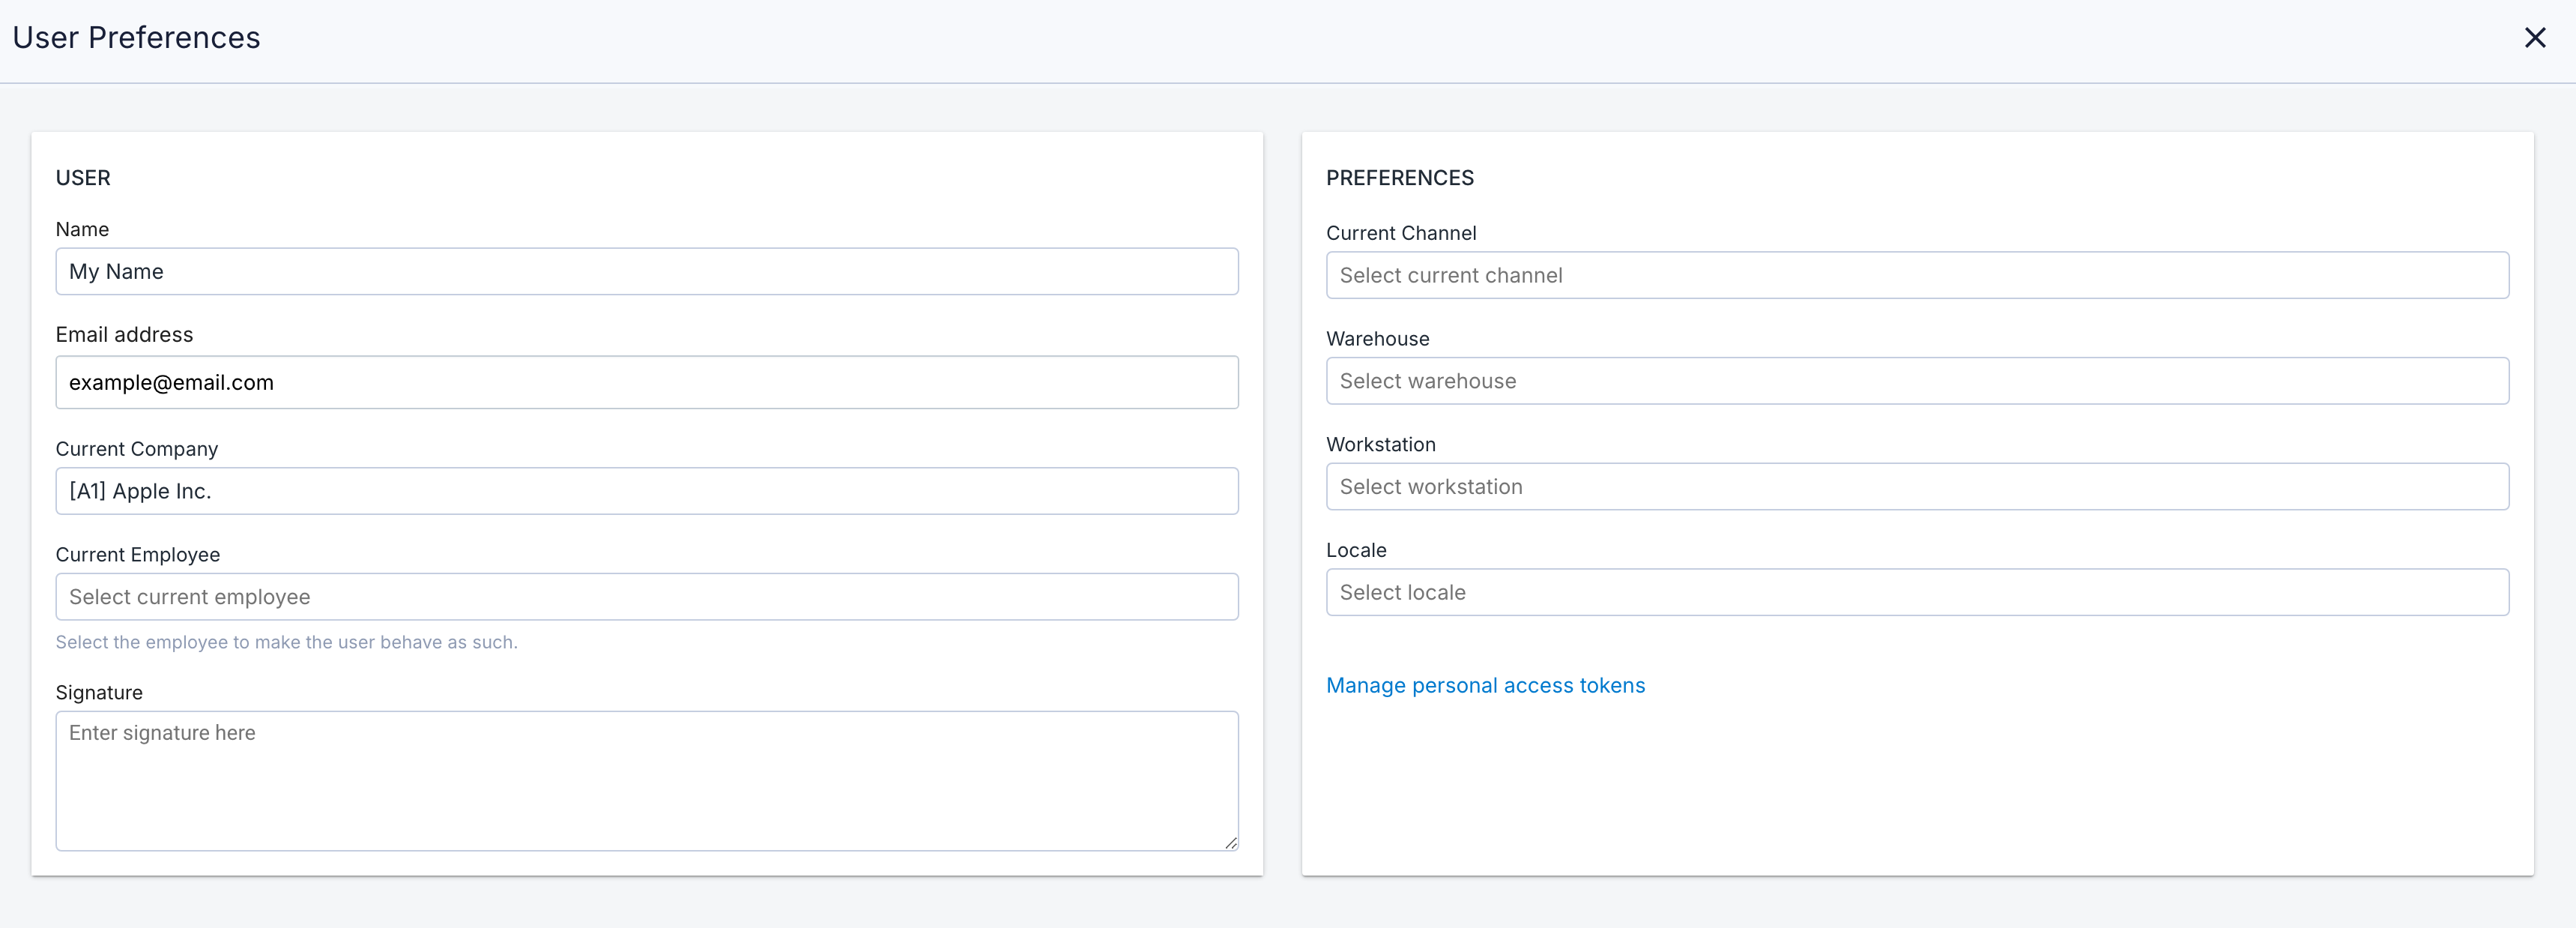
4
In the upper right, click Generate Personal access token.
5
Enter a description for the token and click Generate.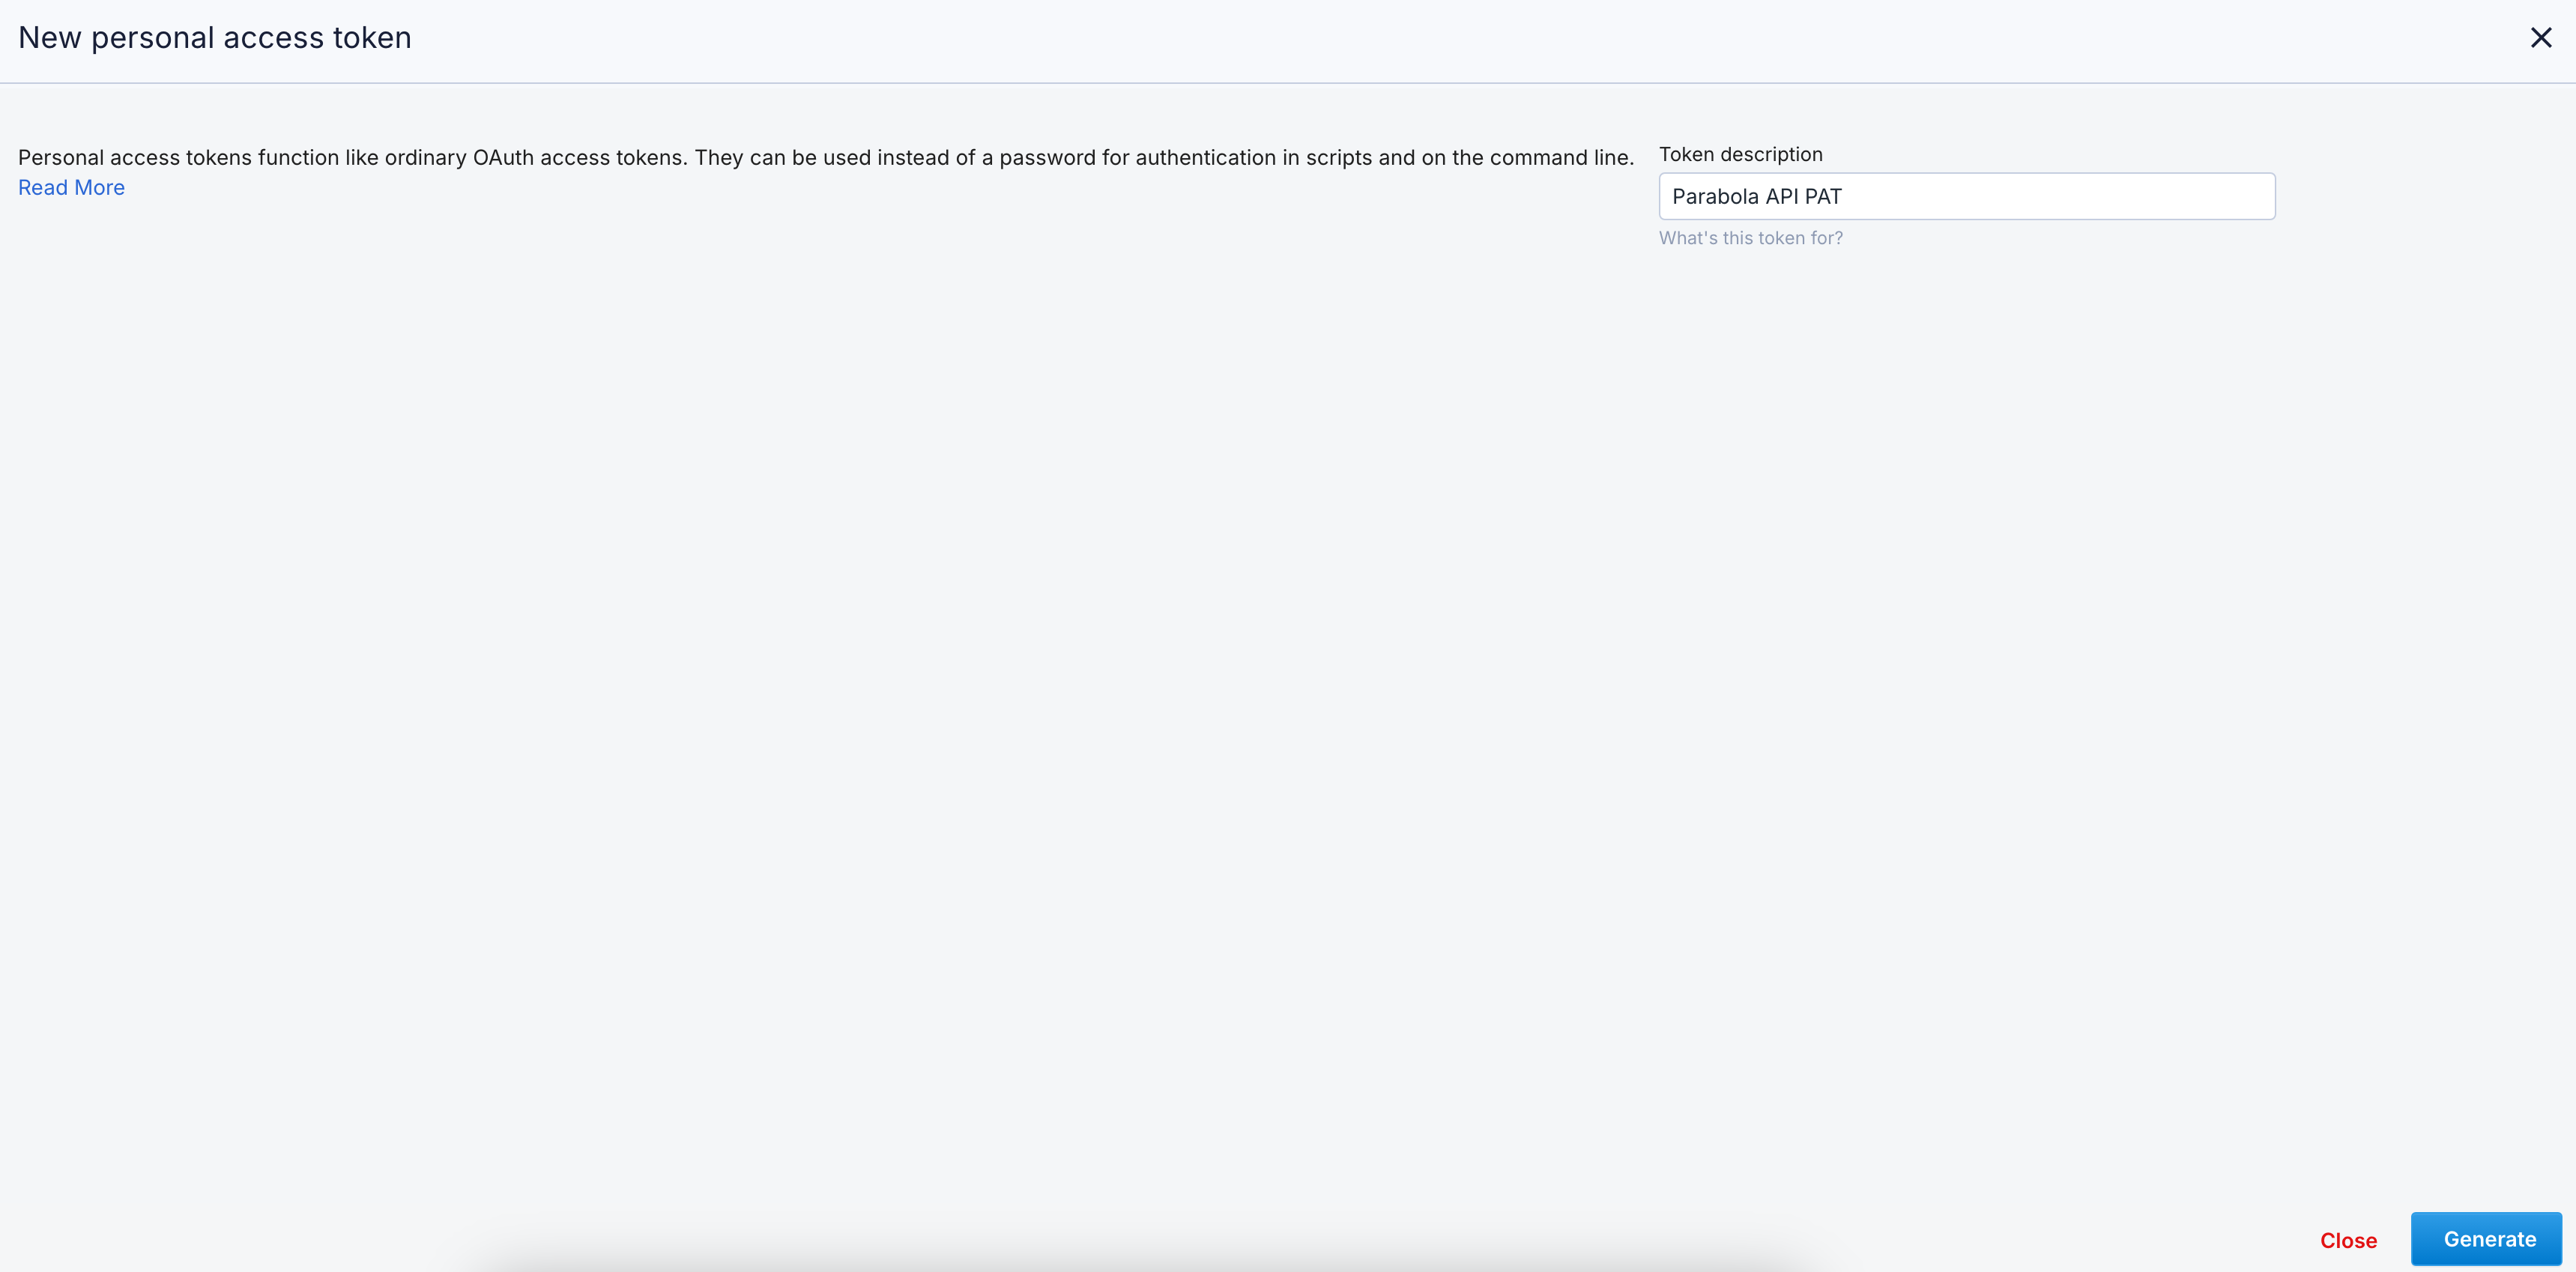
6
Copy the API key and store it somewhere safe—you won’t be able to see it again.
Available data
Using the Pull from Fulfil step, you can access a wide range of operational data from your ERP, including:- Sales Orders and Lines: Order headers and line-level details, including customers, products, quantities, prices, and fulfillment states.
- Products: Product master data, SKUs, pricing, and inventory attributes.
- Customers and Suppliers (Parties): Contact details, account information, and classifications for customers and vendors.
- Invoices: Sales and purchase invoices, including totals, taxes, and payment status.
- Shipments (Outbound and Internal): Shipment records with itemized contents, destinations, and fulfillment status.
- Stock Moves: Detailed inventory movement logs across warehouses and transactions.
- Purchase Orders and Lines: Order headers and line-level details, including suppliers, costs, and received quantities.
- Production BOMs: Bills of materials for manufactured products.
- EDI Documents: Transactional documents exchanged with trading partners.
- Automation Rules: Rules that drive workflow automation within Fulfil.
Selecting fields
Common use cases
- Reconcile sales orders across channels: Join Fulfil sales orders with order data from Shopify, Amazon Seller Central, and Walmart so finance can confirm accuracy before posting revenue.
- Audit shipping and 3PL invoices: Cross-reference carrier invoices against Fulfil shipment records, joining with rates from DHL, FedEx, UPS, or ShipStation to catch overcharges and billing discrepancies.
- Push invoices into accounting: Send Fulfil sales and purchase invoices to NetSuite or QuickBooks Online on a schedule for a clean monthly close without manual data entry.
- Monitor inventory and trigger restock alerts: Pull stock moves and inventory levels across warehouses, then send Slack alerts when key SKUs drop below thresholds or when warehouse-level anomalies appear.
- Track purchase orders and supplier performance: Join Fulfil POs with supplier acknowledgments and receipts to monitor lead times, on-time delivery, and outstanding orders, with reminders going to suppliers via email or Slack.
- Build cross-functional ops dashboards: Export reconciled Fulfil data to Google Drive or Smartsheet so finance, supply chain, and customer service all work from the same numbers.
Tips for using Parabola with Fulfil
- Set the tenant field correctly. It’s the subdomain from your Fulfil URL. Auth fails if this is missing or wrong, often without an obvious error.
- Filter by state or date in the step config. Pulling “all sales orders” on a multi-year ERP gets slow. Pull “sales orders updated in the last 7 days” instead, and let downstream logic handle the rest.
- Join Sales Orders with Sales Order Lines. Fulfil splits headers and lines across two endpoints, so most order-level reporting needs both. Same pattern applies to Purchase Orders, Invoices, and Shipments.
- Match cadence to use case. Hourly for ops alerts and dashboards, daily for reconciliations, weekly for valuation and supplier reviews.
- Use the Selecting Fields control (see video above) to reduce payload size on large endpoints like Stock Moves or Sales Order Lines. Only pull the columns you actually use downstream.
- Document your flows with step notes. Fulfil’s data model is dense, so naming what each step does helps the next person (or future-you) audit and maintain the flow.
FAQ
Does Parabola support real-time Fulfil events?
The Pull from Fulfil step is API-pull only. For closer-to-real-time updates, schedule your flow on a tight cadence (every 15–30 minutes) or trigger it from another service using Parabola’s webhook trigger.Can I push data back into Fulfil?
The Pull from Fulfil step is read-only. To write back to Fulfil (for example, creating a sales order or updating a stock move), use a generic Send to an API step pointed at the relevant Fulfil endpoint with your API key.Where do I find my tenant name?
It’s the subdomain in your Fulfil URL. If you log in athttps://acme.fulfil.io, your tenant is acme.
Can I pull custom fields from Fulfil?
Yes. Fulfil’s API exposes custom fields on supported endpoints. Use the Selecting Fields control in the step to add them to the pull, or hit the underlying REST API via a generic Pull from an API step if you need more flexibility.With Fulfil and Parabola connected, the reports and reconciliations that used to live in spreadsheets run themselves, with clean data flowing into the systems where your team actually works.