Select columns to reformat
First, select the columns that contain dates to format. Each rule card can be applied to any number of columns. The formats defined in the rule card will be used for all columns targeted by that rule.Define the starting format
Use the first formatting menu to define the date format of the column(s) that you are targeting. Use a preset, build a custom format using the ‘Insert element’ dropdown within the format field, or click ‘Auto-detect format’ to use AI to find the correct starting format. When creating a format, wrap any non-formatting character in single quotes. For example, ‘2024-01-01T10:30:59’ should be represented as ‘yyyy-M-d’T’H:m:s’ with the ‘T’ character in single quotes. Punctuation does not need to be wrapped in single quotes, just letters or words that are not used to format. If the format you have entered is valid, you will see an example date using that format below the formatting field.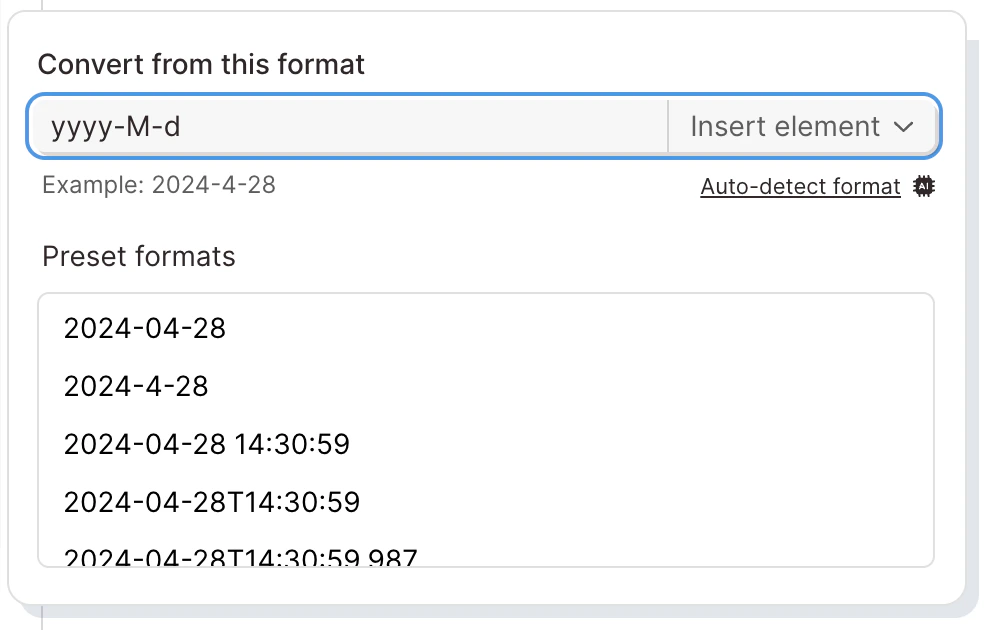
Define the new format
Use the second formatting menu to define the new date format to convert to. Use a preset or build a custom format using the ‘Insert element’ dropdown within the format field. When creating a format, wrap any non-formatting character in single quotes. For example, ‘2024-01-01T10:30:59’ should be represented as ‘yyyy-M-d’T’H:m:s’ with the ‘T’ character in single quotes. Punctuation does not need to be wrapped in single quotes, just letters or words that are not used to format. If the format you have entered is valid, you will see an example date using that format below the formatting field.Formatting Pattern Reference
Date and time formats are based on the pattern strings from Java DateTimeFormatter. Date Format Table| Format | Pattern | Example |
|---|---|---|
| Year with two digits | yy | 24 |
| Year with four digits | yyyy | 2024 |
| Month | M | 8, 08 |
| Month with leading zero | MM | 08 |
| Month as abbreviation | MMM | Aug |
| Month as full name | MMMM | August |
| First letter of the month | MMMMM | A |
| Quarter | Q | 3, 03 |
| Quarter with leading zero | 03 | |
| Quarter with leading Q | QQQ | Q3 |
| Quarter ordinal | QQQQ | 3rd quarter |
| Day of year without leading zero | D | 68 |
| Day of year with leading zeros | DD | 068 |
| Day of month | d | 5, 05 |
| Day of month with leading zero | dd | 05 |
| Day as abbreviation | E | Tue |
| Day as full name | EEEE | Tuesday |
| First letter of the day | EEEEE | T |
| Day of week without leading zero | e | 2 |
| Day of week with leading zero | ee | 02 |
| 24-hour clock (0-23 or 00-23) | H | 9 |
| 24-hour clock with leading zero (00-23) | HH | 09 |
| 12-hour clock (1-12 or 01-12) | h | 9 |
| 12-hour clock with leading zero (01-12) | hh | 09 |
| 24-hour clock without leading zero (1-24) | k | 9 |
| Upper-case AM / PM | a | AM |
| Minute | m | 2, 02 |
| Minute with leading zero | mm | 02 |
| Second | s | 2, 02 |
| Second with leading zero | ss | 02 |
| Fractional second | S | .9 |
| Fractional second | SS | .98 |
| Fractional second | SSS | .987 |
| Fractional second | SSSS | .9875 |
| Unix timestamp (seconds) | unix_seconds | 1691363945 |
| Unix timestamp (milliseconds) | unix_milliseconds | 1691363945000 |
| Time-zone ID | VV | America/Los_Angeles |
| Time-zone name | zz | PST |
| Zone offset “Z” for zero | X | -07 |
| Zone offset “Z” for zero | XX | -0700 |
| Zone offset “Z” for zero | XXX | -07:00 |
| Zone offset | x | -07 |
| Zone offset | xx | -0700 |
| Zone offset | xxx | -07:00 |
Timezone conversion
To the left of the format fields are icons that represent timezones. The default settings will not convert timezone. Use the timezone menus to define the starting timezone and the new timezone. If a timezone token is provided in the starting format, Parabola will read the timezone directly from the input dates.Date rounding
Use the date rounding field to round the dates during the formatting process to a specific date-time precision. Use the menu to round to the start or the end of a year, month, week, day, hour, minute, or second. When using the week option, use the additional field to define the starting day of the week.Rounding examples:
Round to the end of the month- Input: February 15, 2024
- Output: February 28, 2024
- Input: Wednesday June 5, 2024
- Output: Tuesday June 4, 2024
- Input: Wednesday June 5, 2024
- Output: Wednesday June 5, 2024
Creating new columns
Each rule can either format the dates in their respective input columns, or create a new column for each new format to be placed in. Each column targeted by a rule can be formatting into a new separate column.Failure settings
If an input date format cannot be formatted, use the failure settings to define what the step does.- Fail the entire step run
- Keep the date in its original format (default)
- Convert the date to a blank
- Fallback to this value…
Columns with multiple formats
If you have a column with multiple formats in the same column, use multiple rule cards to target each format in that column. When taking this approach, be sure to keep your failure setting set to ‘Keep the date in its original format’Getting the week number
If want to get the week-of-the-year number for a date, Custom Transforms are able to calculate thatFAQ
My dates aren't converting correctly. What should I check first?
My dates aren't converting correctly. What should I check first?
Confirm the starting format matches the actual format of your input data exactly — including casing (capital
M for month vs. lowercase m for minute). Use the example date preview below the format field to verify, or click ‘Auto-detect format’. If a column has multiple date formats mixed together, add multiple rule cards (one per format) and keep the failure setting on ‘Keep the date in its original format’.Why is my date showing up as a number?
Why is my date showing up as a number?
That number is a Unix timestamp. Either set the starting format to
unix_seconds or unix_milliseconds, or change the new format to a human-readable pattern like yyyy-MM-dd.How do I keep dates from breaking downstream Filter rows or Compare dates steps?
How do I keep dates from breaking downstream Filter rows or Compare dates steps?
Convert dates to
yyyy-MM-dd HH:mm:ss (lexicographical) or unix_seconds before sending them into Filter rows or Compare dates. These formats are the most reliable.