Pull from UPS
The Pull from UPS step pulls data from the UPS Tracking API. You can pull shipments, packages, scan activities, milestones, and proof-of-delivery details by inquiry number or reference number, then join with order and invoice data to drive reporting.How to authenticate
UPS uses OAuth 2.0 Client Credentials for API access. You’ll create an app in the UPS Developer Portal, then paste the resulting Client ID and Client Secret into Parabola.1
Go to the UPS Developer Portal and register an app (full instructions below).
2
Locate your Client ID and Client Secret on the app info page.
3
In Parabola, add a Pull from UPS step and open its settings:
- Enter your Client ID and Client Secret.
- Set
x-merchant-idto your 6-digit UPS account number. - Parabola handles the token request to UPS automatically.
4
Once authenticated, pull tracking data by inquiry number or by reference number tied to your shipments.
Creating an application in the UPS Developer Portal
1
Go to the UPS Developer Portal and click Login to access your UPS account.
2
Click Create Application to start a new app and generate credentials.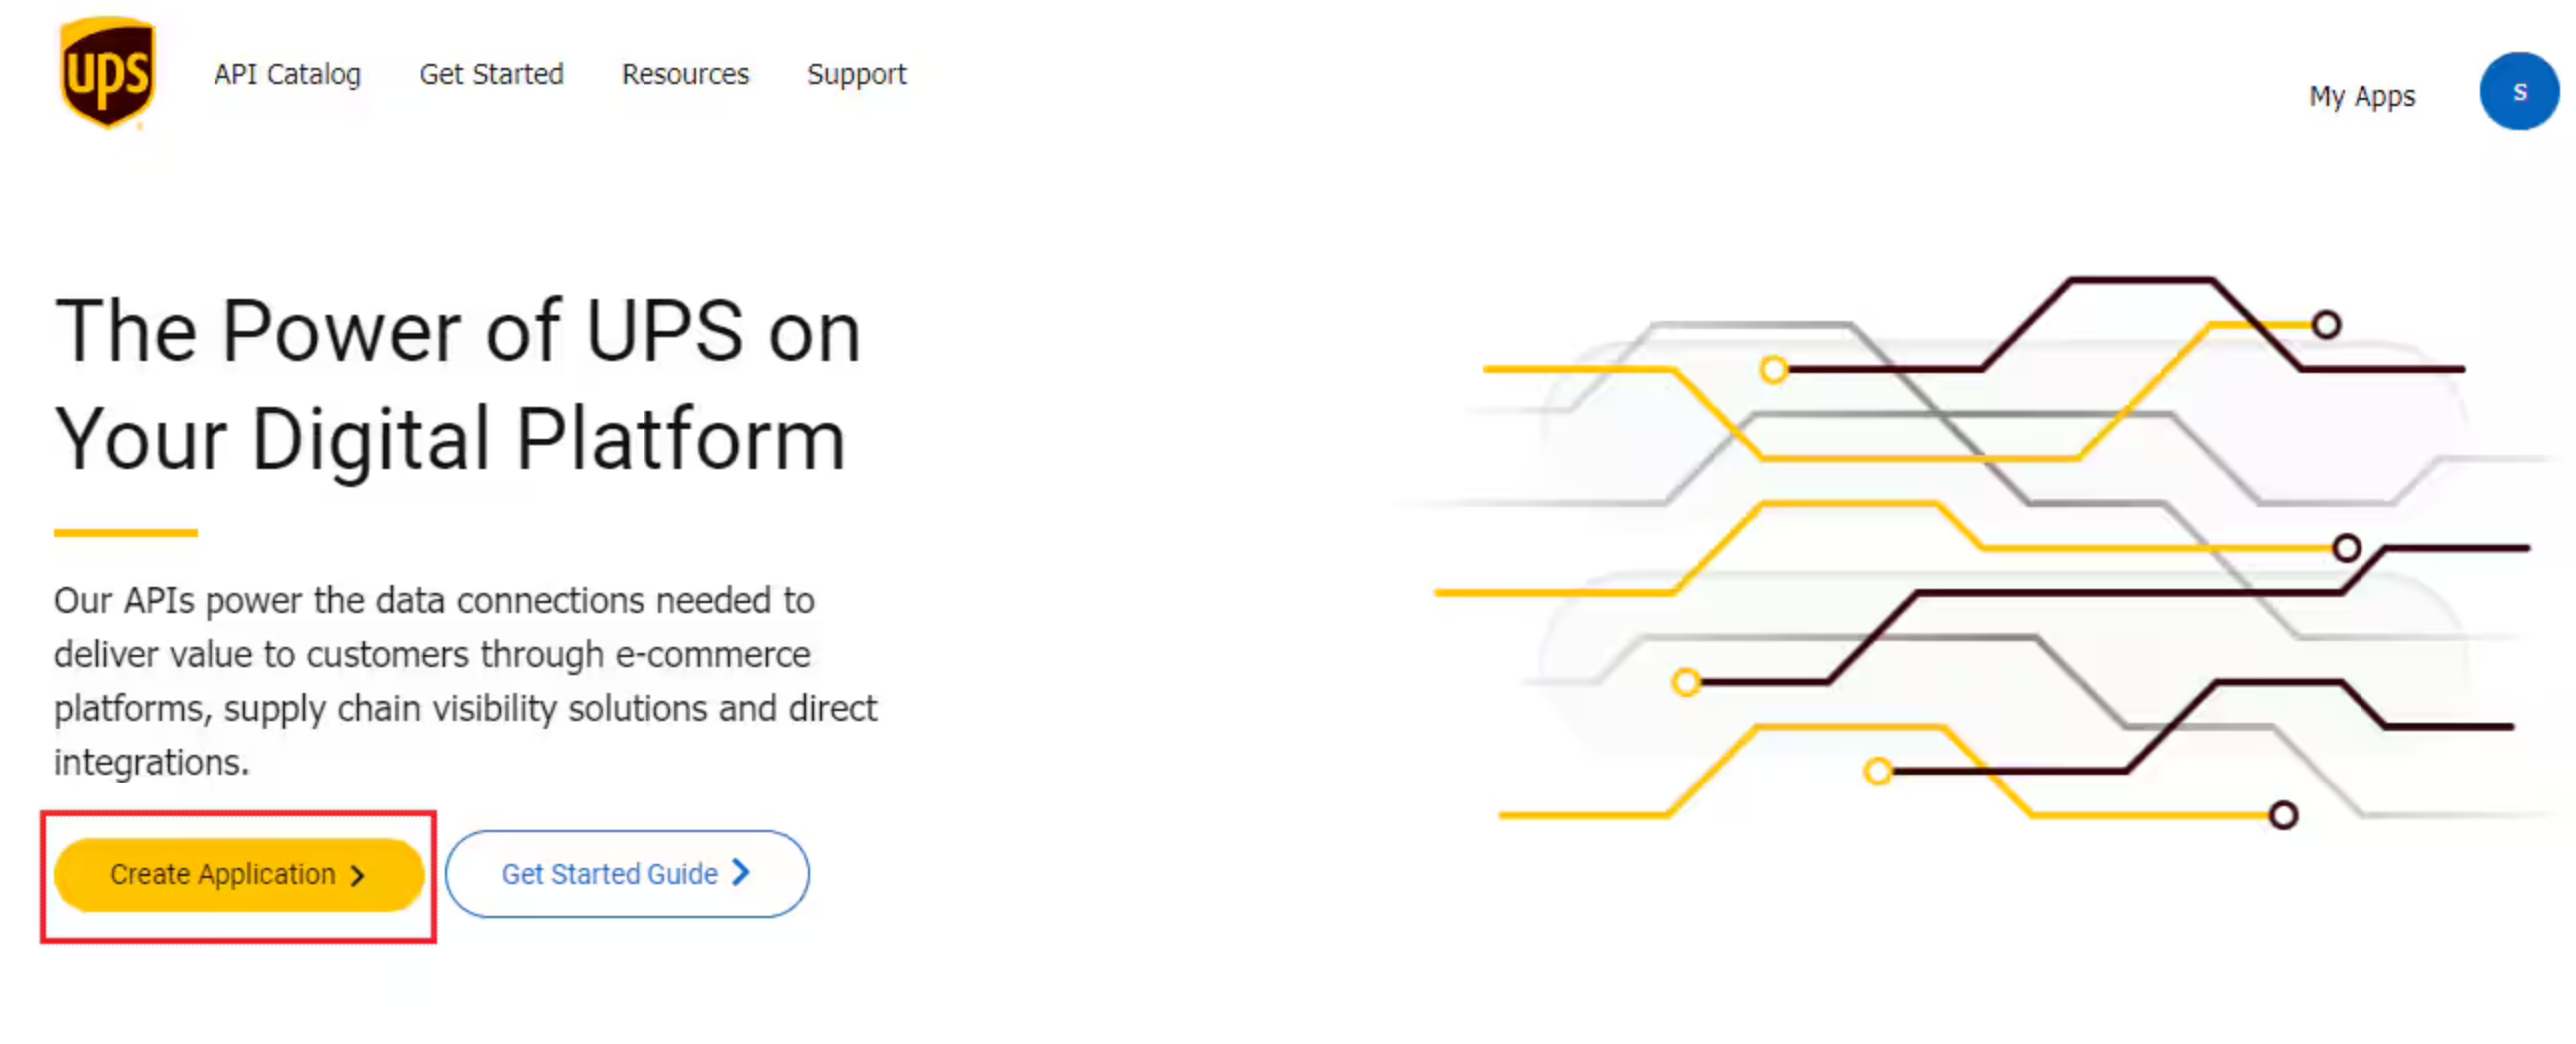
3
Select your use case, shipper account, and accept the agreement.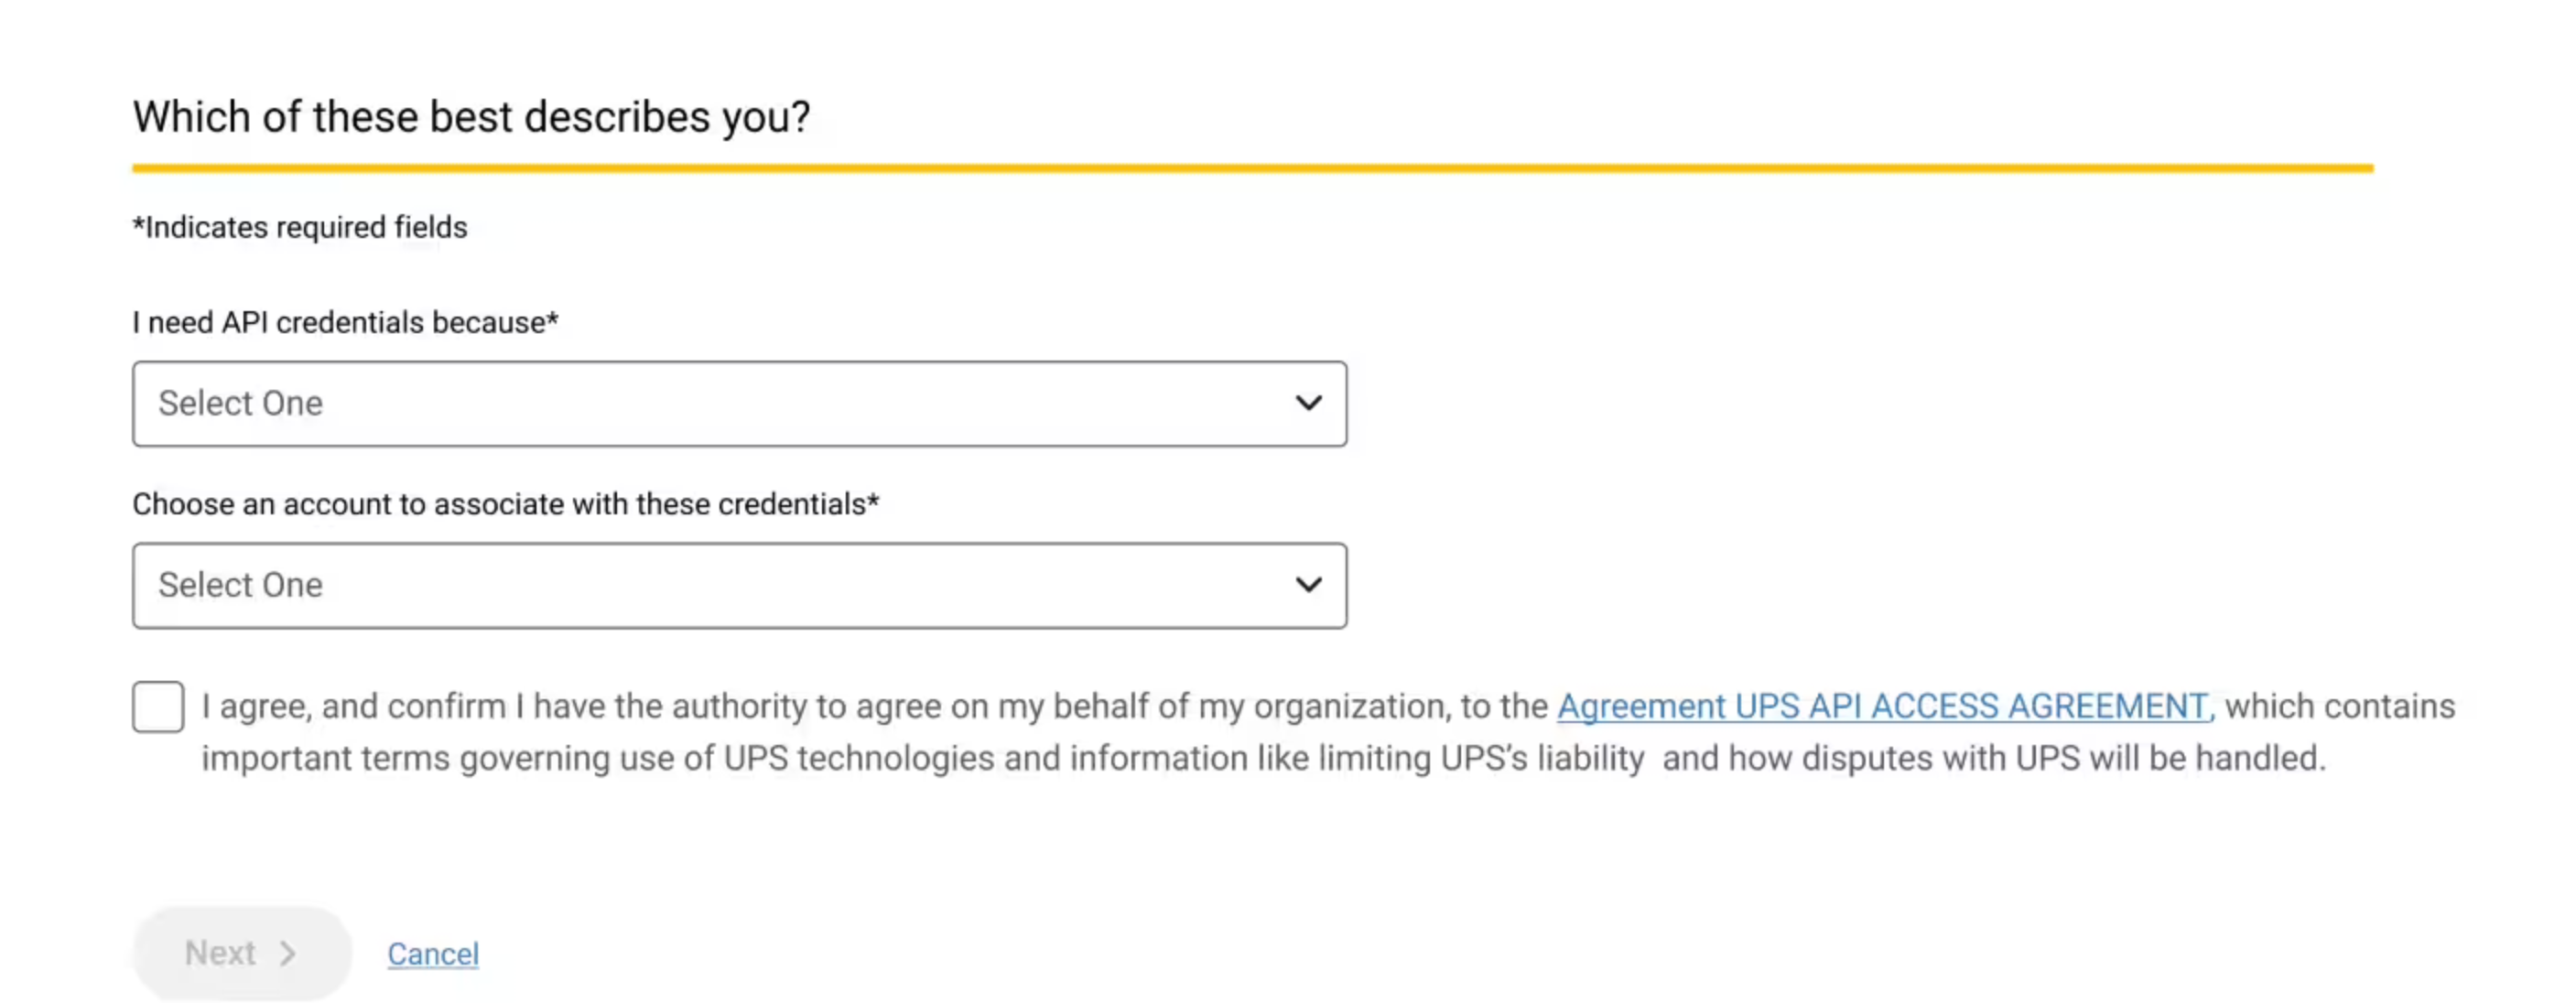
4
Enter your contact information.
5
Define your application details: name, billing account number, and the products (APIs) you want enabled.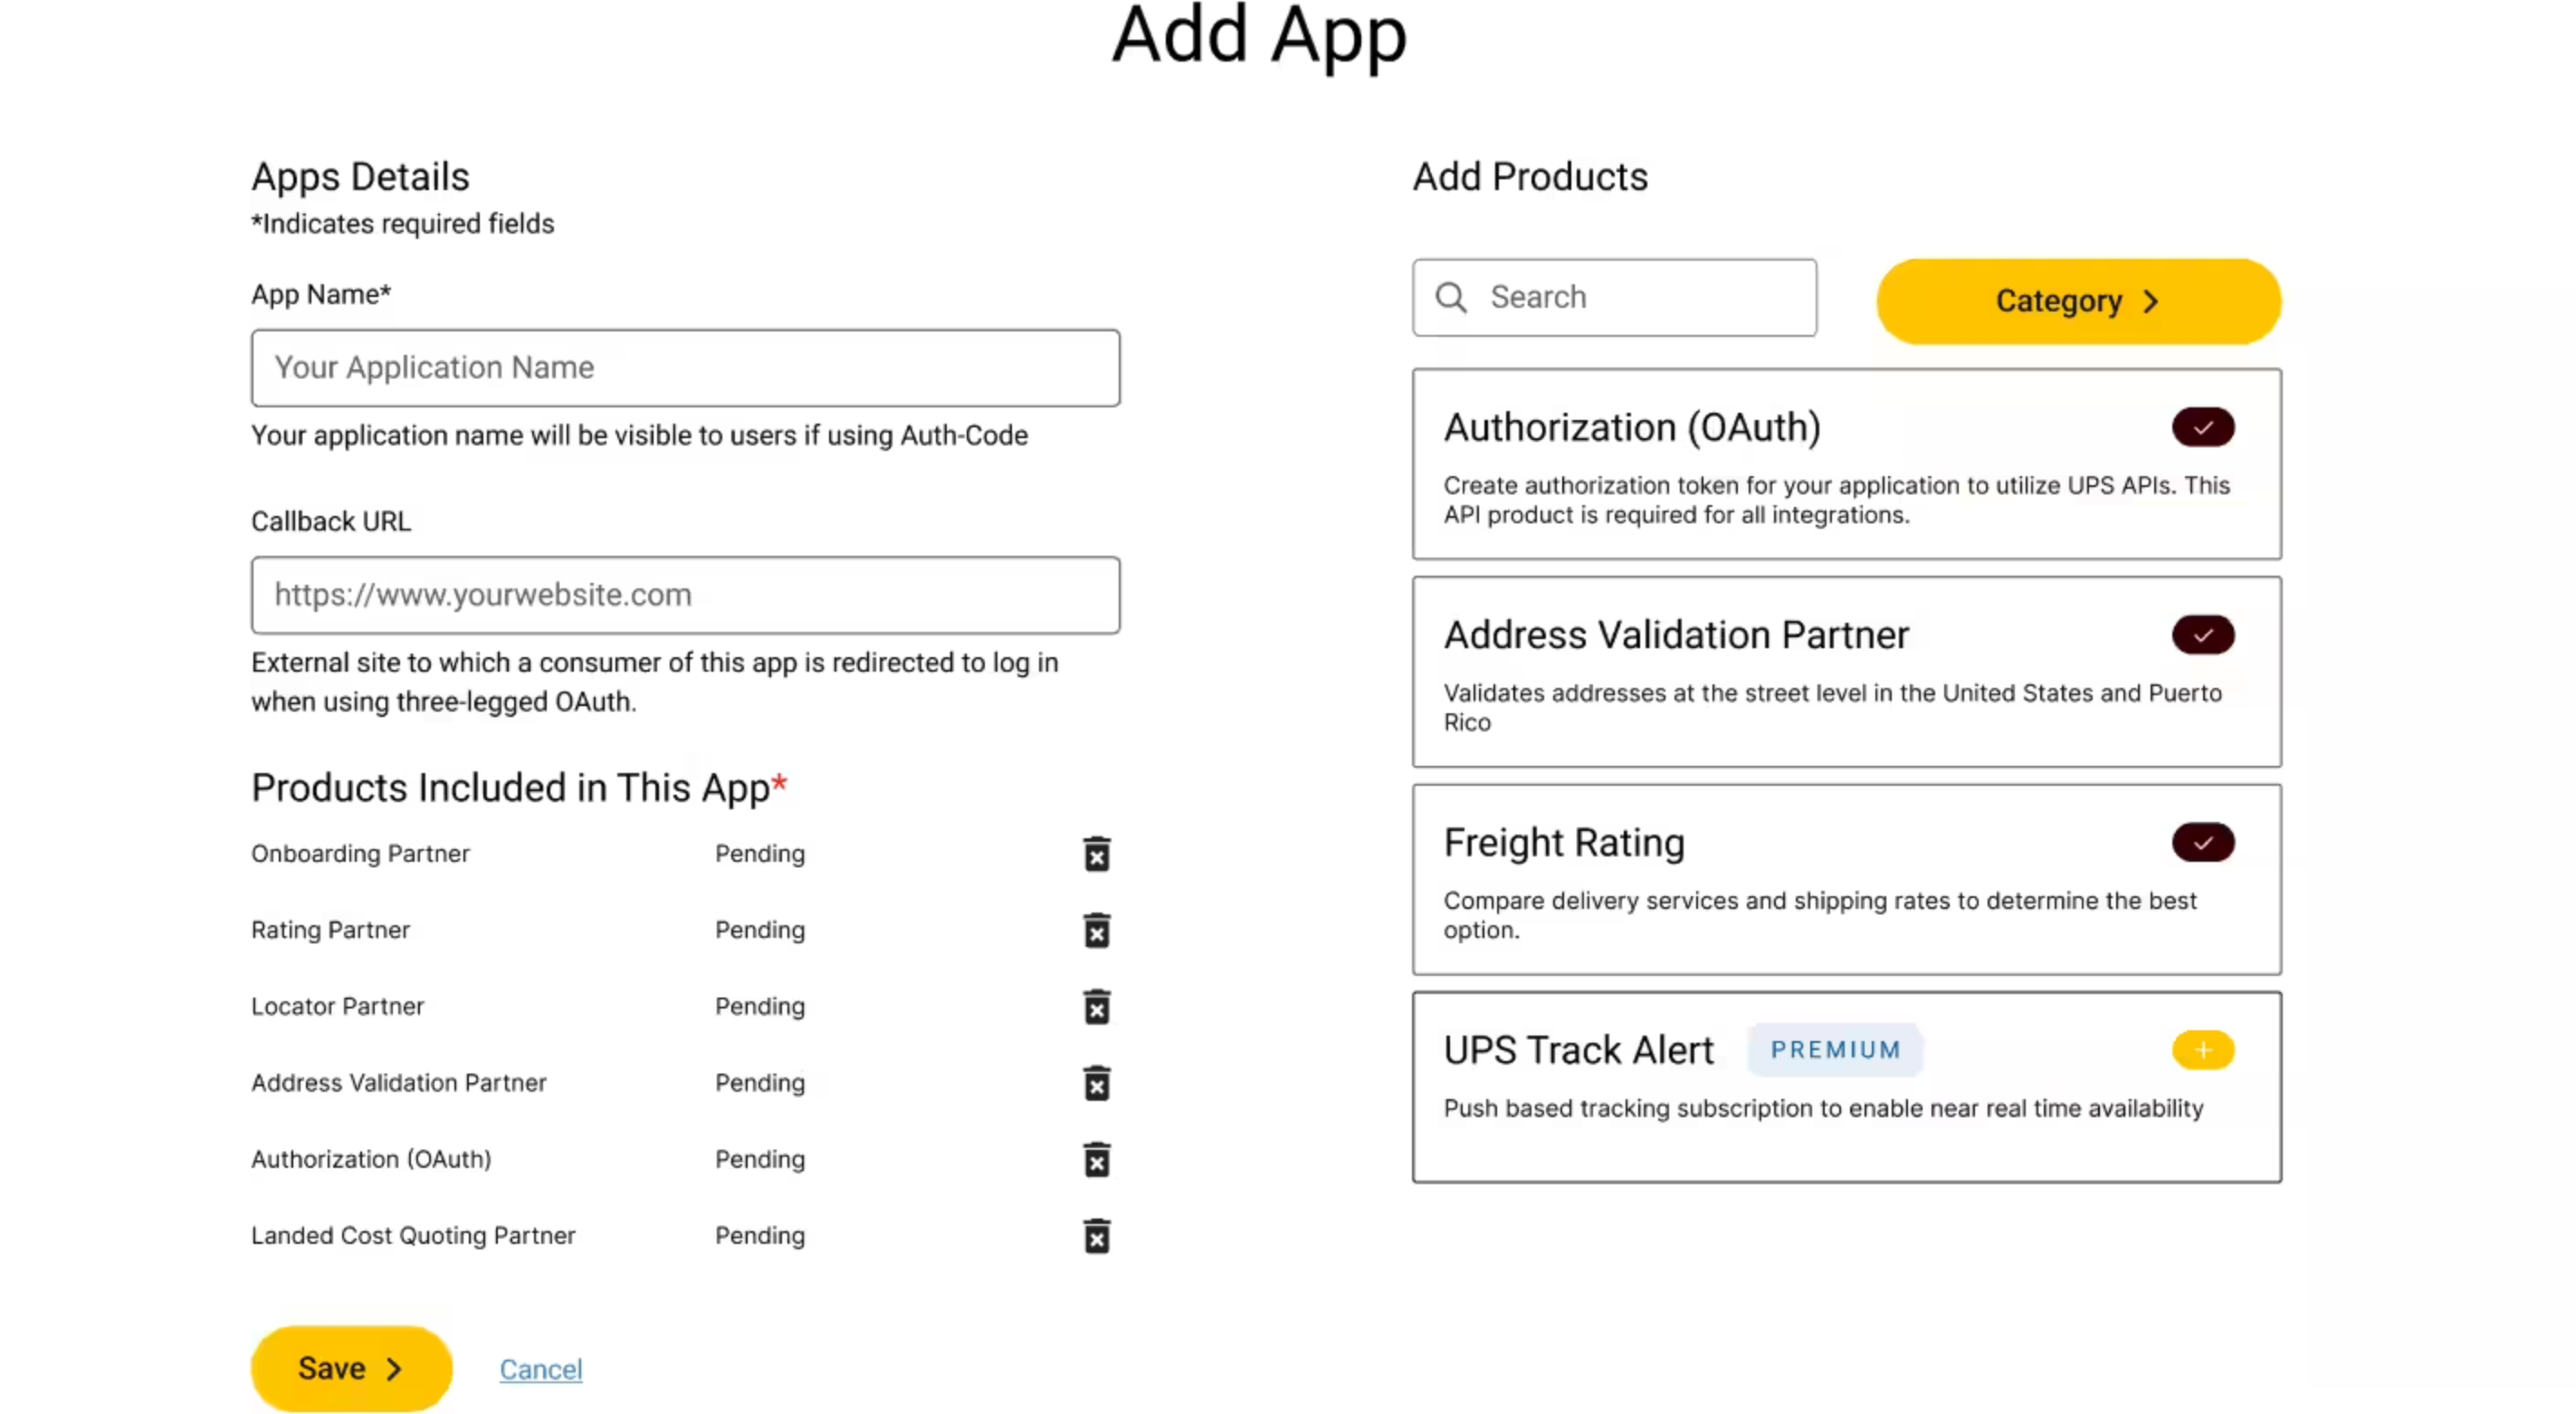
6
Save the application. UPS generates your Client ID and Client Secret.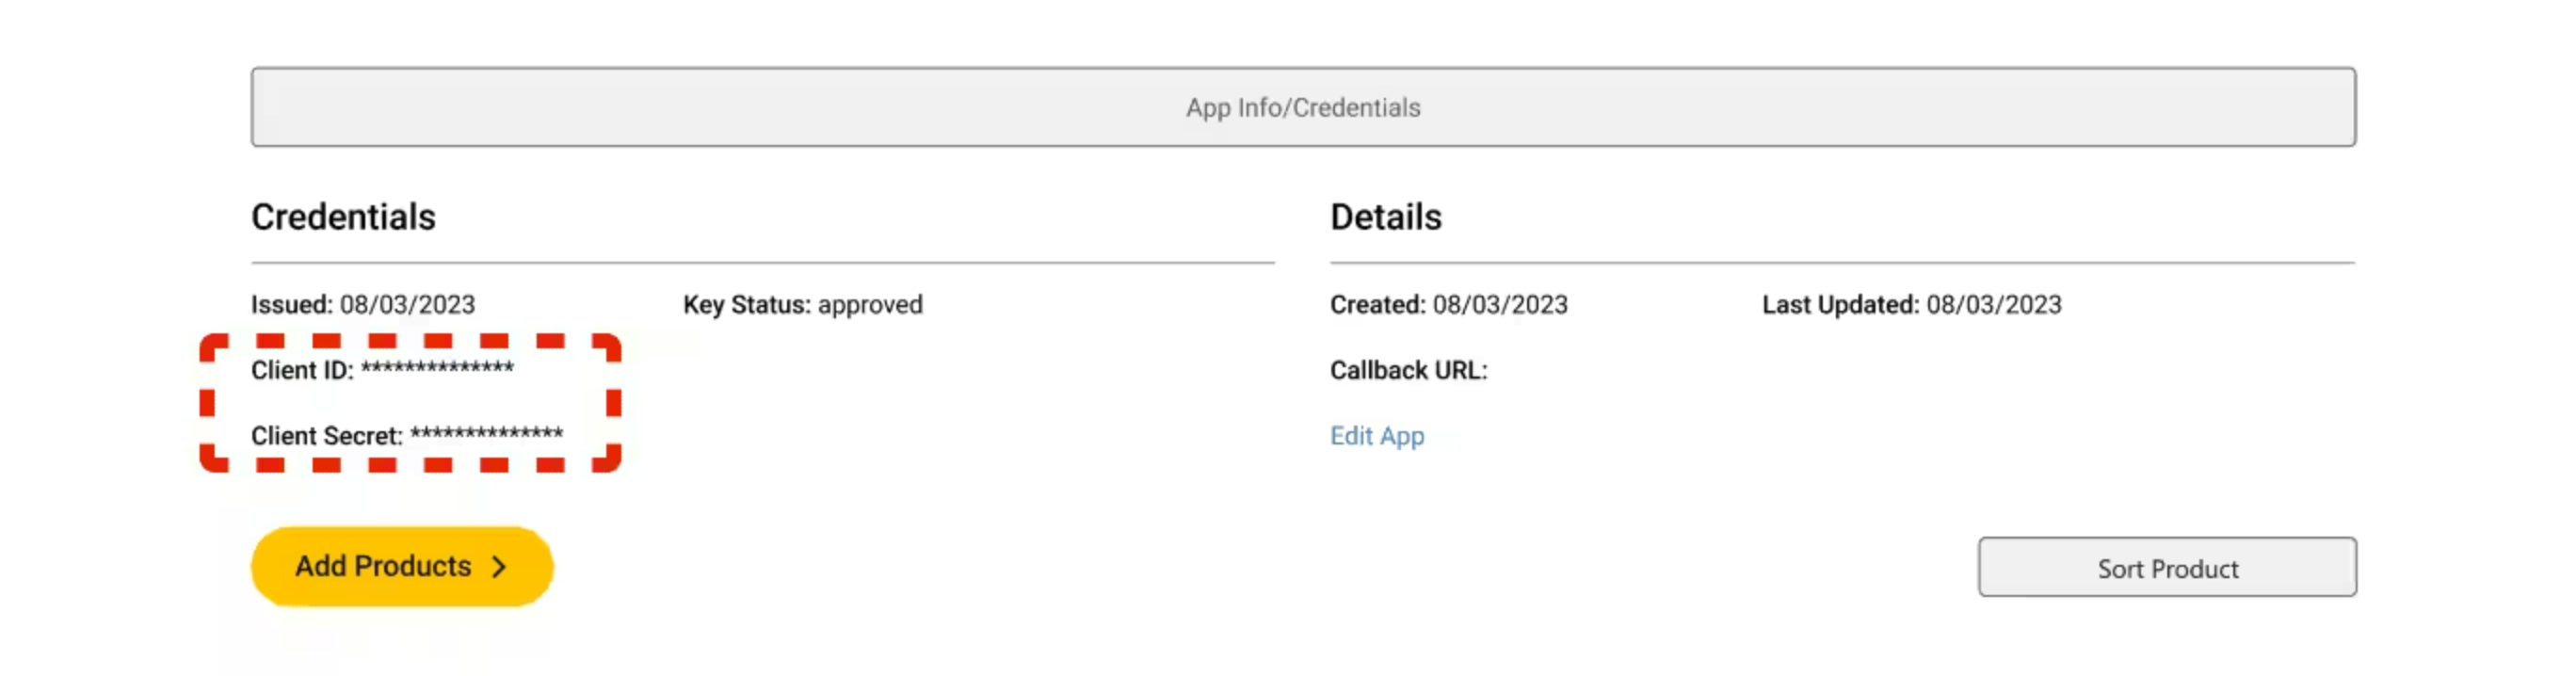
Available data
The UPS Tracking API exposes the full lifecycle of a parcel:- Shipments — overview of each tracked shipment, including inquiry numbers, reference numbers, and the user relationship to the shipment.
- Packages — package-level detail with tracking number, weight, dimensions, and delivery details.
- Activities — historical scan events with timestamps and locations, the same data behind the public tracking page.
- Status — current status and a simplified text description (
In Transit,Out for Delivery,Delivered,Exception). - Milestones — key checkpoints in the package’s journey for SLA reporting.
- Delivery information — proof-of-delivery data including delivery location, signature image, and confirmation timestamps.
- Addresses — origin, destination, and final delivery address for each shipment.
- Payment information — collect-on-delivery and other payment records tied to the shipment.
- Service details — the UPS service used (UPS Ground, UPS Next Day Air, UPS Worldwide Express).
Common use cases
- Reconcile delivery confirmations to orders: Join UPS delivery events with orders from Shopify, Amazon Seller Central, or NetSuite to mark items delivered and trigger downstream workflows like review requests.
- Audit UPS invoices: Cross-check UPS shipment records against billing files to catch overcharges, surcharges, and missing tracking numbers, with summary output going to Google Drive or Smartsheet for finance.
- Build SLA and transit-time reports: Roll up UPS milestones and timestamps by service level, zone, and lane to measure on-time rates, average transit days, and exceptions for QBR-ready scorecards.
- Track delayed and exception shipments: Filter UPS activities to Exception or stuck-in-transit packages and post a Slack message so CX can reach out before the customer does.
- Combine UPS with other carriers: Pull tracking from UPS alongside FedEx, DHL, USPS via EasyPost, and AfterShip for one cross-carrier delivery view.
- Push milestones into your CRM or ERP: Sync “Out for Delivery” and “Delivered” events into HubSpot, Salesforce, or your warehouse system so internal dashboards reflect live UPS status.
Tips for using Parabola with UPS
- Use the smallest reference list that works. The Tracking API responds faster when you pull by a focused set of inquiry or reference numbers. Pull only the shipments you actually need.
- Filter to active shipments. Once a package is delivered, you don’t need to keep pulling it. Add a Filter rows step on status so each run focuses on packages still in motion.
- Use proof-of-delivery for high-value orders. The signature and POD image come back on the delivery information endpoint, useful for resolving “didn’t receive it” disputes.
- Pair UPS with order data for milestone alerts. UPS knows when a package is out for delivery; your OMS knows whose order it is. Joining the two lets you send the right alert to the right customer or internal team.
- Match cadence to use case. Every 15–30 minutes for active CX dashboards, hourly for ops monitoring, daily for SLA reporting, weekly for invoice audits.
- Rotate the email on the app holder. Use a group inbox for the UPS Developer account so you don’t lose access to the app when one person leaves.
FAQ
Why am I getting authentication errors?
The most common causes are a wrongx-merchant-id (it must be your 6-digit UPS account number, not your developer account number), missing API products on the app (enable Tracking under Add Products), or a Callback URL that doesn’t match https://parabola.io/api/steps/generic_api/callback.
Does UPS support webhooks into Parabola?
The native step is API-pull only. For event-driven flows, schedule on a tight cadence or set up a UPS Quantum View notification feed and forward it to Parabola’s webhook trigger.Can I create UPS shipments or buy labels from Parabola?
The native step covers tracking and visibility. To create shipments or buy labels, use a generic Send to an API step pointed at the relevant UPS API (Shipping, Rating) with the same OAuth credentials, or route shipments through EasyPost for multi-carrier label buying.How do I pull tracking for shipments not yet in my UPS account?
The Tracking API works for any UPS tracking number you have permission to see. Pass the tracking numbers as inquiry values, regardless of which UPS account purchased the label.With UPS and Parabola connected, the manual exception list, the weekly SLA deck, and the monthly invoice audit all run themselves, with output landing in the tools where your ops, finance, and CX teams actually work.