Select columns
This step is now part of the Edit columns step. If you are using this step in an older Flow, it will continue to work but will not be available for new Flows.
Input/output
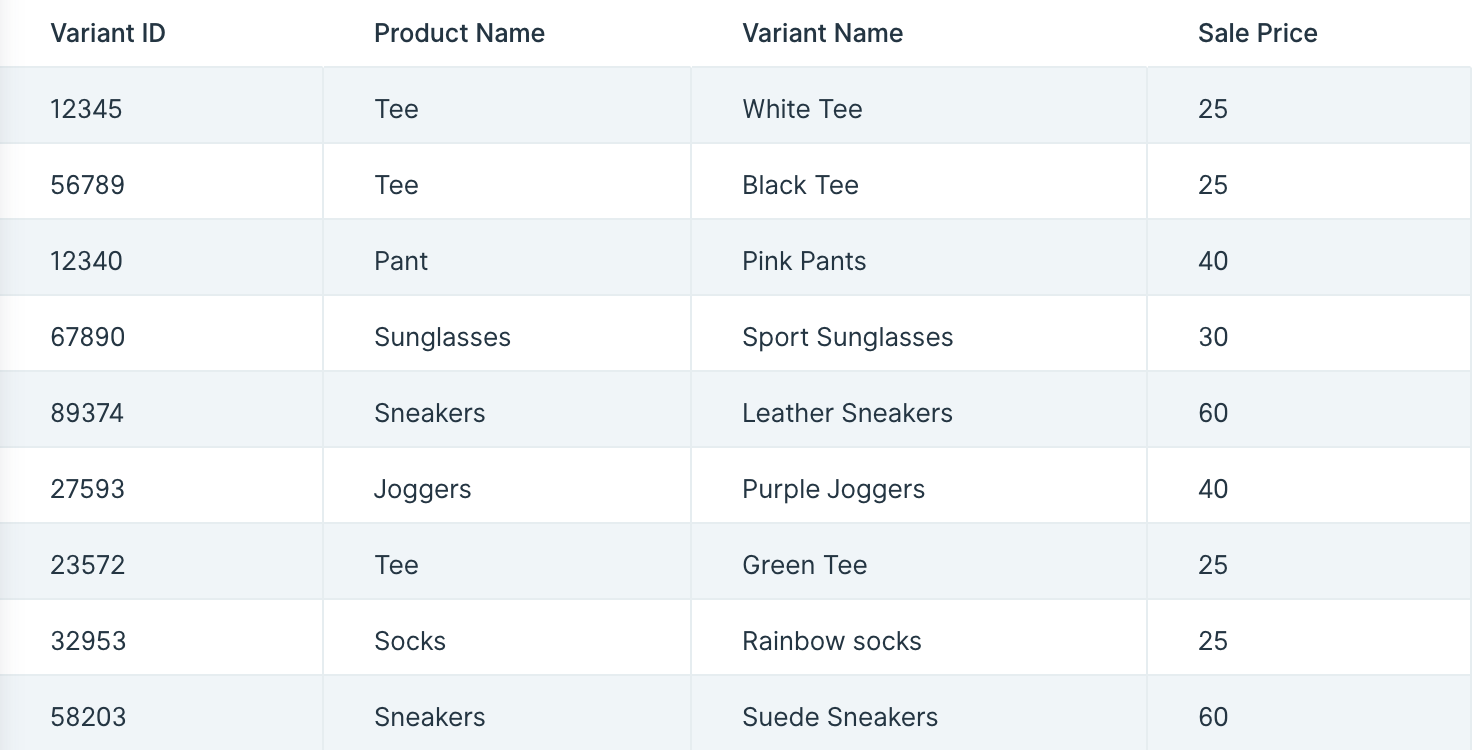
In our input data below, there are four columns: "Variant ID", "Product Name", "Variant Name", and "Sale Price".

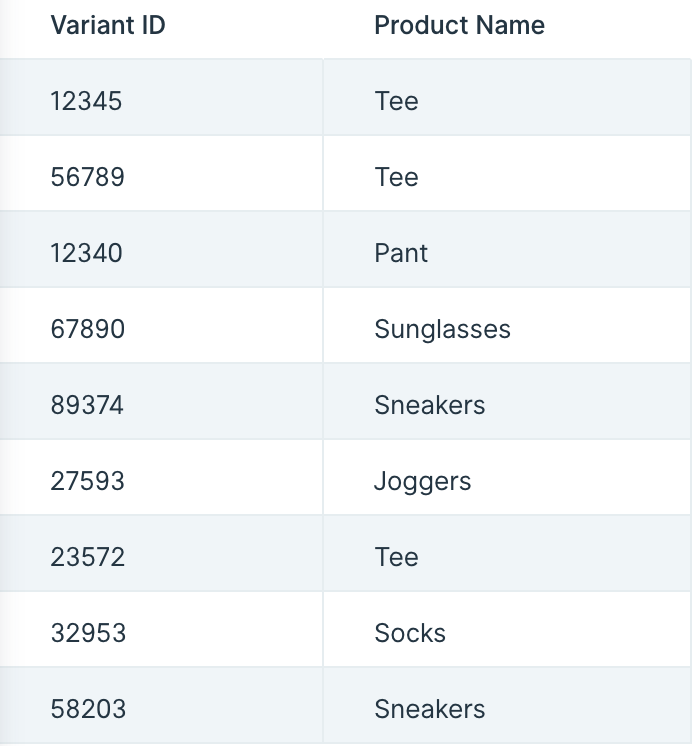
After connecting our data into this step, it produces an output of the two columns selected to keep: "Variant ID" and "Product Name".

Default settings
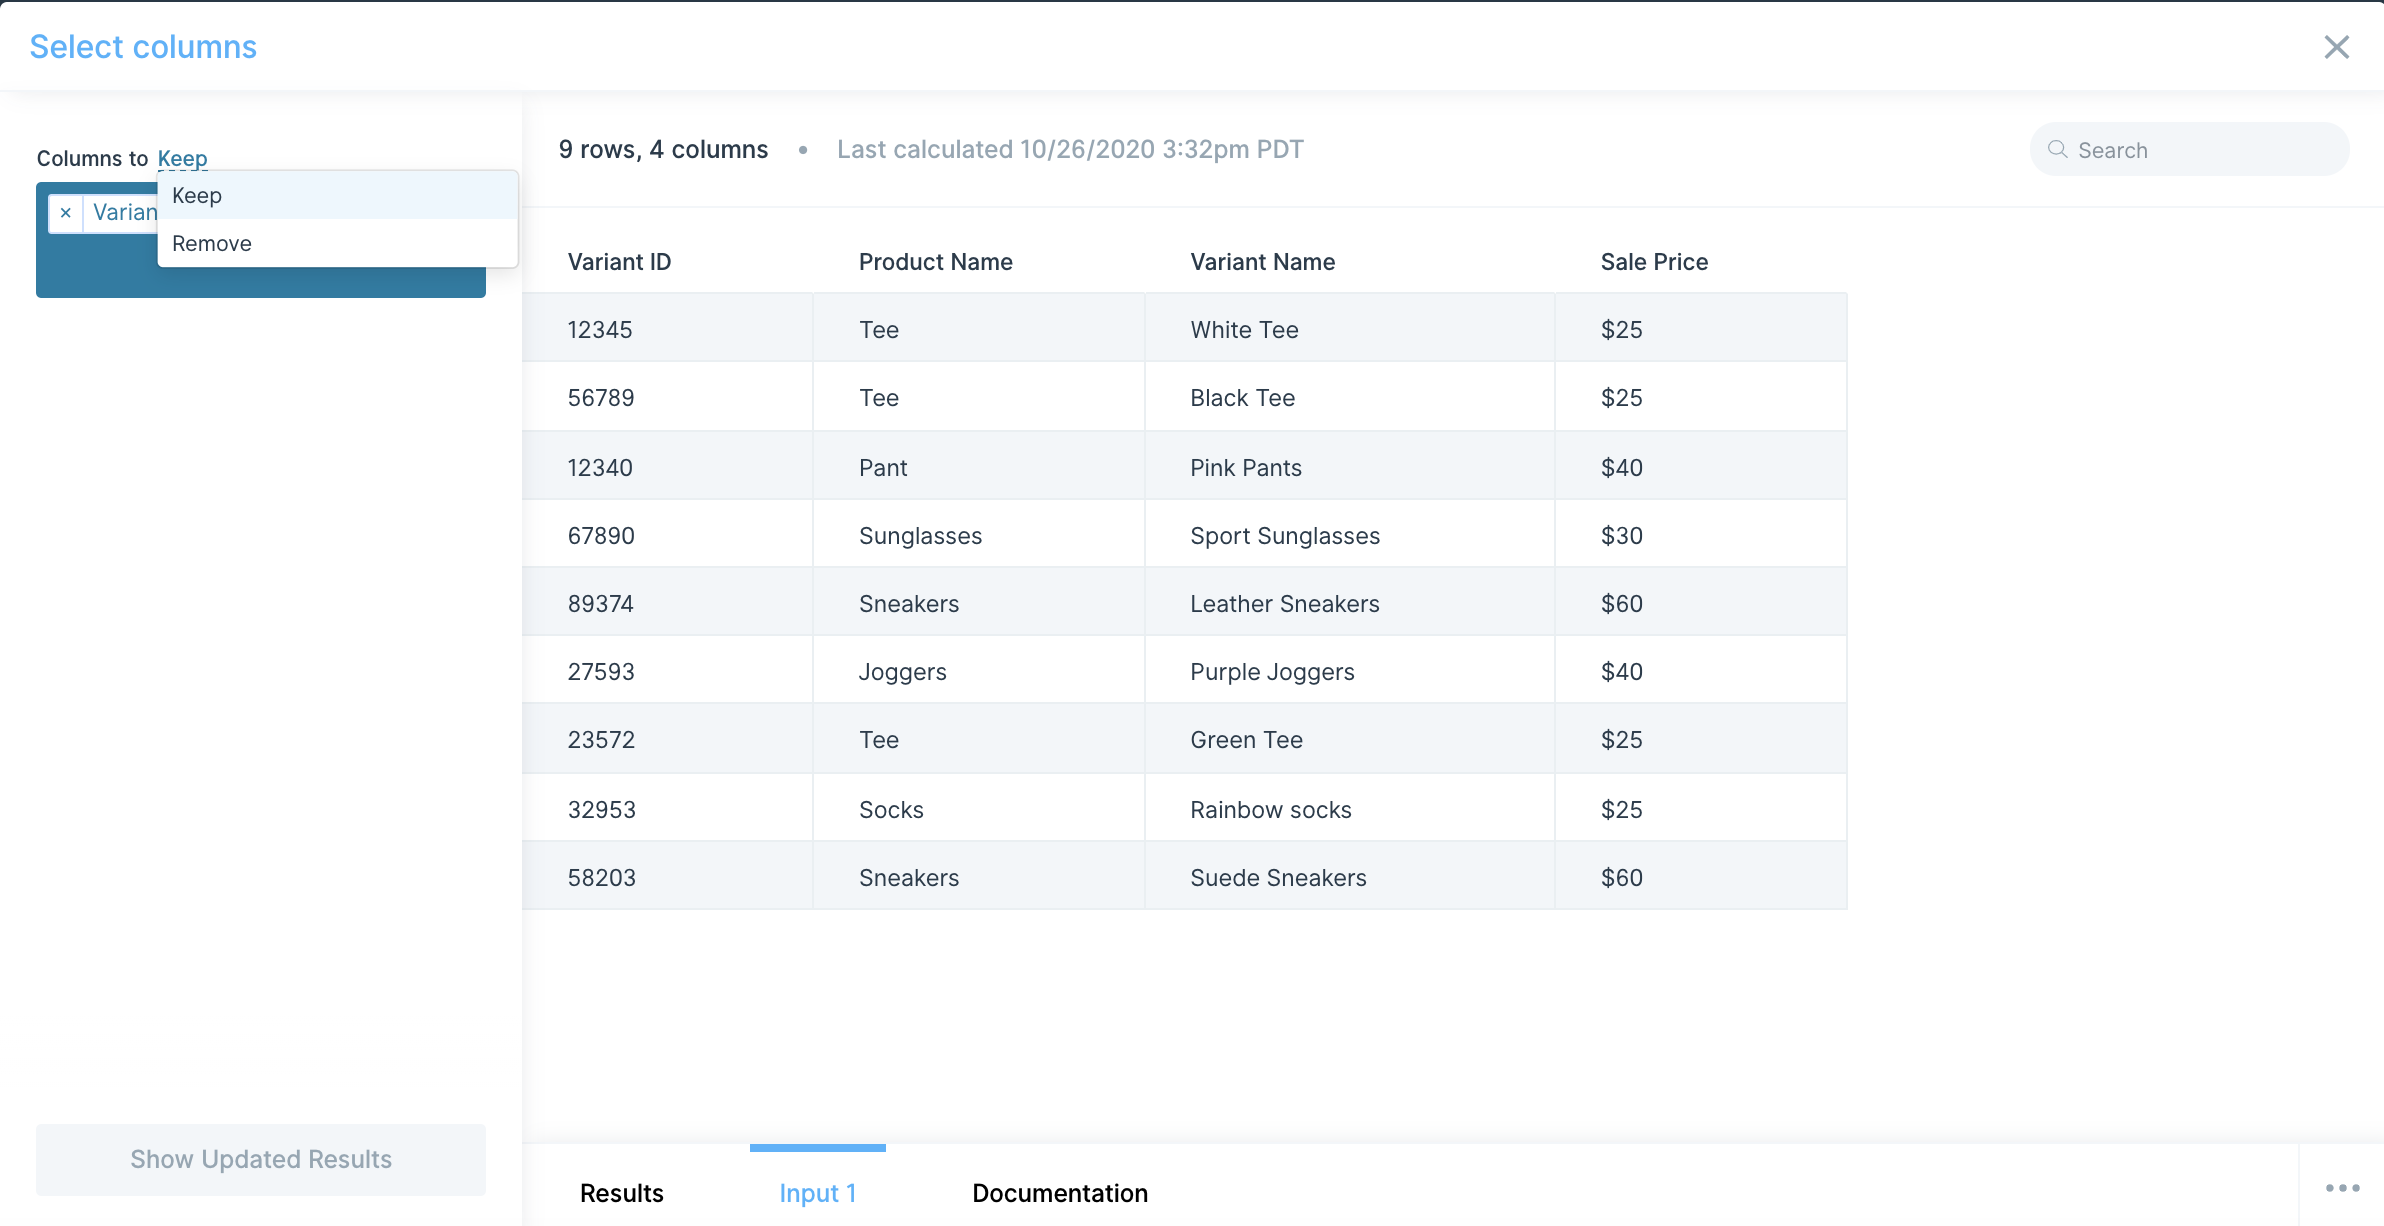
When you first connect your data into the Select columns step, it will auto-select to Keep instead of Remove columns. It will also default to keeping your first two left-side appearing columns in a table.
Custom settings
To customize these settings, first decide whether you'd like to keep or Remove columns. We generally recommend selecting the option with fewer columns to select, since this will save you time when finalizing the step's settings.

After this, you'll then customize the column selection. Clicking on the blue dropdown box brings up a list of columns. You can select columns directly from that dropdown, or type the name in directly. If a column is selected in the dropdown, you can hit "return" or "enter" on your keyboard to select it.
To remove columns from your selection, click the "x" next to the column name in the blue box or use the backspace key on your keyboard near it.
Helpful tips
- Depending on your data source, usually when working with APIs, the data source's column structure varies. If a column you selected to remove or keep no longer exists in the input, the step will error. Try to Keep or Remove selections in a way that'll focus on the most consistent columns. We generally find that keeping columns are a safer bet. If you hit this error when running your flow, you can use an Insert static text columns step with its advanced setting enabled (to only add columns if it does not exist in your input).